Dell™ PowerVault™ 124T LTO3-060-0 SAS Autoloader User's Guide Introduction Installing the Autoloader Operating the Autoloader Remote Management Unit Front Panel Administration Diagnostics Troubleshooting Technical Specifications Getting Help Notes, Notices, and Cautions NOTE: A NOTE indicates important information that helps you make better use of your system. NOTICE: A NOTICE indicates either potential damage to hardware or loss of data and tells you how to avoid the problem.
Back to Contents Page Front Panel Administration: Dell™ PowerVault™ 124T LTO3-060-0 SAS Autoloader User's Guide Configuring the Autoloader SCSI Barcode Length Setting Ethernet Setting Magazines Setting the Time Setting Security Barcode Reader Setting Passwords When you first power on the Dell PowerVault 124T LTO3-060-0 SAS autoloader, it automatically runs a Power-On Self-Test (POST). During the POST, the left (green) LED flashes.
To configure the Dell PowerVault 124T LTO3-060-0 SAS autoloader, you must verify the setup of the following: l Magazine(s). l Ethernet IP address (if you are not using DHCP). l SNMP server IP address—only if SNMP is being used. l Time server IP address (or the time zone, date, and time, if configuring manually)—only if a time server is being used. l Control mode. l Security option. Setting Ethernet Ethernet is the method used by the autoloader to access a network.
1. From the main menu, scroll to Configuration, and then press Enter. 2. From the Configuration menu, scroll to Ethernet, and then press Enter. 3. From the Ethernet submenu, scroll to Set IP, and then press Enter. 4. Scroll to Static IP, and then press Enter. The cursor automatically appears at the first digit. 5. At each position of the IP address, use the up and down arrows to change the value of each digit. Press Enter to advance the cursor to the next digit.
next digit. When you have advanced through all of the digits of the SNMP server address, the autoloader displays Enter to save. NOTE: If you make a mistake, press Escape to backspace to the digit you want to change. 5. Press Enter. New SNMP Server xxx.xxx.xxx.xxx appears on the LCD. You do not need to reboot the autoloader. 6. Press Escape or Enter to return to the Ethernet submenu. Setting the Time The system time is displayed by the RMU and it is used internally when logging events and errors.
9. 10. Press Enter to save. Press Escape as necessary to return to the main menu. Barcode Reader You can enable or disable the Barcode Reader from the Operator Control Panel (OCP). Disabling the barcode reader prevents the barcode reader from attempting to read label information. If barcode labels are not being used, disabling the barcode reader will reduce initialization time.
Security Option When you first power on the autoloader, the security option is set to Off. Use the following procedure to enable the security option. You must have an administrator-level password to set passwords. To set the security option: 1. From the main menu, scroll to Configuration, and then press Enter. 2. From the Configuration menu, scroll to Security. If a check mark appears before the word, the security option is On. If no check mark appears, the security option is Off. 3. Press Enter.
Back to Contents Page Contacting Dell: Dell™ PowerVault™ 124T Autoloader For customers in the United States, call 800-W W W-DELL (800-999-3355). NOTE: If you do not have an active Internet connection, you can find contact information on your purchase invoice, packing slip, bill, or Dell product catalog. Dell provides several online and telephone-based support and service options. Availability varies by country and product, and some services may not be available in your area.
Barbados Online Support www.dell.com/bb la-techsupport@dell.com Technical Support, Customer Service, Sales Belgium (Brussels) International Access Code: 00 Country Code: 32 City Code: 2 Online Support support.euro.dell.com General Support 02 481 92 88 General Support Fax 02 481 92 95 Customer Service 02 713 15 65 Corporate Sales 02 481 91 00 Fax 02 481 92 99 Switchboard Bermuda toll-free: 1-800-534-3142 Online Support 02 481 91 00 www.dell.com/bm la-techsupport@dell.
Customer Service Fax Colombia 592 818 1308 Home and Small Business toll free: 800 858 2222 Preferred Accounts Division toll free: 800 858 2557 Large Corporate Accounts GCP toll free: 800 858 2055 Large Corporate Accounts Key Accounts toll free: 800 858 2628 Large Corporate Accounts North toll free: 800 858 2999 Large Corporate Accounts North Government and Education toll free: 800 858 2955 Large Corporate Accounts East toll free: 800 858 2020 Large Corporate Accounts East Government and Edu
Switchboard City Codes: (1) (4) Switchboard (calls from outside of France) Sales Fax Fax (calls from outside of France) 0825 004 700 04 99 75 40 00 0825 004 700 0825 004 701 04 99 75 40 01 Corporate Technical Support Customer Service 0825 004 719 0825 338 339 Switchboard 01 55 94 71 00 Sales 01 55 94 71 00 Fax 01 55 94 71 01 Germany (Frankfurt) Online Support International Access Code: 00 Technical Support 069 9792-7200 Home/Small Business Customer Service 0180-5-224400 Global Segment Cust
E-mail Phone Numbers eec_ap@dell.com 080-25068033 or your city STD code + 60003355 or toll-free: 1-800-425-9045 Customer Service Home and Small Business India_care_HSB@dell.com Large Corporate Accounts India_care_REL@dell.com toll-free: 1800-4254051 toll-free: 1800-4252067 Sales Large Corporate Accounts Home and Small Business Ireland (Cherrywood) Online Support International Access Code: 00 Technical Support Country Code: 353 City Code: 1 1600 33 8044 1600 33 8046 support.euro.dell.
Korea (Seoul) International Access Code: 001 Country Code: 82 Customer Service 044-556-4240 Business Sales Division — up to 400 employees 044-556-1465 Preferred Accounts Division Sales — over 400 employees 044-556-3433 Public Sales — government agencies, educational institutions, and medical institutions 044-556-5963 Global Segment Japan 044-556-3469 Individual User 044-556-1657 Individual User Online Sales 044-556-2203 Individual User Real Site Sales 044-556-4649 Switchboard 044-556-4300
New Zealand Online Support International Access Code: 00 Country Code: 64 Nicaragua support.ap.dell.com support.ap.dell.com/contactus Technical Support, Customer Service, Sales 0800 441 567 Online Support www.dell.com/ni la-techsupport@dell.com Technical Support, Customer Service, Sales Norway (Lysaker) International Access Code: 00 Country Code: 47 001-800-220-1377 Online Support support.euro.dell.
00 Country Code: 421 Technical Support 02 5441 5727 Customer Service 420 22537 2707 Fax 02 5441 8328 Tech Fax 02 5441 8328 Switchboard (Sales) South Africa (Johannesburg) Online Support International Access Code: 09/091 02 5441 7585 support.euro.dell.com dell_za_support@dell.
Technical Support, Customer Service, Sales Turks and Caicos Islands Online Support toll-free: 1-888-799-5908 www.dell.com/tc la-techsupport@dell.com Technical Support, Customer Service, Sales U.K. (Bracknell) International Access Code: 00 Country Code: 44 City Code: 1344 Online Support toll-free: 1-877-441-4735 support.euro.dell.com dell_direct_support@dell.com Customer Service Online support.euro.dell.com/uk/en/ECare/form/home.
Venezuela Online Support www.dell.com/ve la-techsupport@dell.
Back to Contents Page Diagnostics: Dell™ PowerVault™ 124T LTO3-060-0 SAS Autoloader User's Guide Diagnostic Tests from the Front Panel Remote Management Unit Diagnostic Tests Diagnostic Tests from the Front Panel Diagnostic tests allow you to calibrate parts of the autoloader, check the condition of parts, or test the autoloader's functionality. From the front panel, you can perform all of the diagnostic tests.
2. Scroll to the test you want to run and press Enter. If you are already logged in as Administrator, the test begins executing immediately. The message Running Test appears while the test is running. NOTE: Each test takes from 30 seconds to several minutes to complete. To stop the test prematurely, see "Stopping a Diagnostic Test." 3. If you are not logged in, you will be asked to enter the Administrator password.
Back to Contents Page Getting Help: Dell™ PowerVault™ 124T LTO3-060-0 SAS Autoloader User's Guide Technical Assistance Dell Enterprise Training and Certification Problems With Your Order Product Information Returning Items for Warranty Repair or Credit Before You Call Technical Assistance If you need assistance with a technical problem, perform the following steps: 1. Complete the procedures in "Before Contacting Customer Support". 2.
www.dell.com/jp (Japan only) www.euro.dell.com (Europe only) www.dell.com/la (Latin American countries) www.dell.ca (Canada only) l Anonymous file transfer protocol (FTP) ftp.dell.com/ Log in as user:anonymous, and use your e-mail address as your password. l Electronic Support Service support@us.dell.com apsupport@dell.com (Asian/Pacific countries only) support.jp.dell.com (Japan only) support.euro.dell.com (Europe only) l Electronic Quote Service sales@dell.com apmarketing@dell.
Automated Order-Status Service To check on the status of any Dell™ products that you have ordered, you can go to support.dell.com, or you can call the automated order-status service. A recording prompts you for the information needed to locate and report on your order. See "Contacting Dell" for the contact information for your region. Technical Support Service Dell's technical support service is available 24 hours a day, 7 days a week, to answer your questions about Dell hardware.
Before You Call NOTE: Have your Express Service Code ready when you call. The code helps Dell's automated-support telephone system direct your call more efficiently. If possible, turn on your system before you call Dell for technical assistance and call from a telephone at or near the computer. You may be asked to type some commands at the keyboard, relay detailed information during operations, or try other troubleshooting steps possible only at the computer system itself.
Back to Contents Page Installing the Autoloader: Dell™ PowerVault™ 124T LTO3-060-0 SAS Autoloader User's Guide Installation Overview Product Overview Installation Preparation Unpacking the Autoloader Host Bus Requirements Identifying Product Components Accessories Connecting the SAS, Ethernet, and Power Cables Choosing a Location Preparing the Host and Verifying the Connection UL Requirements Installing the Device Drivers Bar Code Reader Enabling LUN Support in Linux Installation Overview Ins
Room Temperature 10-35ºC (50-95ºF) Power Source AC power voltage: 100-127 VAC; 200-240 VAC Line frequency: 50-60 Hz NOTE: Locate the AC outlet near the autoloader. The AC power cable should be easily accessible at all times. Weight 14.1 kg (31 lb) unloaded 17.2 kg (38 lb) loaded (2 magazines, 16 cartridges) Air Quality Minimize sources of particulate contamination.
1 Power switch 2 Media door (mailslot) 3 Front panel LEDs 4 Front panel LCD screen 5 Function keys 6 Left magazine 7 Right magazine (or blank) Back Panel Overview 1 SAS connector 2 Fan vent 3 Power connector 4 Ethernet connector 5 Power switch NOTE: If the cover must be taken off, there are 26 screws and 6 rail bolts that need to be removed. The cover should be removed only by a qualified Dell Service Provider.
1 SAS cable 2 Power cable 3 Getting Started Guide 4 CD (drivers and documentation) 5 Magazine blank (supplied only with a single magazine configuration) 6 Bar code labels 7 TORX L-key drivers (T8 and T10) 8 Emergency Magazine Removal Tool Connecting the SAS, Ethernet, and Power Cables To connect the SAS, Ethernet, and power cables to the autoloader: 1. Shut down and turn off the selected server. Turn off all attached accessory devices, such as printers and other devices. 2.
1 2 Ethernet cable SAS cable 3 Power cable 6. Attach the female connector of the power cable to the power connector on the back panel of the autoloader. 7. Plug in the power cable to the nearest properly grounded power outlet. 8. Plug in the host server or workstation and all attached devices. 9. Turn on the autoloader by setting the power switch on the back panel to the ON position. Turn on any other devices you turned off earlier.
Enabling LUN Support in Linux To verify the detection of a tape drive, administrators should check for its entry in /proc/scsi/scsi. Current versions of Linux may not scan the logical storage unit (LUN) ID of every device. This can result in some PowerVault devices not being identified or listed in the /proc/scsi/scsi output. Administrators can follow these steps to enable support for such devices. 1. Type cat /proc/scsi/scsi.
Back to Contents Page Introduction: Dell™ PowerVault™ 124T LTO3-060-0 SAS Autoloader User's Guide Overview Data backup is essential to protect irreplaceable information. Backing up data to magnetic tape is an easy, cost-efficient method used by many small and medium businesses. However, most enterprises have so much data that a single backup tape is not enough; the information has to be spread across numerous tapes.
Back to Contents Page Operating the Autoloader: Dell™ PowerVault™ 124T LTO3-060-0 SAS Autoloader User's Guide Operator's Panel Functionality Using Cartridges Using Magazines and Magazine Blanks Viewing Status Information Running an Inventory Data Compression Operator's Panel Functionality NOTE: If security is enabled and you try to execute a command without entering a password, the autoloader displays the Enter Password screen until you enter a password.
NOTE: You can also press Escape to log out. Continue pressing Escape as required until the main screen appears. Using Cartridges When you first install the autoloader, you load your cartridges into the magazines (see "Manually Operating the Magazine") and then load the magazines into the autoloader. However, you can insert and eject cartridges individually using the media door (mailslot), or you can eject a magazine, manually load and unload cartridges, then load the magazine back into the autoloader.
Ejecting a Single Cartridge When you want to remove a single cartridge from the autoloader, you can specify the cartridge you want by bar code or location, or choose the cartridge currently in the tape drive. To eject a cartridge by bar code: NOTE: This function is only allowed if the bar code reader is enabled. 1. From the main menu, scroll to Commands, and then press Enter. 2. From the Commands submenu, scroll to Eject, and then press Enter. 3.
Outward Side of a Magazine The autoloader will not run unless both magazine bays are properly occupied with either a magazine or a magazine blank. One way that you can close the openings is to use two magazines. If you use only one magazine, then you must fill the other magazine opening with a magazine blank for the unit to become operational. NOTE: Magazines are not interchangeable between drive types. Order the appropriate part numbers when replacing these items.
Manually Operating the Magazine There are two white thumbwheels, located on each end of the magazine. You can move the slots within the magazine by turning these two white thumbwheels in either direction and aligning a slot with one of the two openings. Do not rotate the magazine by inserting your hand and pushing the cartridge carriers. You can use the openings in the magazine to load and unload cartridges from the eight slots within each magazine.
Running an Inventory The autoloader automatically runs an inventory whenever you power it back on or insert a magazine. An inventory checks each magazine slot, the drive, the picker, and the media door (mailslot) to determine if a cartridge is present. If so, it also reads the bar code label, if available. If you need to run an inventory in addition to this, you can do so manually.
Viewing Element Status The element status reports the status of the magazine slots. The status indicates whether a slot contains a cartridge or not, and which slot is allocated as the cleaning cartridge's slot. To view an element's status: 1. From the main menu, scroll to Status, and then press Enter. 2. From the Status submenu, scroll to Autoloader, and then press Enter. 3. 4. From the Autoloader submenu, scroll to Element Status, and then press Enter.
Back to Contents Page Remote Management Unit: Dell™ PowerVault™ 124T LTO3-060-0 SAS Autoloader User's Guide Remote Management Unit Overview Configuration Page Firmware Page Error Log and Diagnostics Page Library Operations Page Remote Management Unit Overview Your Dell PowerVault 124T LTO3-060-0 SAS autoloader includes an Ethernet interface that allows remote administration.
RMU Web Interface Status Pane 1. System Status - provides model and serial number (S/N) of both the autoloader and the drive. This section also contains the Dell Service Tag number. You will need this number if you call for technical support. 2. Autoloader - provides status specific to the automation device. Refer to Front Panel Administration for information regarding magazine configuration. Refer to Installation Overview for information regarding enabling or disabling the Barcode Scanner. 3.
The options listed under System Operations include Compression, Barcode Reader, Cleaning Tape, Magazines, and System Time. Compression For the Dell PowerVault 124T LTO3-060-0 SAS autoloader, data compression is drive-dependent. The front panel and the RMU will display whether or not compression is enabled. Compressing the data means that the drive can write more data to the same amount of tape. Compression also increases the performance of the data transfers.
NOTE: The default setting of Left must be reconfigured if the optional right magazine is installed. Host backup software may also require reconfiguration if the loader was originally installed with only the default left magazine When configured for Both magazines, the autoloader always reports 16 storage elements to the host. This allows the removal and reinstallation of magazines without affecting what is reported to the host.
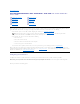
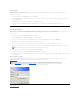
To Set Network Configuration: 1. To change the values of the subnet mask, gateway, Simple Network Management Protocol (SNMP) server, or the time server, type in the new address, using the key to move from box to box. 2. Click submit. Setting Front Panel Security Options When you enable the security option, users must enter a password to access the autoloader's front panel functionality. A password allows either administrator-level access or operator-level access (see "Setting Security").
l Full Locking permits only one authorized client to issue control requests at a time. This client must release the lock by clicking the Home/Logout option in the upper frame of the page to permit other authorized clients to have control access. l Time-Based Locking is similar to Full Locking in that only one authorized client can have control access at once, but the lock is automatically released after the specified number of seconds of inactivity have elapsed.
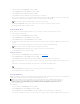
A minimum of two cartridges are required to run the diagnostic tests. The diagnostic tests available on the autoloader include: l Loader - Picker Test l Loader - Magazine Test l Loader - Inventory Test l Random Moves 1. From any page, click the Error Log and Diagnostics heading. The Error Log and Diagnostics screen will be displayed. 2. In the Diagnostics section, select the diagnostic test that you want to run from the Test drop-down menu. 3. Specify a loop count, if desired.
2. From the Library Operations page, click Set to Home. This executes a reset command to the autoloader.
Back to Contents Page Technical Specifications: Dell™ PowerVault™ 124T LTO3-060-0 SAS Autoloader User's Guide Physical Specifications Autoloader Performance Specifications Autoloader Environmental Specifications Autoloader Power Specifications Autoloader Vibration Specifications Autoloader Shock Specifications Tape Drive Specifications Physical Specifications Characteristic Height Product Alone 8.9 cm (3.5 in) Width 45 cm (17.7 in) Length 75.46 cm (29.71 in) Package Weight (without media) 22.
Autoloader Power Specifications Characteristic Line voltage Line frequency AC Input current Power consumption Specification 60 Hz system: 90 – 265 VAC 50 Hz system: 90 – 265 VAC 47 – 63 Hz 60 Hz system: 4.0 A (RMS) for 115 VAC 50 Hz system: 2.0 A (RMS) for 230 VAC 60 Hz = 75 W (256 BTU/hr) 50 Hz = 80 W (273 BTU/hr) Autoloader Vibration Specifications Characteristic Specification Operating Random Vibration 0.26 Grms, 5 – 350 Hz (X, Y, Z) axes Nonoperating Random Vibration 1.
Back to Contents Page Troubleshooting: Dell™ PowerVault™ 124T LTO3-060-0 SAS Autoloader User's Guide Before Contacting Customer Support Operator Control Panel Error Display Checking For Errors Autoloader Logs TapeAlert Logs Returning the Autoloader for Service Before Contacting Customer Support Errors that you may experience with your autoloader can range from simple connection problems to more complex hardware failure.
The autoloader does not communicate with the host system through the Ethernet. A problem with either the Ethernet cabling or network configuration is preventing communication. The application software reports The current host backup software or a failure locating a piece of media autoloader inventory has been lost. or fails to move a piece of media as requested. The application software reports an error while reading or writing a piece of media.
When either of these things occur, the system generates a log of the error. You can use these error logs to determine the type of error, when it occurred, and what parts of the autoloader it affects. Different types of error logs are generated for the autoloader and for the internal tape drive. l The Autoloader Logs provide information for errors related to the autoloader, or data cartridge movement within the autoloader.
17 Activate Error 18 Threshold Error 19 Suspend Lifted 1A Block Pool Error 1B Queue Function Failed 1C Semaphore Function Failed 1D Timer Function Failed 1F Thread Function Failed 20 Command Started 21 System Failure 22 System Busy 23 System Timeout 24 Software Error 25 Hardware Error Message Error Types 26 Message Sender (Task ) ID Error 27 Message Type Bad 28 Message Parameter Bad l Verify the host backup application and device driver are at the latest supported revision
l If the Random Moves test failed, see steps above for necessary actions. l Power cycle the autoloader and re-run the failed test. See Contacting Dell if failure recurs. Tape Drive Error Types 3A Drive Reset Error 3B Drive HW Error 3C Drive Cleaning Required 3D General Drive Error 3E Drive Load Error 3F Drive Unload Error Check the TapeAlert log for more specific drive error information. Refer to Table 3 for recommended actions.
Error 52 IP Stack Can't Free Memory 53 Stack DTrap Occurred l Verify that the autoloader operates correctly when properly configured and attached directly to a host system using a cross-over cable. l If all previous steps fail, see Contacting Dell. l Check support.dell.com for PowerVault 124T firmware updates. l Check the TapeAlert log for more specific drive error information. Refer to Table 3 for recommended actions.
l Check host adapter and SAS cables. l Power cycle the autoloader and retry the operation. l If all previous steps fail, see Contacting Dell. Servo Elevator Hardware Error Types 92 Elevator Flag Bad l Power cycle the autoloader 93 Elevator Sensor Bad l Run the Random Moves test from either the Remote Management Unit (RMU) or the Operator Control Panel (OCP).
AA l Power cycle the autoloader through the front panel. l Run the Random Moves test from either the Remote Management Unit (RMU) or the Operator Control Panel (OCP). Picker Cartridge Sensor Error Note: The Random Moves test requires a minimum of two cartridges present within the autoloader. AB Drive Path Sensor Error l If the source is a slot within a magazine, check if the spring loaded cartridge present flag moves freely when the cartridge is manually inserted into the magazine.
BF l Power cycle the autoloader. l Run the Random Moves test from either the Remote Management Unit (RMU) or the Operator Control Panel (OCP). Picker Jammed Cartridge Error Note: The Random Moves test requires a minimum of two cartridges present within the autoloader. l If all previous steps fail, see Contacting Dell. l Insure that the autoloader is resting on a solid flat surface, or mounted level in a rack unit. l Power cycle the autoloader.
Front Panel Error Types EA EB LCD Busy Error LCD Goto Error EC Login/Password Error ED Socket Error During SNTP Possible LCD controller problem, software error, or communication error. l Power cycle the autoloader. l Run the Random Moves test. l If all previous steps fail, see Contacting Dell. Incorrect login from front panel. l Use correct login/password. l Remove magazines and inspect cartridges.
TapeAlert Logs You can retrieve TapeAlert log information through one of three methods: l Operator Control Panel (OCP) l Remote Management Unit (RMU) display to screen l Detailed logs saved to text file through the RMU for call center diagnosis Further information and recommended actions for tape drive TapeAlerts can be found in Table 3. TapeAlert Logs through OCP To view TapeAlert log information from the front panel: 1. From the front panel LCD, scroll to Diagnostics, and then press Enter.
Tape Alert Message Drive TAflag[01] Read Warning TapeAlert Log Entry: 8000000000000000 Drive TAflag[02] Write Warning Typical Application Client Message The tape drive is having problems reading data. No data has been lost, but there has been a reduction in the performance of the tape. TapeAlert Log Entry: 2000000000000000 Drive TAflag[04] Media TapeAlert Log Entry: 1000000000000000 Drive TAflag[05] Read Failure The drive is having severe trouble reading. This can be caused by bad media or the drive.
Unrecoverable Mechanical Cartridge Failure in the drive has experienced a mechanical failure. cartridge mechanical failure in the drive where medium cannot be de-mounted. with a different tape. TapeAlert Log Entry: 0004000000000000 Drive TAflag[15] Memory Chip In Cartridge Failure The memory in the tape cartridge has failed, Memory chip failed in cartridge. which reduces performance. Do not use the cartridge for further write operations. Replace cartridge.
Drive TAflag[28] Power Consumption The tape drive power consumption is outside the specified range. Power consumption of the tape drive is outside specified range. Not supported. Preventive maintenance of the tape drive is required. The drive requires preventative maintenance (not cleaning). Check the tape drive user's manual for device specific preventive maintenance tasks. The tape drive has a hardware fault. The drive has a hardware fault that requires reset to recover.
TapeAlert Log Entry: 0000000000000800 Drive TAflag[54] No Start Of Data The start of data could not be found on the tape. Tape damaged, bulk erased, or incorrect format. TapeAlert Log Entry: 0000000000000400 Drive TAflag[55] Loading Failure l Check that you are using the correct format tape. l Discard the tape or return the tape to your supplier. The operation has failed because the media cannot be loaded and threaded. The drive is unable to load the media and thread the tape.
Packing the Autoloader Gather the original packaging material to pack the autoloader: the shipping box, two foam end caps, accessory package insert (placed at the back of the unit), and the antistatic bag. You will also need packing tape. 1. Place the antistatic bag over the autoloader. 2. Place one of the foam end caps onto each end of the autoloader. Place the second foam insert onto the other side of the autoloader and make sure the pieces fit snugly onto the autoloader.