VMware vSphere 向け Dell PowerVault MD Series vCenter Plug-in インストールおよび設 定ガイド(ウェブクライアント)
メモ、注意、警告 メモ: メモでは、コンピュータを使いやすくするための重要な情報を説明しています。 注意: 注意では、ハードウェアの損傷やデータの損失の可能性を示し、その問題を回避するための方法 を説明しています。 警告: 警告では、物的損害、けが、または死亡の原因となる可能性があることを示しています。 著作権 © 2015 Dell Inc. 無断転載を禁じます。この製品は、米国および国際著作権法、ならびに米国および国際知的財産 法で保護されています。Dell™、および Dell のロゴは、米国および / またはその他管轄区域における Dell Inc. の商標です。 本書で使用されているその他すべての商標および名称は、各社の商標である場合があります。 2015 - 09 Rev.
目次 1 Modular Disk Storage Manager Plug-in for VMware vCenter Web Client の概要..............................................................................................................7 MD vCenter Plug-In の機能.................................................................................................................. 8 インストールの必要条件.......................................................................................................................
ESXi の SAS プロバイダのアップグレードのインストール ..........................................................26 ストレージアレイへの ESXi ホストの設定.......................................................................................... 27 ESXi ホストのストレージアレイウィザードへの構成................................................................... 27 5 MD vCenter Plug-in マネージャ........................................................................31 MD vCenter Plug-In の機能..................................................................................
仮想ディスクコピーの作成............................................................................................................56 仮想ディスクのコピーの停止........................................................................................................ 58 再コピー.........................................................................................................................................58 設定の変更.......................................................................................................................
ID: 200627833 - 複数の項目の削除操作には最大 80 のオブジェクトの制限がかかってい ます................................................................................................................................................ 82 ID: 200702748 - ESXi ホストおよびストレージアレイウィザードのユーザビリティ問題......... 82 ID: 200716368 – vSphere 6.0 SAS データストアビュー..............................................................82 構成ワークシート................................................................................................................................
Modular Disk Storage Manager Plug-in for VMware vCenter Web Client の概要 1 Dell PowerVault Modular Disk Storage Array vCenter Plug-in(MD vCenter Plug-in)は VMware Web Client セッションから Dell MD Storage Arrays の統合管理を提供する VMware vCenter Server Plug-in です。Web Client は、VMware のインフラストラクチャや日々のすべてのストレージ要件を管理するために使用できる 単一管理インタフェースです。他の管理アプリケーションについて学ぶよりも、仮想インフラストラクチャ の全体に焦点を当てることができます。 特に記載のない限り、本書後半における「MD Storage Array vCenter Plug-in」または「MD vCenter Plugin」は、MD VMware vCenter Plug-in を指す言葉として同じ意味で使用されています。 メモ: MD vCen
図 1. 通信の詳細 MD vCenter Plug-In の機能 以下の MD vCenter プラグインの機能は、MD ストレージアレイの統合管理を有効にします。 • ストレージアレイの情報 • ストレージアレイの整理 • 自動および手動によるストレージアレイの設定バックアップ • ストレージプロビジョニングと仮想ディスクのマッピング • コピーサービス管理 • リモートレプリケーション(レガシー) • レプリケーションの非同期削除 • データストアから仮想ディスクへの詳細 • ESXi ホストの設定 インストールの必要条件 MD vCenter Plug-in をインストールして使用するには、 Dell.
2 MD vCenter Plug-in for VMware vCenter Web Client のインストール MD vCenter Plug-in for VMware vCenter のダウンロード MD vCenter Plug-in の最新バージョンを Dell の Web サイトからダウンロードして ください 。最新のウェ ブクライアントのバージョンについては、Dell の Web サイトから入手可能の『 Support Matrix 』 (サポート マトリックス)を参照してください。ファイルをアプリケーションサーバーとして使用するホストにコピー します。 メモ: Linux バイナリをダウンロードした後に、 実行属性をバイナリファイルに追加し、インストーラ ーの実行を有効にします(chmod +x vCenterInstaller-xx.xx.xxxx.xxxx.
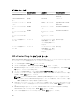
表 1. 構成ワークシートの例 例に関する情報 必要情報 例に関する情報 vCenter Server 名: VC-01 DNS 名: IP アドレス: vc-01.domain.com192.1 68.51.217 vCenter Administrator 名: 管理者 Password: パスワード アプリケーションサーバ ー名: APP-01 DNS 名: IP アドレス: app-01.domain.com192. 168.51.225 ストレージアレイ 1 の名 前: E5400 IP アドレス: パスワー ド: 192.168.51.89/90None ストレージアレイ 2 の名 E2600 前: IP アドレス: パスワー ド: 192.168.51.
9. vCenter Server 管理者のユーザー ID を入力して、Next(次へ) をクリックします。 メモ: プラグインが Single Sign-on(SSO) 付きの vSphere 5.5 または 6.0 環境にインストールさ れる場合、デフォルトのユーザー ID を vSphere 5.5 または 6.0、あるいはそれ以降のドメイン構成 に一致するように変更する必要があります(例えば、administrator@ vsphere.local)。 10. vCenter 管理者のパスワードを入力し、Next(次へ)をクリックします。 11. これでインストールは完了します。 Done(完了)をクリックして、インストールウィザードを閉じま す。 12. Windows:アプリケーションサーバが正常にインストールされていることを確認するには、services.msc コマンドを実行し、アプリケーションサーバーがインストールされ、サービスが開始されていることを 確認します。 13.
3 アプリケーションサーバーとプラグインの 構成 アプリケーションサーバーと MD vCenter Plug-in がインストールされたら、MD vCenter Plug-in が vCenter Server に正常に登録されたことを確認します。 1. vSphere Client を vCenter Server に開きます。 2.
図 2. アプリケーションサーバーのメモリ設定 2. vmarg.3=-Xmx1024M 行を確認します。 3. 1024 の数字をストレージアレイの数に関連付けられている数に変更します。 4. 設定ファイルを保存します。 5.
図 3. vCenter サーバーの役割リスト 2. 緑色のアイコン(+) をクリックして新しい役割を追加します。 図 4. 役割ウィンドウの作成 3. Role(役割)ボックスに、新しい役割の名前を入力します。 4.
メモ: 管理者の役割は編集することはできません。従って、管理者ユーザーがストレージを管理す る場合は、すべての権限が追加された新しい役割を作成する必要があります。次の手順を使ってこ の役割に管理者を追加する必要があります。 5. ストレージアレイに Read-Only(読み取り専用) (ビュー) または 読み書き(構成) のアクセス権限を 許可したい場合、Storage Administrator(ストレージ管理者)グループから適切な権限を選択します。 6. OK をクリックします。 メモ: 変更不可である管理者の役割の除いて、ストレージ管理者の権限を含むように既存の役割を 変更することができます。 ユーザー ID の役割への追加 1. VMware Home アイコンをクリックし、vCenter Inventory List(vCenter インベントリリスト)を選択 し、次に Resources Lists(リソースリスト)下の vCenter Servers をクリックします。 2. 管理したい vCenter サーバー の要素を選択し、Manage(管理)タブを選択します。 図 5.
図 6. 権限の追加ウィザード 4. ウィザードで、Add(追加)をクリックし、ストレージアレイへのアクセスを必要としているユーザー ID を選択します。 5. ドロップダウンメニューから割り当てられた役割を選択し、OK をクリックして変更を適用します。 6. OK をクリックして役割に権限を適用します。 アクセスなし MD Storage Administrator の閲覧または構成のどちらかの権限を所持している役割のメンバーでない場合、 MD vCenter Plug-in のいかなる統計も見ることはできません。MD vCenter Plug-in の機能をアクセスしよ うとすると、User is not authorized to use this plug-in(ユーザーはこのプラグインを使用する権限を持って いません)のメッセージが表示されます。 MD vCenter Plug-In のセキュリティ The MD vCenter Plug-in は TLS 1.
された CA 署名付き SSL 証明書を使用する場合、アプリケーションサーバーの証明書が署名および再インポ ートされた後、次の手順は必要ありません。 Mozilla firefox 現在 Mozilla Firefox では、Getting Started(はじめに)ページで自己署名 SSL 証明書を承認して、証明書を Firefox のトラストストアに永久に保存することができ、Web Client とアプリケーションサーバー間の今後 の接続に適用されます。 Google Chrome Google Chrome の場合、 1. vCenter Server に接続したい URL を入力し、Advanced(詳細)オプションを選択します。 2. Proceed(続行)をクリックして VMware vCenter Server のリンクに移動し、通常通りに vCenter Server にログインします。 3.
図 7. Chrome のセキュリティページ Microsoft Internet Explorer Internet Explorer において 1. 接続したい vCenter Server の URL を入力し、Continue to this website(not recommended) (このウ ェブサイトに移動する(推奨されません))リンクをクリックします。接続を確立するには vCenter Server の SSL 証明書 をインストールする必要がある場合があります。 2.
図 8. Internet Explorer の証明書エラーページ アプリケーションサーバー証明書の管理 最新のブラウザでの自己署名証明書のエラーを解決するには、信頼できる認証局(CA)によって署名された アプリケーションサーバーの証明書を持っている必要があります。 MD vCenter プラグインのインストール 中に、アプリケーションサーバーに SSL 証明書が生成され、ともにそのアプリケーションサーバーに固有の certificate signing request(CSR)(証明書署名要求)が生成されました。信頼できる CA が、完全に信頼で きる証明書のチェーンを展開するには、CSR に署名し、Java キーストロークに再インポートする必要があり ます。信頼できる CA によって署名された後にアプリケーションサーバーをインポートするプロセスは次の ステップで説明されています。 メモ: CSR は通常、次のアプリケーションサーバーホストのディレクトリに位置付けられています。C: \Program Files\MD Storage Manager\ MD Storage Manager Plug-in
3. CLI に次のコマンドを実行して証明されたアプリケーションサーバーの証明書を Java キーストアにイ ンポートします。 ..\..\jre\bin\keytool -import -trustcacerts -alias jetty -file -keystore keystore -storepass changeit 4. MD Storage Manager Application Server(vCP) のサービスを再起動し、サービスが初期化されるまで 1 分から 2 分待ちます。 5. 次の URL にアクセスして証明書が有効であることを確認します(https 接続の想定されるデフォルトの ポート番号): https://:8084/vcenter2/About.
図 10. 設定ファイルのページのインポートまたはエクスポート エクスポート 現在の構成ファイルをエクスポートするには、Export(エクスポート)ボタンをクリックしてファイルの保 存先を選択します。 インポート 以前に保存した設定ファイルをインポートするには、次の作業を行います。 1. 参照 ボタンをクリックします。 2. インポートする設定ファイルに移動し、開く をクリックします。 3. 使用したいインポートオプションボタンを選択します(Merge(結合)または Overwrite(上書き))。 4. インポート ボタンをクリックします。 アプリケーションサーバーでのユーザー管理 アプリケーションサーバーのユーザー管理は、C:\Program Files\MD Storage Manager\MD Storage Manager Plug-in for VMware vCenter\jetty\working\config directory に存在する users.properties のファイルを使ってコントロールされます。 users.
デルはパスワードをクリアテキスト形式で保存することはお勧めしません。 MD 5 のパスワードハッシュが 次のサイトから生成できます。http://md5hashgenerator.com/index.php。ハッシュしたいパスワードを String(文字列)ボックスに入力し、Generate MD5 Hash(MD 5 ハッシの生成)をクリックします。既存 のユーザーパスワードハッシュ(#)の代わりに、ハッシュされた結果を users.properties ファイルに コピーします。 または、md5sum を UNIX システムに使用し、次を使用して MD5 ハッシュを生成することができます(あ なたのパスワードを YOUR_PASSWORD_HERE と入れ替えます) 。 $ echo -n "YOUR_PASSWORD_HERE" | md5sum | awk '{print $1}' 635893277b6b217e327565d3427ee5e8 上記のコマンドの出力をコピーして特定のユーザーの users.
VMware ESXi ホストの構成 4 ALUA SUPPORT の構成 バージョン 7.84 移行のバージョンでは、Target Port Group Support(TPGS) フラグが「ON」(7.84 での デフォルト)になっている場合、Asymmetric Logical Unit Access(ALUA) の構成のサポートが許容されま す。このサポートにより、エラー発生のシナリオにおいて現在所有している RAID コントローラモジュール へのすべてのパス、および別の RAID コントローラモジュールへの LUN 転送の間のアクティブ I/O をアクテ ィブ化します。お使いの環境によっては、デフォルトのマルチパスポリシーを MRU から Round Robin(RR) に切り替えることで、より高いパフォーマンスを得られる場合があります。このパフォーマンスは次のタス クを実行することで得られます。 1. ストレージに使用されている現在の SATP クレームルールを識別します。 図 11. esxcli storage nmp device list 2.
図 12.
図 14. ソフトウェア iSCSI アダプタの追加 追加情報 ソフトウェア iSCSI ストレージのネットワーク設定の詳細については、VMware vSphere Online Library の iSCSI SAN Configuration Guide(構成ガイド)に記載されている次のセクションを参照してください。 • iSCSI イニシエータおよびストレージの構成 • ソフトウェア iSCSI イニシエータの設定 • ソフトウェア iSCSI ストレージのネットワーク構成 ESXi ホストでの SAS サポートの構成 MD vCenter Plug-in が SAS 接続で ESXi ホストを MD ストレージアレイに構成させる場合は、LSI SAS SMIS プロバイダの更新版が ESXi ホストにインストールされている必要があります。 SAS SMI-S プロバイダのアップグレード メモ: SAS サポートは、 ESXi バージョン 5.
ESXi ホストのコンソールログインからのルートログインの有効化 1. F2 を押して診断コンソールに切り替えます。 2. トラブルシューティングオプション を選択します。 3. リモートテクニカルサポートを有効にする を選択します。 4. 管理アラートの再起動 を選択します。 5. Esc を押して Configuration(構成)メニューを閉じます。 新規ユーザーログインの作成 1. Web クライアントを ESXi ホストに直接接続し、構成させます。 2. Home(ホーム) → Inventory(インベントリ) → Inventory window(インベントリウィンドウ)の User & Groups(ユーザー&グループ)タブを選択します。 3. 右クリックして Add(追加)をクリックします。 4. 新しいユーザーの詳細を入力または選択し、Grant shell access to this user(このユーザーにシェルア クセスを付与する)を必ず選択します。 5. OK をクリックして、変更を保存します。 6.
ストレージアレイへの ESXi ホストの設定 メモ: ESXi ホストをストレージアレイに構成する前に、お使いの環境でストレージアレイを追加または 発見されている必要があります。詳細については、ストレージアレイの追加 および ストレージアレイ の検出 を参照してください。 自動ホスト設定ユーティリティを使用するには、Web Client にある Hosts(ホスト)に移動し、設定したい ESXi ホストを選択します。ESXi ホストを右クリックし、All MD vCenter Plug-in 下のドロップダウンメニュ ーから Configure ESXi host to Storage Array(ESXi ホストをストレージアレイに設定する)を選択します。 図 15.
図 16. ESXi ホストのストレージアレイウィザードへの構成 1. 紹介ページを読み終わった後、Next(次へ)をクリックします。 Inspect Configuration(構成の検査)ページが初期化され、このページはユーザー権限を確認し、選択 した ESXi ホストの情報を収集し、構成されたストレージアレイに関する情報を収集します。このプロセ スは、HBA の数およびシステムに構成されたストレージアレイによっては数分かかる場合があります。 2. 3 つのすべての発見プロセスが完了し、3 つの緑のチェックマークが表示された後、Next(次へ)をク リックします。 Select Host HBAs(ホスト HBA の選択) ページでは、 ESXi ホストから設定する HBA を選択します。 設定したいインタフェースの種類の隣りにあるオプションボタンを選択します。ターゲットのストレー ジアレイに対して構成されるすべての HBA ポートを選択します。 3.
c. クラスタのホストグループがすでに存在する場合は、このホストを追加するホストグループの名前を 選択します。Add Host(ホストの追加)ボタンをクリックし、この ESXi ホストの名前を入力し、ホ スト定義に使用される HBA の隣りにあるチェックボックスを選択します。 図 17. 推奨される ESXi ホストの構成 6. 手動設定の完了後、Next(次へ)を選択します。 メモ: 以前に定義されたホストからの別のホストグループにおけるその他のホスト構成。 図 18.
名前を変更したり、既存の構成されたホストまたはホストグループを削除することはできません。既存 のホストおよびホストグループの構成の変更は、MD ストレージ管理ソフトウェアから実行する必要が あります。すべてのホストグループおよびホストが定義された後、Next(次へ)をクリックします。 7. Review Changes(変更のレビュー)ページが表示され、ストレージアレイに適用される変化を示しま す。変更を受け入れる場合は、Next(次へ)ボタンをクリックします。 8.
MD vCenter Plug-in マネージャ 5 MD vCenter Plug-In の機能 MD ストレージアレイを管理するために MD vCenter Plug-in を使用するには、 Inventories(インベントリ) セクションにあるウェブクライアントのホームページの MD vCenter Plug-in アイコンをクリックします。 図 20.
図 21. Getting Started(はじめに)ページ MD vCenter Plug-in の Summary(サマリ)タブはプラグインで構成されている次のようなすべてのストレ ージアレイに関するサマリ情報を提供します。 • プラグインバージョンおよび著作権 • 集計ストレージ容量 • ストレージアレイ状態のブレークダウン • ストレージアレイのオブジェクト • ストレージアレイのハードウェアの詳細 図 22.
6 ストレージアレイオブジェクトビュー ストレージアレイオブジェクトビュー Storage Arrays Objects(ストレージアレイオブジェクト)ビューは既知のすべてのストレージアレイをリス トビューで表示し、このリストビューは列ヘッダの矢印記号をクリックし、どの列を表示するか表示してカ スタマイズすることができます。列を並べ替えることもできます。 図 23.
を新しいストレージアレイに割り当てることを可能にします。複数のアレイを追加する場合は ストレージ アレイの検出 を参照してください。 1. MD vCenter Plug-in Array Manager の Commands(コマンド)領域で、Add Storage Array(ストレ ージアレイの追加)をクリックします。 Add Storage Location(ストレージの場所の追加)ダイアログボックスが表示されます。 図 24. ストレージアレイウィンドウの追加 2. RAID Controller Module 0 のボックスに、ストレージアレイの RAID コントローラモジュール 0 の IP アドレスまたは DNS 名を入力します。 3. RAID Controller Module 1 のボックスに、ストレージアレイの RAID コントローラモジュール 1 の IP ア ドレスまたは DNS 名を入力します。 4. Password(パスワード)ボックスに、MD vCenter Plug-in に追加するストレージアレイのパスワード を入力します。 5.
図 25. ストレージアレイの検出ウィンドウ 2. ストレージアレイを検出するための IP 範囲の開始 TCP/IP アドレスを入力します。 3. ストレージアレイを検出するための IP 範囲の終了 TCP / IP アドレスを入力します。 4. Discover(検出)ボタンをクリックしてスキャンを開始します。 メモ: このプロセスは検出のスコープに応じて数分かかることがあります。 5. (任意) 同じアレイパスワードが追加されるすべてのアレイに使用したい場合は、Password(パスワー ド)ボックスで今すぐ指定できます。 6. Add(追加)をクリックして、選択したすべてのストレージアレイを MD vCenter Plug-in Array Manager に追加します。 7.
図 26. サポートバンドルの収集ダイアログボックス vcpsupport_.zip のファイルがシステムにダウンロードされた後、要求された場合 Dell テク ニカルサポートに送信することができます。 ストレージアレイの編集 Edit Storage Array(ストレージアレイの編集)オプションは選択されたストレージアレイの編集機能を提供 します。変更したいストレージアレイを選択し、Edit Storage Array(ストレージアレイの編集)アイコンを クリックします。選択されたアレイの設定を変更するオプションもあります。 図 27. ストレージアレイの編集ダイアログボックス ストレージアレイの削除 Objects(オブジェクト)ビューで個々のストレージアレイを選択したり、または複数のストレージアレイを 選択することで、ストレージアレイを削除することができます。 1. Web Client Storage Arrays Objects(ウェブクライアントのストレージアレイオブジェクト)のタブで 削除したいストレージアレイを選択します。 2.
図 28. 複数のストレージアレイウィンドウの削除 ストレージアレイを削除するかどうかのメッセージが表示されます。 3.
構成バックアップの自動保存の有効化 これらのバックアップを自動的または手動で初期化することができます。ストレージアレイの基本設定の自 動バックアップを行うには、次のタスクを実行します。 1. 管理対象のストレージアレイの一覧からターゲットストレージアレイを選択します。 2. Auto Save Configuration(自動保存設定)アイコンをクリックします。 図 29. Auto Save Configuration(自動保存設定)のダイアログボックス 3. Enable automatic save configuration(自動保存設定の有効化)のチェックボックスを選択します。 4. OK をクリックします。 5.
File Download(ファイルのダウンロード)ダイアログが表示されます。 4. 保存 をクリックします。 5. 閉じる をクリックします。 イベントログの表示 イベントログの表示のユーティリティは、選択したストレージアレイの主なイベントログへのアクセスを提 供します。ストレージアレイの主なイベントログにアクセスするには、次のタスクを実行します。 1. 管理しているアレイのリストからストレージアレイを選択します。 2. View Event Log(イベントログの表示)アイコンをクリックするか、または Actions(アクション)の ドロップダウンメニューから View Event Log(イベントログの表示)オプションを選択します。 図 30.
選択されたストレージアレイの Summary (サマリ)タブ 7 ストレージアレイリストからストレージアレイをクリックすると、ページに選択されたストレージアレイの サマリが表示されます。このサマリには、ストレージアレイの状態、RAID コントローラモジュール、その状 態、その IP アドレス、ストレージアレイの WWN、シャーシのシリアル番号、ファームウェアと NVSRAM のバージョン、および物理ディスク情報などの情報が含まれます。ストレージアレイのサマリタブは、 Recovery Guru の情報へのアクセスも提供します。ストレージアレイが非最適である場合は、Needs Attention(要注意)リンクがアクティベートされ、現在のストレージアレイの問題を表記します。 図 31.
• RAID コントローラモジュールの IP アドレス • RAID コントローラモジュールの状態 • ストレージアレイの WWN • ストレージアレイのシャーシシリアル番号 • ストレージアレイのファームウェアバージョン • ストレージアレイの NVSRAM バージョン Summary View(サマリビュー)タブは、ハードウェアポートレット下に選択されたストレージアレイの物 理ディスクの構成に関する一般情報も表示します(次の情報が含まれます)。 • 拡張エンクロージャの数 • 物理ディスクの数 • 使用されている物理ディスクの種類 • 定義されたホットスペアの数 • 使用中のホットスペアの数 • スタンバイ状態のホットスペアの数 Recovery Guru に関する情報 Recovery Guru に関する情報は、選択されたストレージアレイを現在影響している問題に関する情報を表示 します。この情報には次のものが含まれます。 • 問題の概要 • 問題の詳細 • リカバリ手順 メモ: リカバリ手順は MD Storage Manager から適用される
図 32.
8 選択されたストレージアレイの管理タブ Manage(管理)タブは選択されたストレージアレイの管理を有効にします。このタブでは、次のいずれかの ビューが選択できます。 • 仮想ディスクビューの機能 • マッピングビューの機能 • 仮想ディスクコピービュー機能 • スナップショットビューの機能 • リモートレプリケーションビューの機能 • リモートレプリケーション(レガシー)ビューの機能 図 33.
図 34.
ィスクグループの作成プロセスの際に TLP、DLP または DA の実行を許容します。TLP および DLP は物理デ ィスクの完全なエンクロージャ、またはディスクグループの仮想ディスクのエラーなしの完全なドロワーの エラーを許容します。DA は RAID コントローラーモジュールから流れる物理ディスクへのデータの整合性 を確認し、データがディスクに正しく書き込まれていることを保証します。 図 35. ディスクグループのダイアログボックスの作成 テーブルビューで物理ディスクを選択すると、ページの右上隅で容量の情報がアップデートされ、新しいデ ィスクグループまたはディスクプールの最終容量が表示されます。 メモ: VMware vSphere 環境に対して MD Storage Manager を最適に構成するには、vSphere 用仮想デ ィスクの定義 と 仮想ディスク意思決定スキーマ を確認します。 ディスクプールの作成 Dynamic Disk Pools(DDP)は、 ファームウェアバージョン 7.
スクグループを作成するか、または未構成のディスクスペースから新しいディスクプールを作成する必要が あります。 新しい仮想ディスクまたは仮想ディスクを作成するには、Create Virtual Disk(仮想ディスクの作成)アイ コンをクリックし、次の操作を実行します。 ディスクグループの新しい仮想ディスク 1. Create Virtual Disk(仮想ディスクの作成)アイコンをクリックします。 Create Virtual Disks(仮想ディスクの作成)ウィザードが表示されます。 図 36. 仮想ディスクのダイアログボックスの作成 2. Name(名前)ボックスにディスクの名前を入力します。 3. ディスクスペースのドロップダウンメニューから、新規仮想ディスクに使用するディスクグループを選 択します。 4. Capacity(容量)ボックスに、新しいディスクのディスクスペースを入力し、ドロップダウンから修飾 子を選択します。 5. I/O 設定 フィールドで新規仮想ディスクのセグメントサイズを選択します。 6.
が許容されています。ファットプロビジョニング仮想ディスクを作成するには、ディスクグループへの新し い仮想ディスクの手順を繰り返します(I/O 設定の手順はスキップします)。シンプロビジョニングされた仮 想ディスクを作成するには、次の操作を行います。 1. Create Virtual Disk(仮想ディスクの作成)アイコンをクリックします。 2. Name(名前)ボックスに仮想ディスクの名前を入力します。 3. Disk Group or Disk Pool(ディスクグループまたはディスクプール)のドロップダウンメニューから、 新しい仮想ディスクに使用するディスクプールを選択します。 4. Size(サイズ)テキストボックスに、新規仮想ディスクのサイズを入力し、ドロップダウンリストから レートを選択します。 5. Create thin virtual disk(シン仮想ディスク)のチェックボックスを選択します。 6. (オプション)新規仮想ディスクをホストまたはホストグループに直ちにマップする場合は、Map now (今すぐマップ)チェックボックスを選択します。 7.
能は選択されたベース仮想ディスクのレガシースナップショットの作成を可能にします。ポイントインタイ ムコピーで新しいバージョンのスナップショットを作成するには、スナップショットビューの機能 を参照し てください。 メモ: レガシースナップショットはシンプロビジョニングされた仮想ディスクには許可されません。 メモ: レガシースナップショットは DDP 上に存在する仮想ディスクにはサポートされていません。こ れらの仮想ディスクのポイントインタイムスナップショットを作成するには、スナップショットビュー の機能 を参照してください。 Create Snapshot(スナップショットの作成) Virtual Disks(仮想ディスク)ビューでのスナップショットコマンドはレガシースナップショット機能の管 理を可能にします。レガシースナップショットを作成するには、次の作業を行います。 1. ベース仮想ディスクをハイライトし、Create Snapshot(スナップショットの作成)をクリックします。 Create Snapshot(スナップショットの作成)ウィザードが表示されます。 図 38.
スナップショットの再作成 無効のスナップショットを再確立したり、または既存のスナップショットを更新するには、Recreate Snapshot(スナップショットの再作成)、OK の順にクリックします。ベース仮想ディスクの新しいスナップ ショットが作成されます。 メモ: スナップショットを再作成すると、新しいスナップショットが作成される前に元のスナップショ ットが無効になります。 仮想ディスクの再配分 MD vCenter Plug-in は、優先される RAID コントローラモジュールの所有権に基づいてストレージアレイ仮 想ディスクの再配布をサポートします。 一般的には ESXi の再スキャン操作中に、仮想ディスクの所有権は 非優先 RAID コントローラモジュールに転送され、ストレージアレイが非最適となります。仮想ディスクを 優先される RAID コントローラーモジュールの所有者に再配分することで、非最適状態を解決し、ストレー ジアレイの RAID コントローラーモジュールにわたって I/O ロードのバランスを取ります。すべてのストレ ージアレイの仮想ディスクがすでに優先される RAID コントローラーの
削除 Delete(削除)コマンドは選択されたオブジェクト(仮想ディスク、ディスクグループ、ディスクプール、 またはスナップショット)を削除する能力を提供します。リモートレプリケーショングループ、スナップシ ョットグループ、またはリモートレプリケーションに参加していないオブジェクトのみ削除できます。 1. 削除したいオブジェクトを選択し、Actions(アクション)のドロップダウンメニューから Delete(削 除)コマンドをクリックします。 2.
5. 削除したい仮想ディスクの情報が正しければ、Finish(完了)をクリックして選択された仮想ディスク を削除します。 メモ: SDK の制限があるため、このコマンドを使用して一度に最大 80 の仮想ディスクを削除する ことができます。 メモ: リモートレプリケーションの関係に関与している仮想ディスクを削除するには、この仮想デ ィスクを Remote Replication Group(RRG) で解除する必要があります。 マッピングビューの機能 マッピングビューでは、ストレージアレイ仮想ディスクが ESXi ホストにどのように提示されている管理する ことができます。このビューは、選択されたストレージアレイのホストおよびホストグループを管理する機 能があります。このビューからは次のコマンドが可能です。 • ホストの追加 • ホストグループの追加 • マッピングの追加 • 名前の変更 • 削除 (Actions(操作)のドロップダウンメニューからしか利用可能でない) 図 40.
図 41. 仮想ディスクからホストへのマッピングの追加 2. ホストまたはホストグループを選択します。 仮想ディスクは 、ロップダウンメニューから表示されま す。 3. デフォルトの論理ユニット番号( LUN) を受け入れるか、または新しいマッピングの必要な LUN 番号 に変更します。 4. マップされる仮想ディスクを選択します。 5. 追加 をクリックします。 6.
図 42. ストレージアダプタ 1. このビューでは、ストレージアダプタ下に一覧表示されているデバイスの一つをクリックすることで、 パスの正しい数が構成されていることを確認することもできます。 2. Paths(パス)タブを選択し、選択したデバイスの詳細を表示します。ラウンドロビン PSP には、2 つ の表示されている I/O 付きのアクティブな接続が 4 つ表示されている必要があります。最近使用した PSP には、アクティブな接続が 4 つと I/O を示すチャネルが 1 つ、またはアクティブな接続が 2 つ、ス タンバイの接続が 2 つと I/O を表示しているアクティブなチャネルが 1 つ表示されている必要があり ます。 3.
ホストの追加 Add Host(ホストの追加)コマンドは、仮想ディスクを提示するために使用されているホストを定義するこ とができます。新しいホストを追加するには、次の作業を行います。 1. 新しいホストにを追加するにはホストグループを選択し、Add Host(ホストの追加)アイコンをクリッ クします。 2. 新規ホストの 名前 を入力します。 3. ドロップダウンメニューからホストの種類(VmwTPGSALUA for ESXi ホスト)を選択します。 4. インタフェースの種類を選択して Next(次へ)をクリックします。 5. 追加する新しいホストで使用可能なホストポートアダプタの識別子を選択します。 6. 下矢印をクリックして、ホストポート識別子を下のウィンドウに移動させます(デュアルポートでは同 じ手順を繰り返します)。 メモ: 未設定のホストポート識別子のみが、Add Host(ホストの追加)ウィザードの上部ペインに 表示されます。 図 44. ホストポートアダプタウィザード 7. 次へ をクリックします。 8.
ホストグループの追加 新しいホストグループを作成し、ホスト間で LUN マッピングを共有するには、次のタスクを実行します。 1. Add Host Group(ホストグループの追加)をクリックします。 図 45. ホストグループの追加ウィザード 2. 新しいホストグループの名前を入力します。 3. 新しいホストグループに追加したいホストの名前を選択します。 メモ: 現在デフォルトのホストグループに所属するホストのみが利用可能ホスト一覧に記載されま す。 4. ホストを新しいホストグループに追加するには、右矢印をクリックします。 5. (任意)ホストをさらに追加するには、手順 3 および 4 を繰り返します。 6.
仮想ディスクのコピーは、ソース仮想ディスクのすべての既存データをターゲットの仮想ディスクにコピー する方法を提供します。スナップショットと異なる部分は、完了後にターゲット仮想ディスクはソース仮想 ディスクからのデータに頼らず、元の仮想ディスクのすべてのデータを所持しており、データマイニングま たは復元の目的でソース仮想ディスクに影響を及ぼすことなく別のホストにマップすることができます。こ のビューからは次のコマンドが利用可能です。 • 仮想ディスクコピーの作成 • 仮想ディスクのコピーの停止 • 再コピー • 設定の変更 • コピーペアの削除 図 46. 仮想ディスクコピービューのタブ 仮想ディスクコピーの作成 1.
図 47. ソース仮想ディスクの選択 メモ: 仮想ディスクのコピーが確立されている間、仮想ディスクのコピーの作成元となるソース仮 想ディスクのスナップショットが作成されます。これは、仮想ディスクのコピーが初期化されてい る際にデータが一貫し、コピー操作中にソース仮想ディスクへの読み書きアクセスが続行されるこ とを保証します。 メモ: ディスクプールにある仮想ディスクのスナップショットは、本リリースではサポートされて いません。ディスクプール上の仮想ディスクを使用している仮想ディスクコピーは、コピープロセ スが完了するまで、ホストに対して読み取り専用として表示されます。 2. ソース仮想ディスクを選択し、Next(次へ)をクリックします。 3.
図 48. ターゲットの仮想ディスクおよび優先順位を選択します 4. 新規仮想ディスクコピーの確立中に使用する コピー優先度を選択します。 5. 次へ をクリックします。 6. 仮想ディスクのコピー設定を確認して Finish(完了)をクリックし、仮想ディスクコピーを開始します。 仮想ディスクのコピーの停止 Stop Virtual Disk Copy(仮想ディスクのコピーの停止)コマンドは選択されたコピーのペアにおける現在の 仮想ディスクのコピー操作を停止させます。進行中のコピーペアを選択し、Stop Virtual Disk Copy(仮想デ ィスクのコピー停止)アイコンをクリックします。確認メッセージが表示されます。OK をクリックします。 再コピー 再コピーコマンドは、ソース仮想ディスクからのすべてのデータをターゲット仮想ディスクに再コピーし、 選択された仮想ディスクコピーのペアにおいてターゲット仮想ディスクの既存データを上書きします。 このオプションではターゲット仮想ディスク上のすべてのデータが上書きされます。 1. 再コピーに使用する仮想ディスクコピーのペアを選択します。 2.
図 49. 仮想ディスクのコピーパラメータの変更 3. Copy Priority(コピー優先度)のドロップダウンボックスから、仮想ディスクコピーの新しい優先度を 選択します。 4. ターゲット仮想ディスクのコピーにおいて読み書きを許容するには、Target virtual disk Read-Only(タ ーゲット仮想ディスクは読み取り専用のチェックボックスの選択を解除します。 5. OK をクリックします。 コピーペアの削除 Remove Copy Pair(コピーペアの削除)コマンドは、仮想ディスクのコピーペアのソースとターゲットの関 係を削除します。このコマンドは、ターゲット仮想ディスクまたはターゲット仮想ディスク上のデータは削 除しません。仮想ディスクのコピーペアの関係を削除するには、次の作業を行います。 1. 削除する仮想ディスクのコピーペアを選択します。 2. Actions(操作)のドロップダウンメニューから Remove Copy Pair(複製ペアの削除)アイコンをクリ ックします。 3.
• スナップショットイメージの作成 • スナップショット仮想ディスクの作成 • 削除 図 51. スナップショットビュー メモ: ベース仮想ディスクにスナップショットイメージをロールバックするには、 MD Storage Manager を使用する必要があります。 イメージロールバックは現在 MD vCenter Plug-in ではサポー トされていません。MD Storage Manager を使用してスナップショットイメージの自動スケジュール をセットアップすることもできます。 スナップショットの作成 スナップショットグループは、ストレージアレイ仮想ディスクのスナップショットイメージを保持するため に使用します。新しいスナップショットを作成するには、次の手順を実行します。 1. Virtual Disk(仮想ディスク)ツリーからベース仮想ディスクを選択します。 2.
図 52. スナップショットグループの作成ダイアログボックス 3. 必要に応じて表示されているパラメータを変更します。 4. OK をクリックします。 スナップショットイメージの作成 スナップショットイメージは、ベース仮想ディスクのポイントインタイムのコピーです。イメージが作成さ れた後、ベースに仮想ディスクをロールバックするためにそれを使用するか、または仮想ディスクを作成す るのに使用することができます。イメージを作成するには、次の操作を行います。 1. 仮想ディスク ツリーウィンドウから、ベース仮想ディスクを選択します。 2.
図 53. スナップショットイメージの作成ダイアログ 3. 仮想ディスク ドロップダウンボックスで、スナップショットイメージのベース仮想ディスクを選択しま す。 4. 新しいイメージ用に使用する既存のスナップショットグループを選択します。 メモ: これがベース仮想ディスクの最初のスナップショットイメージの場合、まだ手動で作成され ていなければ、新しいスナップショットグループが作成されます。 5. OK をクリックします。 スナップショット仮想ディスクの作成 スナップショット仮想ディスクは、データアクセスのためにホストまたはホストグループにスナップショッ トイメージをマップすることを可能にします。スナップショット仮想ディスクを作成するには、次の手順に 従います。 1. 既存のスナップショットグループがある 仮想ディスク ツリーウィンドウで、ベース仮想ディスクを選択 します。 2.
図 54. スナップショット仮想ダイアログボックスの作成 3. 使用可能なイメージのリストから スナップショットイメージ を選択するか、A new snapshot image(新 規スナップショットイメージ)のオプションを選択して Next(次へ)をクリックします。 4. Snapshot virtual disk name(スナップショット仮想ディスク名)ボックスに新しいスナップショット仮 想ディスクの名前を入力します。 5. スナップショット仮想ディスクのアクセスモードを選択します。 6. 終了 をクリックします。 削除 削除コマンドでは、選択したオブジェクトに応じてスナップショット仮想ディスク、スナップショットイメ ージ、スナップショットグループの削除を行うことができます。削除オプションは、選択したオブジェクト のリーフを表示する、オブジェクトのダイアログボックスを開きます。スナップショットオブジェクトを削 除するには、次の手順を実行します。 1. 仮想ディスク ツリーウィンドウからベース仮想ディスクを展開します。 2.
図 55. スナップショットのイメージの削除 4. 削除するリーフオブジェクトの隣にあるチェックボックスを選択ます。 5. OK をクリックします。 6. 表示されたメッセージで OK をクリックしてオブジェクトを削除するか、または操作をキャンセルする には Cancel(キャンセル)をクリックします。 リモートレプリケーションビューの機能 リモートレプリケーションビューの機能では、Asynchronous Remote Replication(aRR)の管理が可能にな ります。 arrs は MD コントローラのファームウェア 7.
図 56.
レプリケーショングループの作成 非同期レプリケーショングループ(RRG)は、複製されたペアを単一のエンティティとしてグループ化し、 RRG の全メンバーのレプリケーション設定を制御するために使用されます。複製されたペアは、単一の RRG 内にしか存在できません。ARG は、ストレージアレイ 1 つあたり 4 個に制限されています。新しい RRG を 作成するには、次の操作を行います。 メモ: MD vCenter Plug-in 内でリモートレプリケーションを構成するには、両方のアレイ(ローカルア レイおよびリモートアレイ)を MD Storage Manager Plug-in Array Manager に追加する必要がありま す。どちらかのアレイが Array Manager から削除されると、これら 2 つのアレイ間に設定された RRG は Plug-in 内に表示されなくなります。 1. Create Replication Group(レプリケーショングループの作成)をクリックします。 図 57. リモートレプリケーショングループの作成ダイアログボックス 2.
Create Asynchronous Remote Replicated Pair(非同期リモートレプリケーションペアの作成)ダイア ログが表示されます。 図 58. 非同期レプリケーションペアの作成ダイアログボックス 3. Select a Primary Virtual Disk(プライマリ仮想ディスクの選択)ドロップダウンメニューから、レプリ ケーションペアのプライマリ仮想ディスクを選択します。 4. 次へ をクリックします。 5. Select a Secondary Virtual Disk(セカンダリ仮想ディスクの選択)ドロップダウンメニューから、レプ リケーションペアのセカンダリ仮想ディスクを選択します。 6. 終了 をクリックします。 図 59.
レプリケーションの再開 リモートレプリケーショングループのすべてのメンバーが最適なな状態である場合にのみレプリケーション を再開することができます。再開操作は、RRG で主な役割を持つストレージアレイによってのみ行うことが できます。レプリケーションを再開するには、次の操作を行います。 1. Remote Replication Group(リモートレプリケーショングループ)で一時停止された RRG を選択しま す。 2. Resume Replication(レプリケーションの再開)をクリックします。 3. Yes, I wish to perform the operation(はい、この操作を実行します)を選択します。 4. OK をクリックします。 手動再同期 手動再同期コマンドは、RRG のすべての複製されたペアのデータの即時再同期を強制します。手動再同期 は、RRG の主要役割を持っているストレージアレイによって実行されなければなりません。 メモ: 手動再同期は、同期の間の最小待機時間が経過するまで実行できません。 RRG を手動で同期化するには、次の操作を行います。 1.
図 60. Test Replication Communication(レプリケーション通信のテスト)の結果 役割の変更 役割の変更 オプションは、現在のセカンダリレプリケーショングループのプライマリ役割への昇格、および 現在のプライマリレプリケーショングループのセカンダリ役割への降格を容易にします。役割が変更された 後、非同期レプリケーショングループ(RRG)の以前のプライマリ仮想ディスクにマップされていたホスト は複製された仮想ディスクへの書き込みアクセスを失い、プライマリ役割に昇格された RRG 内のホストが複 製された仮想ディスクへの書き込みアクセスを持つようになります。 メモ: RRG が再同期化されなければ、最後の同期化後にプライマリ仮想ディスクに書き込まれたデータ は失われ、回復できません。 役割を変更するには、次のタスクを実行します。 1. RRG を Remote Replication Group(リモートレプリケーショングループ)ウィンドウで選択します。 2.
レプリケーショングループの削除 RPG からすべての重複されたペアが削除された後、リモートレプリケーショングループを削除することもで きます。すべての重複されたペアを削除した後、Actions(操作)のドロップダウンメニューから Delete Replication Group(レプリケーショングループの削除)オプションを選択します。 リモートレプリケーショングループ 複製されたペアを削除するとプライマリ仮想ディスクおよびセカンダリ仮想ディスクの関係が失われてしま います。両方の仮想ディスクが標準の仮想ディスクの状態に戻ってしまいます。ソース仮想ディスクまたは ターゲット仮想ディスクからはデータは削除されません。複製されたペアを削除するには、次のタスクを行 います。 1. Remote Replication Group(リモートレプリケーショングループ)の表で、削除したい複製されたペア が含まれているリモートレプリケーショングループを選択します。 2. Replicated Pairs(レプリケーションペア)表から削除したい複製されたペアを選択します。 3.
示されます。このタブで、コマンドエリアと共に既存のリモートレプリケーション(レガシー)ペアが表示 され、これにより次のコマンドが可能となります。 • • • • • • • リモートレプリケーション(レガシー)の作成 リモートレプリケーション(レガシー)の中断 リモートレプリケーション(レガシー)の再開 レプリケーション設定の変更 レプリケートされた役割の変更 レプリケーション通信のテスト 複製されたペアの削除 図 62. リモートレプリケーション(レガシー)ビュー リモートレプリケーション(レガシー)の作成 リモートレプリケーション(レガシー)コマンドは、Fibre Channel を介して接続されている 2 つのストレ ージアレイ間でリモートレプリケーション(レガシー)を確立するために使用されます。 新しいリモートレ プリケーションを確立するには、次のタスクを実行します。 メモ: リモートアプリケーション(レガシー)を作成するには、ローカルおよびリモートストレージア レイの両方がアレイマネージャのビューに追加される必要があります。 1.
9. Confirmation(確認)ページを確認し、Finish(終了)をクリックして、レプリケーション関係を確立 します。 図 63. リモートレプリケーション(レガシー)の作成ダイアログボックス リモートレプリケーション(レガシー)の中断 レプリケートされたペアのリモートレプリケーション(レガシー)を一時停止するには、次のタスクを実行 します。 1. Replicated Pairs(複製されたペア)ウィンドウから複製されたペアを選択します。 2. Suspend Replicating(複製の停止)をクリックします。 3. OK をクリックして選択されたレプリケーションペアを停止するか、Cancel(キャンセル)をクリック して操作をキャンセルします。 レプリケーションペア間の I/O が停止されますが、レプリケーションの関連付けは維持されます。 リモートレプリケーション(レガシー)の再開 一時停止されたレプリケーションペアのリモートレプリケーション(レガシー)を再開するには、次のタス クを実行します。 1.
レプリケーション設定の変更 同期優先度、再同期化方法、または書き込みモードなど、レプリケートされたペアのパラメータを変更する には、次のタスクを実行します。 1. 変更したい複製されたペアを選択します。 2. Change Replication(Legacy) Settings(レプリケーション(レガシー)の設定を変更)コマンドを Actions(操作)のドロップダウンメニューから選択します。 図 64. 仮想ディスクコピーのパラメータの変更 3. 必要に応じて表示されているパラメータを変更します。 4. OK をクリックします。 レプリケートされた役割の変更 レプリケーション役割を変更すると、レプリケーションペアで以下の役割変更が行われます。 • セカンダリ仮想ディスクをプライマリ仮想ディスクに昇格し、リモートの場所からの仮想ディスクへの読 み取り / 書き込みアクセスを可能にします。 • プライマリ仮想ディスクがセカンダリ仮想ディスクに降格し、プライマリサイトから仮想ディスクへの書 き込みが無効になります。 レプリケーション役割を変更するには、次のタスクを実行します。 1.
複製された通信のテスト 複製された通信のテストには、複製されたペア内の仮想ディスク間におけるラウンドトリップ時間が表示さ れます。この時間は、平均ラウンドトリップ時間、最短ラウンドトリップ時間、および最長ラウンドトリッ プ時間として表示されます。 複製された通信をテストするには、次の操作を行います。 1. Actions(操作)のドロップダウンメニューから、Test Replicated Communication(複製された通信 のテスト)を選択します。 2. 情報表示を確認した後、OK をクリックしてダイアログボックスを閉じます。 図 65. 複製された通信のテスト結果 複製されたペアの削除 複製されたペアを削除すると、プライマリサイトの仮想ディスクとセカンダリサイトの仮想ディスクの間の レプリケーションの関連付けが壊れてしまいます。操作が完了すると、仮想ディスク間のレプリケーション 状態が失われます。仮想ディスクの間でレプリケーションを再確立するには、完全な再同期化が発生する必 要があります。複製されたペアの関係を削除するには、次の操作を行います。 1.
9 MD Storage Manager のデータストアのサ マリ情報 データストアのサマリ情報は次のタスクを実行しても表示できます。 1. ホームボタンから Storage(ストレージ)ビューに移動します。 2. ナビゲーターリストから Datastore(データストア)を選択します。 3. MD Storage Manager Datastore Summary(MD Storage Manager のデータストアサマリ)のリンクを クリックします。 図 66.
選択されたデータストアの概要情報が表示されます。この情報には、選択されたデータストアにサービ スを処理する基盤となる仮想ディスク上のストレージアレイ固有の情報が含まれています。 図 67.
10 ベストプラクティス この項は、 VMware vSphere 環境内での MD ストレージアレイの使用におけるベストプラクティスについて 説明します。 vSphere 用仮想ディスクの定義 仮想ディスクを VMFS データストアにプロビジョンする前に、使用したい仮想ディスクの数、および仮想デ ィスクのサイズを含め、ESXi システムのストレージをどのようにセットアップするか計画する必要がありま す。 メモ: 予測スキーマ、適応スキーマ、およびディスク共有を含む仮想ディスクの意思決定に関する詳細 については、iSCSI SAN の構成ガイドの次のセクションを参照してください。 • Using ESXi with an iSCSI Storage Area Network(iSCSI ストレージエリアネットワークでの ESXi の 使用) • Making LUN Decisions in the VMware vSphere Online Library(VMware vSphere のオンラインライ ブラリでの LUN に関する意思決定) 仮想ディスクをどのようにフォーマットするかについて決定
予想スキーマを使用した仮想ディスクに関する意思決定 1. 異なるストレージ特徴を持つ複数の仮想ディスクを作成します。 2. 各仮想ディスクに VMFS データストアを構築して、各データストアにその特徴に基づいたラベルを付け ます。 3. 仮想ディスク上に構築された VMFS データストア内の仮想マシンアプリケーションのデータを格納する 仮想ディスクを、アプリケーション要件に応じた RAID レベルで割り当てます。 4. 優先度の高い VM と優先度の低い仮想マシンを区別するにはディスク共有を使用します。 メモ: ディスク共有は、指定されたホスト内でのみ関連を持ちます。ホスト上の仮想マシンに割り 当てられた共有は、他のホスト上の仮想マシンには影響しません。 5. VM のパフォーマンスが許容できるかどうか識別するためにアプリケーションを実行します。 仮想ディスクに関する意思決定に対する適応スキーマの使用 1. RAID 1+0 または RAID 5 などの大容量の仮想ディスクを作成し、書き込みキャッシュを有効にします。 2.
図 68. デュアルポートの HBA 構成 次の例はフルリダンダントのファブリック構成を示しています。 Fibre Channel(FC) スイッチまたは HBA がエラーになると、代替スイッチが両方のストレージアレイの RAID コントローラモジュールに接続されま す。また、RAID コントローラモジュールがエラーになると、ESXi ホストは残りの RAID コントローラモジュ ールにアクセスすることができ、すべての仮想ディスクがその RAID Controller Module にフェールオーバー します。その他の要素がエラーになった場合、ストレージへのアクセスが完全に失われます。 図 69.
図 70.
図 71. クアッドポートの設定 メモ: この構成の目的は、HBA ポートのいかなるグループが単一の HBA カードに含まれないように HBA をペア化することです(デュアルポートカードを使用している場合)。 図 72.
11 付録 現在の制限 ここでは MD vCenter Plug-in での既知の問題と可能な回避策について説明します。 ID: 200627833 - 複数の項目の削除操作には最大 80 のオブジェクトの制限がか かっています 問題: 複数のアレイまたは複数の仮想ディスクを削除する時に、コマンドごとに選択されたオブジェクトの 数が 80 未満である必要があります。これは SDK によって許容されるアドレス空間によるものです。 解決策: 呼び出しごとに 80 未満のオブジェクトを選択し、繰り返し複数の削除アクションを実行します。 メモ: Microsoft Internet Explorer ブラウザは呼び出しごとに 40 未満のオブジェクトに制限されます。 ID: 200702748 - ESXi ホストおよびストレージアレイウィザードのユーザビリ ティ問題 問題: 1. Add Host Group(ホストグループの追加)ボタンは手動構成ページの最初のロード後にグレーアウト されているはずです。 2.
DNS 名:___________________________________________________________ IP アドレス:_________________________________________________________ vCenter Server 管理者名:________________________________________ パスワード:___________________________________________________________ アプリケーションサーバー名:__________________________________________________ DNS 名:___________________________________________________________ IP アドレス:_________________________________________________________ ストレージ管理者のユーザー ID: ______________________________________