
Deployment Guide


1. In the Configuration Wizard (Cross-protocol User Mapping) step 11 of 14 screen, select Map users in Active Directory to
users in the UNIX repository automatically.
NOTE: By default, Map unmapped users to the guest account is selected.
2.
Click Next.
The Configuration Wizard (NAS Volumes Configuration) step 12 of 14 screen is displayed.
Creating NAS Volumes
NAS volumes can be created with file access security styles of NTFS, UNIX, or mixed. Due to security concerns, it is highly recommended
to choose NTFS or UNIX unless mixed is absolutely necessary. Most security concerns in a mixed Windows/Unix environment can be fully
addressed by using either NTFS or UNIX file system security modes in conjunction with User Mapping.
NOTE: If you create NAS volumes with file access security styles of NTFS you can still manage and access an UNIX file
system and vice-versa.
1. In the Configuration Wizard (NAS Volumes Configuration) step 12 of 14 screen, click Add to define NAS volumes.
2. Enter appropriate values for the following:
a) NAS Volume
b) NAS volume allocated space
c) Alert when used space reaches
d) Send email events to administrator
e) Access time granularity
f) File access security style
3. Click Save Changes.
The new NAS volume is added.
NOTE:
Repeat this procedure to define more NAS volumes.
4. Click Next.
The Configuration Wizard (Add CIFS Shares) step 13 of 14 screen is displayed.
Creating CIFS Shares
To create CIFS shares:
1. In the Configuration Wizard (Add CIFS Shares) step 13 of 14 screen, select the volume from the NAS Volume list to add CIFS
Share.
2. Select either General-access share or CIFS share, containing a user-based directory tree and enter the appropriate information.
NOTE:
You cannot add a CIFS share if a shared folder is not created.
3. Click Save Changes.
A CIFS share is created and the Configuration Wizard (CIFS Shares) step 13 of 14 screen is displayed.
NOTE:
Click Add and repeat this procedure to add more CIFS shares to a NAS volume.
4. Click Next.
The Configuration Wizard (NFS Exports) step 14 of 14 screen is displayed.
Creating NFS Exports
NOTE:
You must create an NFS export only if you have a UNIX client.
1. In the Configuration Wizard (NFS Exports) step 14 of 14 screen do one of the following:
• Click Add.
• Click Next to skip to the final step.
2. Select the volume from the NAS Volume list.
3. To create an NFS export from an existing shared folder, click the Browse icon and navigate to the appropriate folder and select the
directory from the Exported directory list.
4. To create a new NFS export, in Exported directory enter the name for the NFS export. Select Create the exported directory if it
does not exist.
28
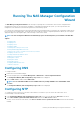
Running The NAS Manager Configuration Wizard