
Users Guide
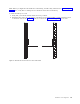

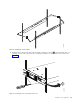
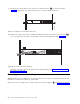

9. Secure the rear of the library to the rack with a round-head screw ▌10▐ on each rear bracket
(Figure 25). Tighten the other rear bracket screws to secure the library to the rack.
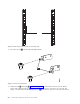
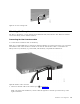
10. Run the SAS cable, power cable, and Ethernet cable through the hook-and-loop fastener strap ▌12▐.
Leave enough slack to reach the corresponding connectors, then tighten the strap (Figure 26).
Note: For information about converting and relocating the library, see “Removal and replacement
procedures” on page 119.
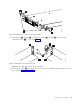
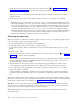
Removing the accessor locking screw
Important: The accessor locking screw prevents the library accessor from moving during shipment and
must be removed before the library is powered ON.
Remove the accessor locking screw, located on the rear panel of the library (▌1▐ in Figure 27 on page 29).
a29z0022
1010
Figure 25. Securing the rear of the library in the rack
a29z0023
12
Figure 26. The cables at the rear of the library
28 Dell PowerVault TL1000 Tape Autoloader: User's Guide