Dell Precision 3431 Dator med liten formfaktor Installations och specifikationshandledning Regleringsmodell: D11S Regleringstyp: D11S004
Anmärkningar, försiktighetsbeaktanden och varningar OBS OBS innehåller viktig information som hjälper dig att få ut det mesta av produkten. CAUTION VIKTIGT anger antingen risk för skada på maskinvara eller förlust av data och förklarar hur du kan undvika problemet. VARNING En VARNING visar på en potentiell risk för egendoms-, personskador eller dödsfall. © 2018 - 2019 Dell Inc. eller dess dotterbolag. Med ensamrätt. Dell, EMC och andra varumärken är varumärken som tillhör Dell Inc. eller dess dotterbolag.
Innehåll 1 Konfigurera datorn....................................................................................................................... 5 2 Chassiöversikt............................................................................................................................. 8 Framsida..................................................................................................................................................................................8 Baksida......................
Uppdatera Dell BIOS i Linux- och Ubuntu-miljöer..................................................................................................... 28 Uppdatera BIOS från F12-menyn för engångsstart.................................................................................................. 29 System- och installationslösenord.....................................................................................................................................33 Tilldela ett systeminstallationslösenord...
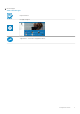
1 Konfigurera datorn 1. Anslut tangentbordet och musen. 2. Anslut till nätverket med en kabel eller anslut till ett trådlöst nätverk. 3. Anslut bildskärmen. OBS Om du beställde datorn med ett separat grafikkort är HDMI- och skärmsportarna på baksidan av datorn övertäckta. Anslut bildskärmen till det separata grafikkortet. 4. Anslut strömkabeln.
5. Tryck på strömbrytaren. 6. Följ instruktionerna på skärmen för att fullborda konfigureringen av Windows. a) Anslut till ett nätverk. b) Logga in till ditt Microsoft-konto eller skapa ett nytt konto.
. Hitta Dell-appar. Tabell 1.
2 Chassiöversikt Ämnen: • • • Framsida Baksida Etikett med servicenummer Framsida 1. 2. 3. 4. 5. 6. 7. 8. 9. 8 Optisk enhet Strömbrytare Indikator för enhetsaktivitet SD-kortplats Headsetport USB 2.0-port med PowerShare USB 2.0-port USB 3.1 Gen 2 Type-C-port med PowerShare USB 3.
Baksida 1. 2. 3. 4. 5. 6. 7. 8. 9. 10. 11. 12. 13. 14. 15. 16. 17. Utgångsport PS/2-tangentbordsport Seriell port PS/2-musport DisplayPort/HDMI 2.0/VGA/USB typ-C alternativt läge (tillval) DisplayPort * 2 Etikett med servicenummer USB 3.1-portar Gen 1 USB 2.
Etikett med servicenummer 10 Chassiöversikt
3 Systemspecifikationer OBS Erbjudanden kan variera beroende på region. Följande specifikationer gäller endast sådant som enligt lag måste levereras med datorn. För mer information om konfiguration av datorn, gå till Hjälp och support i ditt Windowsoperativsystem och välj alternativet att visa datorinformation.
Tabell 3. Specifikationer 8:e generationen Intel Core-processor Typ UMA Graphics Intel Xeon E-processor E-2174G (4 kärnor HT, 8 MB cacheminne, 3,8 GHz, 4,7 GHz) Intel UHD-grafik 630 Intel Core processor i7-8700 (6 kärnor, 12 MB cacheminne, 3,20 GHz, 4,6 GHz) Intel UHD-grafik 630 Minne Tabell 4.
Primär/start-enhet Formfaktor 1 x 2,5-tums hårddisk Ej tillämpligt 1 x 2,5-tums HDD Ej tillämpligt OBS Stöder RAID 0 och 1 med dubbel 2.5 " HDD. Det är inte tillgängligt med Optane-minne (tillgängligt från 2019). För optimal prestanda när du konfigurerar enheter som en RAID-volym rekommenderar Dell de enhetsmodeller som är identiska.
Bildskärmskort Tabell 8. Specifikationer för bildskärmskort Styrenhet Typ CPU-beroende Grafikminne typ Kapacitet Externt bildskärmsstöd Maximal upplösning Intel UHD-grafik 630 UMA • Delat systemminne DisplayPort/HDMI 1.
Smartkortläsare Tillval USB • • • • • • Security (säkerhet) Noble wedge-lås/hänglåsring Ljud • Universellt ljuduttag Video • • DisplayPort/HDMI 2.0b/VGA/USB typ C displayport (tillval) Två displayportar Nätverksadapter En RJ-45-kontakt Seriell port En serieport (tillval) PS/2 • • En USB 3.0-port med PowerShare En USB 2.0-port (fram) En USB 3.1 Generation 2 Typ C PowerShare (fram) En USB 3.1 Generation 1 port (fram) Fyra USB 3.1-portar Gen 1 (bak) Två USB 2.
Miljö OBS För mer information om Dells miljöegenskaper, gå till avsnittet om miljöattribut. Se din specifika region för tillgänglighet. Tabell 16.
4 Systeminstallationsprogram Systemkonfigurationen gör det möjligt att hantera maskinvaran för din surfplattastationära datorbärbara dator och ange BIOS-alternativ.
Navigeringstangenter OBS För de flesta alternativ i systeminstallationsprogrammet gäller att ändringar som görs sparas men träder inte i kraft förrän systemet startas om. Tangenter Navigering Upp-pil Går till föregående fält. Ned-pil Går till nästa fält. Retur Markerar ett värde i det markerade fältet (om sådana finns) eller följer länken i fältet. Mellanslag Visar eller döljer en nedrullningsbar meny, om sådan finns. Flik Går till nästa fokuserade område.
Allmänna alternativ Tabell 17. Allmänt Alternativ Beskrivning Systeminformation Visar följande information: • • • • • System Information (systeminformation): Visar BIOS Version (BIOS-version), Service Tag (servicenummer), Asset Tag (inventariemärkning), Ownership Tag (ägarnummer), Ownership Date (ägarskapsdatum), Manufacture Date (tillverkningsdatum) och Express Service Code (expresskod).
Alternativ Beskrivning Serial Port Anger hur den inbyggda seriella porten fungerar. Välj ett av alternativen: • • • • • SATA Operation Med det här alternativet kan du konfigurera driftläget för den inbyggda hårddiskstyrenheten. • • • Drives Inaktivera COM1 (valt som standard) COM2 COM3 COM4 Disabled (inaktiverat) = SATA-styrenheten är dold AHCI = SATA är konfigurerad för AHCI-läge.
Alternativ Beskrivning Miscellaneous Devices Här kan du aktivera eller inaktivera olika inbyggda enheter. Alternativet Enabled Secure Digital (SD) Card (aktivera SD-kort) är valt som standard. • • • Enable Secure Digital (SD) Card Secure Digital (SD) Card Boot (start från SD-kort) Secure Digital (SD) Card Read-Only Mode (SD-kort i skrivskyddat läge) Videoskärmalternativ Tabell 19.
Alternativ Beskrivning TPM 2.0 Security Här kan du styra huruvida TPM (Trusted Platform Module) är synlig för operativsystemet.
Alternativ Beskrivning Expert key Management Gör att du endast kan manipulera databaser för säkerhetsnycklar om systemet befinner sig i Custom Mode (anpassat läge). Alternativet Enable Custom Mode (aktivera anpassat läge) är inaktiverat som standard. Alternativen är: • • • • PK (standard) KEK db dbx Om du aktiverar Custom Mode (anpassat läge) visas de relevanta alternativen för PK, KEK, db, och dbx.
Alternativ Beskrivning Intel SpeedStep Här kan du aktivera eller inaktivera processorläget Intel SpeedStep. • Enable Intel SpeedStep (aktivera Intel SpeedStep) Det här alternativet är inställt som standard. C-States Control Här kan du aktivera eller inaktivera de extra strömsparlägena för processorn. • C States (C-lägen) Det här alternativet är inställt som standard. Intel TurboBoost Här kan du aktivera eller inaktivera processorläget Intel TurboBoost.
Alternativ Beskrivning Wake on LAN/WWAN Det här alternativet gör att datorn kan startas från avstängt läge när den aktiveras via en speciell LAN-signal. Den här funktionen fungerar endast när datorn är ansluten till en strömkälla. • • • • • Disabled (inaktiverad) - Systemet tillåts inte att starta från special-LAN-signaler när det tar emot en aktiveringssignal från LAN eller trådlöst LAN. LAN or WLAN (LAN eller WLAN) - Tillåt att systemet slås på av special-LAN-signaler eller trådlösa LAN-signaler.
Virtualization Support (virtualiseringsstöd) Tabell 27. Virtualization Support (virtualiseringsstöd) Alternativ Beskrivning Virtualization Det här alternativet anger huruvida en VMM (Virtual Machine Monitor – virtuell maskinövervakning) kan använda den extra maskinvarukapaciteten genom Intels virtualiseringsteknik. • Enable Intel Virtualization Technology (aktivera Intels virtualiseringsteknik) Det här alternativet är inställt som standard.
Alternativ Beskrivning Bios-återställning BIOS Recovery from Hard Drive (BIOS-återställning från hårddisken)—Det här alternativet är inställt som standard. Här kan du återställa skadade BIOS från en återställningsfil på hårddisken eller en extern USB-nyckel. BIOS Auto-Recovery (Automatisk BIOS-återställning)— Här kan du kan återställa BIOS automatiskt. OBS BIOS Recovery from Hard Drive (BIOS-återställning från hårddisken) ska vara aktiverad.
10. Välj den hämtningsmetod du föredrar i Please select your download method below window (Välj hämtningsmetod); klicka på Download Fil (Hämta fil). Fönstret File download (Filhämtning) visas. 11. Klicka på Save (Spara) för att spara filen på datorn. 12. Klicka på Run (Kör) för att installera de uppdaterade BIOS-inställningarna på datorn. Följ anvisningarna på skärmen.
Uppdatera BIOS från F12-menyn för engångsstart Uppdatera system-BIOS med hjälp av en BIOS-uppdateringsfil (.exe-fil) som kopierats till en FAT32 USB-enhet och startas från F12menyn för engångsstart. BIOS-uppdatering Du kan köra BIOS-uppdateringen från Windows med hjälp av en startbar USB-enhet eller så kan du uppdatera BIOS från F12-menyn för engångsstart på datorn. De flesta Dell-datorer byggda efter 2012 har den här funktionen.
3. Menyn BIOS Flash-uppdatering öppnas. Klicka på knappen för BIOS-uppdatera fil bläddra för att välja BIOS-filen. 4. Välj den körbara BIOS-filen och klicka sedan på OK. Växla till rätt katalog för den externa USB enheten genom att använda Filsystemet om du inte hittar den körbara filen för BIOS.
5. Klicka på Påbörja Flash-uppdatering, och sedan visas ett varnings meddelande.
6. Klicka på Ja. Systemet startas om automatiskt och startar BIOS Flash.
7. När processen har slutförts startas systemet om och BIOS-uppdateringen har genomförts. System- och installationslösenord Tabell 32. System- och installationslösenord Lösenordstyp Beskrivning Systemlösenord Lösenord som du måste ange för att logga in till systemet. Installationslösenord Lösenord som du måste ange för att öppna och göra ändringar i datorns BIOS-inställningar. Du kan skapa ett systemlösenord och ett installationslösenord för att skydda datorn.
Tilldela ett systeminstallationslösenord Du kan endast tilldela ett nytt system- eller administratörslösenord när statusen är Ej inställt. Starta systeminstallationsprogrammet genom att trycka på omedelbart efter det att datorn startats eller startats om. 1. På skärmen System BIOS (system-BIOS) eller System Setup (systeminstallation) väljer du Security (säkerhet) och trycker på Retur. Skärmen Security (säkerhet) visas. 2.
5 Programvara I det här kapitlet beskrivs de operativsystem som stöds och du får även anvisningar för hur du installerar drivrutinerna. Ämnen: • • Operativsystem Hämta drivrutiner för Windows Operativsystem Tabell 33. Operativsystem Operativsystem som stöds • • • • • • • Windows 10 Home (64-bitars) Windows 10 Professional (64-bitars) Windows 10 Pro National Academic Windows 10 Home Ubuntu 16.04 LTS (64-bitars) NeoKylin 6.0 Red Hat Linux 7.5 Hämta drivrutiner för Windows 1.
6 Få hjälp Ämnen: • Kontakta Dell Kontakta Dell OBS Om du inte har en aktiv Internet-anslutning kan du hitta kontaktinformationen på ditt inköpskvitto, förpackning, faktura eller i Dells produktkatalog. Dell erbjuder flera alternativ för support och service online och på telefon. Tillgängligheten varierar beroende på land och produkt och vissa tjänster kanske inte finns i ditt område. Gör så här för att kontakta Dell för försäljningsärenden, teknisk support eller kundtjänst: 1. Gå till Dell.com/support.