Dell Precision 5520 Owner's Manual Regulatory Model: P56F Regulatory Type: P56F001
Notes, cautions, and warnings NOTE: A NOTE indicates important information that helps you make better use of your product. CAUTION: A CAUTION indicates either potential damage to hardware or loss of data and tells you how to avoid the problem. WARNING: A WARNING indicates a potential for property damage, personal injury, or death. © 2019 Dell Inc. or its subsidiaries. All rights reserved. Dell, EMC, and other trademarks are trademarks of Dell Inc. or its subsidiaries.
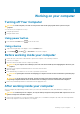
Contents 1 Working on your computer............................................................................................................ 5 Turning off Your Computer.................................................................................................................................................. 5 Before working inside your computer.................................................................................................................................
Installing the Heatsink................................................................................................................................................... 25 Power connector port........................................................................................................................................................ 25 Removing the DC-in Connector..................................................................................................................................
1 Working on your computer Turning off Your Computer CAUTION: To avoid losing data, save and close all open files and exit all open programs before you turn off your computer. You can turn off your computer in two ways : 1. Using the power button 2. Using the charms menu Using power button 1. Press and hold the Power button to turn off the screen. Using charms 1. Swipe from the right edge of the display to access the Charms menu. 2. Touch Settings —> Power —> Shut down to turn off the computer.
CAUTION: To connect a network cable, first plug the cable into the network device and then plug it into the computer. 3. Replace the battery. 4. Connect your computer and all attached devices to their electrical outlets. 5. Turn on your computer.
2 Chassis This chapter illustrates the multiple chassis views along with the ports and connectors and also explains the FN hot key combinations. Topics: • • System Overview Hot key combinations System Overview Figure 1. Inside View — Back 1. 3. 5. 7. 9. 11. power connector system board speakers I/O board cable WLAN card memory modules 2. 4. 6. 8. 10. 12.
Figure 2. Front View 1. Power button 3. Palmrest 2. Keyboard 4. Touchpad Figure 3. Front Open View 1. Camera 3. Left speaker 8 Chassis 2. Camera-status light 4.
Figure 4. Left View 1. Power port 3. HDMI port 5. Headset port 2. USB 3.0 port with PowerShare 4. Thunderbolt 3 port Figure 5. Right View 1. Memory card reader 3. Battery status lights 5. Kensington security slot 2. USB 3.0 port with PowerShare 4. Battery status button Hot key combinations The table below details the hot key combinations. Table 1.
Fn key combination Precision 5520 Fn+ F4 Rewind Fn+ F5 Play/Pause Fn+ F6 Forward Fn+ F8 Display Toggle (Win + P) Fn+ F9 Search Fn+ F10 Increase Keyboard Back light Brightness Fn+ F11 Panel Brightness Down Fn+ F12 Panel Brightness Up Fn+ PrtScr Wireless 10 Chassis
3 Disassembly and reassembly Recommended Tools The procedures in this document may require the following tools: • • • • • Small flat-blade screwdriver #0 Phillips screwdriver #1 Phillips screwdriver T5 Torx screwdriver Small plastic scribe Base cover Removing the Base Cover 1. Follow the procedures in Before Working Inside Your Computer. 2. Close the display and turn the computer over. 3.
Installing the Base Cover 1. Place the base cover on the computer and snap it in place. 2. Tighten the ten M2x3 screws to secure the base cover to the computer. NOTE: Ensure you use a Torx #5 screwdriver for the base screws and a Philips screwdriver for the two M2x8 system badge screws. 3. Turn the system badge flap over and snap it in place. 4. Follow the procedures in After Working Inside Your Computer.
Removing the Battery NOTE: Discharge the battery as much as possible before removing from the system. This can be done by disconnecting the A/C adapter from the system (while the system is turned on) to allow the system to drain the battery. 1. Follow the procedures in Before Working Inside Your Computer. 2. Remove the Base cover 3. Perform the following steps to remove the battery: a) Disconnect the battery cable from the system board [1].
2. Remove the: a) Base cover b) battery 3. Remove the screw that secures the solid-state drive (SSD) to the system board [1]. Then, slide the SSD out from its connector on the system board [2]. Installing the solid-state drive 1. Adhere the thermal pad to the solid-state drive. NOTE: The thermal pad is applicable only for a PCIe SSD card. 2. Slide the solid-state drive at an angle into the solid-state drive slot. 3.
4. Perform the following steps to remove the hard-drive: a) Disconnect the hard-drive cable from the system board [1]. b) Lift the hard drive off the palm rest assembly [2]. 5. Disconnect the hard drive interposer from the hard drive assembly and then remove the hard drive covers away from the hard drive.
Installing the Hard Drive 1. Replace the hard-drive covers on the hard drive. 2. Connect the hard-drive interposer to the hard-drive assembly. 3. Place the hard-drive assembly on the palm-rest assembly. 4. Connect the hard-drive cable to the system board. 5. Align the screw holes on the hard-drive cage with the screw holes on the hard-drive assembly. 6. Replace the four M2x4 screws that secure the hard-drive cage to the palm-rest assembly. 7. Install the: a) battery b) base cover 8.
Installing the Speakers 1. Using the alignment posts, place the speakers on the palm-rest assembly. 2. Replace the four M2x2 screws that secure the speakers to the palm-rest assembly. 3. Route the speaker cables through the routing guides on the palm-rest assembly. 4. Connect the speaker cable to the system board. 5. Install the: a) battery b) base cover 6. Follow the procedures in After Working Inside Your Computer. Coin-cell battery Removing the Coin-Cell Battery 1.
a) Turn the system board over. b) Lift up the coin cell battery [1] c) Disconnect the coin cell battery cable [2] from the system board [3]. Installing the Coin-Cell Battery 1. Replace the coin-cell battery in its slot in the computer. 2. Connect the coin-cell battery cable to the system board. 3. Turn the system board over. 4. Install the: a) b) c) d) e) f) g) h) System Board Memory Heatsink assembly Fans Hard drive WLAN card Battery Base cover 5.
4. Un-route the LVDS cable [1] and then remove the 31 M1.6 x 1.5 screws that secure the keyboard to the computer [2]. 5. Lift and remove the keyboard from the computer.
Installing the Keyboard 1. Adhere the Mylar to the keyboard. 2. Align the screw holes on the keyboard with the screw holes on the palm-rest assembly. 3. Replace the 31 M1.6 x 1.5 screws that secure the keyboard to the palm-rest assembly. 4. Adhere the Mylar to the screws that secure the keyboard to the palm-rest assembly. 5. Connect the keyboard cable and keyboard-backlight cable to the keyboard-controls board. 6. Install the: a) system board b) hard drive c) base cover 7.
Installing the WLAN Card 1. Align the notch on the WLAN card with the tab on the WLAN-card connector on the system board. 2. Align the bracket which secures the WLAN card to the palmrest assembly. 3. Connect the antenna cables to the WLAN card. CAUTION: To avoid damage to the WLAN card, do not place any cables under it. NOTE: The color of the antenna cables is visible near the tip of the cables. The antenna-cable color scheme for the WLAN card supported by your computer is as follows: Table 2.
a) Base cover b) battery 3. Pry the securing clips away from the memory module until it pops-up [1]. Then, remove the memory module from its connector on the system board [2]. Installing the Memory Module(s) 1. Insert the memory module into the memory socket. 2. Press the memory module down until it clicks into place. NOTE: If you do not hear the click, remove the memory module and re-install it. 3. Install the: a) battery b) base cover 4. Follow the procedures in After Working Inside Your Computer.
4. Perform the following steps to remove the right system fan: a) b) c) d) Un-thread the LVDS cable from its restraints [1]. Disconnect the fan cable from the system board [2] Remove the two M2x4 screws that secure the fan to the computer [3]. Lift the fan away from the computer [4]. Installing the Fans 1. Perform the following steps to install the system fan: a) b) c) d) e) f) g) h) i) Align the screw holes on the left fan with the screw holes on the palm-rest assembly.
Heat sink Removing the Heatsink 1. Follow the procedures in Before Working Inside Your Computer. 2. Remove the: a) Base cover b) battery 3. Remove the four M2x3 screws that secure the heatsink to the system board. 4. Lift the heatsink off the computer.
Installing the Heatsink 1. Align the screw holes on the heatsink with the screw holes on the system board. 2. Replace the screws to secure the heatsink to the system board. 3. Install the: a) battery b) base cover 4. Follow the procedures in After Working Inside Your Computer. Power connector port Removing the DC-in Connector 1. Follow the procedures in Before Working Inside Your Computer. 2. Remove the: a) Base cover b) battery 3.
Installing the DC-in Adapter Port 1. Place the DC-in adapter port into the slot on the palm-rest assembly. 2. Route the power-adapter port cable through its routing guides on the palm-rest assembly. 3. Replace the M2x3 screw that secures the power-adapter port to the palm-rest assembly. 4. Connect the power-adapter port cable to the system board. 5. Install the: a) battery b) base cover 6. Follow the procedures in After Working Inside Your Computer. Antenna cover Removing the antenna cover 1.
Figure 6. Turning the display hinge a. display assembly b. display hinges (2) 4. Slide and lift the antenna cover away from the display assembly. Figure 7. Removing the antenna cover a. display assembly b. antenna cover Installing the antenna cover 1. Replace the antenna cover on the display assembly. 2. Turn the display hinges to the normal position. 3. Install the: a) b) c) d) display assembly wireless card battery base cover 4. Follow the procedures in After Working Inside Your Computer.
Display Assembly Removing the Display Assembly 1. Follow the procedures in Before Working Inside Your Computer. 2. Remove the: a) Base cover b) battery 3. Perform the following steps: a) Remove the screw securing the metal bracket [1]. b) Lift the metal bracket off the computer [2]. c) Disconnect the LVDS cable from the system board [3]. 4. Place the computer at the edge of a table as shown and remove the six M2.5x5 screws [1] securing the display assembly to the computer.
Installing the Display Assembly 1. Place the palm-rest assembly at the edge of the table with the speakers facing away from the edge. 2. Align the screw holes on the palm-rest assembly with the screw holes on the display hinges. 3. Replace the six M2.5 x 5 screws that secure the display hinges to the palm-rest assembly. 4. Adhere the tape and route the touch-screen cable through the routing guides on the fan. 5. Connect the touch-screen cable and display cable to the system board. 6.
NOTE: Your computer’s Service Tag is located under the system badge flap. You must enter the Service Tag in the BIOS after you replace the system board. NOTE: Before disconnecting the cables from the system board, note the location of the connectors so that you can re-connect them correctly after you replace the system board. 3. Remove the M2x2 screw securing the metal bracket for the LVDS to the system board [1] and remove the bracket off the computer [2].
Installing the System Board 1. Align the system board on the computer. 2. Replace the five M2x4 screws that secure the system board to the palm-rest assembly. 3. Connect the power-adapter port cable, speaker cable, keyboard-control board cable, touch-pad cable, and touch-screen cable to the system board. 4. Connect the display cable to the system board. 5. Align the screw hole on the display-cable bracket with the screw hole on the system board. 6.
3. After performing the above steps, we are left with the palmrest assembly [1]. Installing the Palm rest Assembly 1. Align the palm rest assembly on the display assembly. 2. Tighten the screws to secure the display hinges to the palm rest assembly. 3. Press down on the palm rest assembly to close the display. 4.
4 Diagnostics If you experience a problem with your computer, run the ePSA diagnostics before contacting Dell for technical assistance. The purpose of running diagnostics is to test your computer's hardware without requiring additional equipment or risking data loss. If you are unable to fix the problem yourself, service and support personnel can use the diagnostics results to help you solve the problem.
Light off Battery in full charge mode with AC adapter present. White light on Battery in charge mode with AC adapter present. Diagnostic LED Occasionally the computer may indicate bicolor flashes on Battery Charge LED. A specific blink pattern, flashing a pattern of amber, followed by white, and then the same pattern repeats. NOTE: The diagnostic pattern consists of a two-digit number that is represented by a first group of amber LED blinks (1 through 9), followed by a 1.
5 System Setup Options NOTE: Depending on your computer and its installed devices, the items listed in this section may or may not appear. Table 5. Main Option Description System Time/Date Allows you to set the date and time. BIOS Version Displays the BIOS version. Product Name Displays the product name. Dell Precision 5520 (Default Setting) Service Tag Displays the service tag. Asset Tag Displays the asset tag. None (Default Setting) CPU Type Displays the CPU type.
Option Description Keyboard Illumination This field lets you choose the operating mode of the keyboard illumination feature. Disabled (Default Setting) USB Configuration Allows you to configure the integrated USB controller. Default Enabled: Enable Boot Support, Enable Thunderbolt Ports; Always Allow Dell Docks; Enable External USB Port Touchscreen This field controls whether the touchscreen is enabled or disabled.
Option Description Asset Tag Allows you to set the asset tag. Admin Password Allows you to set, change, or delete the administrator (admin) password. NOTE: You must set the admin password before you set the system or hard drive password. NOTE: Successful password changes take effect immediately. NOTE: Deleting the admin password automatically deletes the system password and the hard drive password. NOTE: Successful password changes take effect immediately.
Option Description • • Load Legacy Option ROM Disabled (Default Setting) - Windows 7 (Intel Core Xeon E3–1505M v5 and Intel Core i7– 6820HQ processors) Enabled - Windows 8.1 and Windows 10 (Intel Core Xeon E3–1505M; Intel Core i7–7820HQ; Intel Core i7–7700HQ; Intel Core i5–7440HQ; and Intel Core i5–7300HQ processors) This option enables or disables the Load Legacy Option ROM feature. • • Enabled (Default Setting) - Windows 7 Disabled - Windows 8.
6 Technical Specifications NOTE: Offerings may vary by region. For more information regarding the configuration of your computer, click Start (Start icon) > Help and Support, and then select the option to view information about your computer. Table 10. System Information Feature Specification System Chipset Mobile Intel HM175 Express Chipset / Intel CM238 DMA Channels two VT-d DMA remap engines Interrupt Levels Intel 64 and IA-32 Architecture BIOS Chip (NVRAM) 32 MB SPI ROM Table 11.
Feature Integrated Data bus Specification • • Intel HD Graphics 630/P630 with 7th Generation processors Intel HD Graphics 530 with 6th Generation processors PCIE x16, Gen3 Memory Discrete Up to 4 GB GDDR5 Integrated Shared system memory Table 14. Audio Feature Specification Integrated dual-channel High-Definition audio Table 15. Communication Feature Specification Network adapter Ethernet via USB-to-Ethernet Dongle (Optional). NOTE: No RJ45 (10/100/1000Base-T, IPv6) provided.
Feature Specification Operating angle 0° (closed) to 135° Refresh rate 60 Hz Minimum viewing angles: Horizontal 80/80 Vertical 80/80 Table 18. Keyboard Feature Specification Number of keys • • • • Layout QWERTY/AZERTY/Kanji United States: 80 keys United Kingdom: 81 keys Brazil: 80 keys Japan: 84 keys Table 19. Touchpad Feature Specification Active Area: X-axis 105 mm Y-axis 80 mm Table 20. Camera Feature Specification Type HD Camera / Digital Array Microphone Still Resolution 0.
Feature Specification Depth 223.20 mm (8.79 in) Height 7.20 mm (0.28 in) Width 71.80 mm (2.83 in) Weight 0.54 lb (0.24 kg) Depth 330.50 mm (13.01 in) Height 7.20 mm (0.28 in) Width 71.80 mm (2.83 in) Weight 0.76 lb (0.34 kg) 84 Whr : Voltage 11.
Table 25. Environmental Feature Specification Temperature range: Operating 0 °C to 40 °C (32 °F to 104°F) Storage –40 °C to 70 °C (–40 °F to 158 °F) Relative humidity (maximum): Operating 10 % to 90 % (non-condensing) Storage 10 % to 95 % (non-condensing) Maximum vibration: Operating 0.66 GRMS, 2 Hz - 600 Hz Storage 1.3 GRMS, 2 Hz - 600 Hz Maximum shock: Operating 110 G, 2 ms Non-operating 160 G, 2 ms Altitude: Operating –15.2 m to 30482000 m (–50 to 10,0006560 ft) Storage 15.
7 Contacting Dell NOTE: If you do not have an active Internet connection, you can find contact information on your purchase invoice, packing slip, bill, or Dell product catalog. Dell provides several online and telephone-based support and service options. Availability varies by country and product, and some services may not be available in your area. To contact Dell for sales, technical support, or customer service issues: 1. Go to Dell.com/support. 2. Select your support category. 3.