drm.book Page 1 Thursday, June 23, 2011 12:27 PM Dell Repository Manager Version 1.
drm.book Page 2 Thursday, June 23, 2011 12:27 PM Notes and Cautions NOTE: A NOTE indicates important information that helps you make better use of your computer. CAUTION: A CAUTION indicates potential damage to hardware or loss of data if instructions are not followed. ____________________ Information in this document is subject to change without notice. © 2011 Dell Inc. All rights reserved. Reproduction of these materials in any manner whatsoever without the written permission of Dell Inc.
drm.book Page 3 Thursday, June 23, 2011 12:27 PM Contents 1 Overview . . . . . . . . . . . . . . . . . . . . . . . . . . Key Features . . . . . . . . . . . . . . . . . . . . . . . . User Scenarios 12 . . . . . . . . . . . . . . . . . . . . 13 Launching RM Using Command Line Options . Managing RM 8 . . . . . . . . . . . Other Documents You Might Need 2 7 . . . . . 13 . . . . . . . . . . . . . . . . . . . . . . 13 . . . . . . . . . 14 . . . . . . . . . . .
drm.book Page 4 Thursday, June 23, 2011 12:27 PM 3 Upgrading and Uninstalling Repository Manager . . . . . . . . . . . . . . . . Pre-Requisites for Installing Repository Manager Repairing Repository Manager . . . 19 . . . . . . . . . . . . . 21 Uninstalling Repository Manager 4 . . . . . . . . . . . . . . . . 21 On Windows Vista, Windows Server 2008, Windows 2008 R2, and Windows 7 . . . . . . . . . 21 . . . . . . . . . 23 . . . . . . . . . . . . . . .
drm.book Page 5 Thursday, June 23, 2011 12:27 PM Importing Bundles . . . . . . . . . . . . . . . . . 35 Removing Bundles . . . . . . . . . . . . . . . . . 36 . . . . . . . . . . . . . . . . . . 37 Cloning Bundles Comparing Bundles . Exporting Bundles . . . . . . . . . . . . . . . . 37 . . . . . . . . . . . . . . . . . 38 Exporting as a SUU . . . . . . . . . . . . . . . . . Configuring the New Plugin Notification Settings . . . . . . . . . . . . . . . .
drm.book Page 6 Thursday, June 23, 2011 12:27 PM Comparing Repositories . . . . . . . . . . . . . . . . . 64 Saving a Repository . . . . . . . . . . . . . . . . . . . 64 Editing a Repository . . . . . . . . . . . . . . . . . . . 64 Removing a Repository. . . . . . . . . . . . . . . . . . Working With Components . . . . . . . . . . . . . . . 65 . . . . . . . . . . . . . . . . 66 Removing Components . . . . . . . . . . . . . . . Downloading Components Exporting Components . . . . . . . . .
drm.book Page 7 Thursday, June 23, 2011 12:27 PM 1 Overview The Dell Repository Manager (RM) allows you to create repositories of customized bundles and updates, and groups of related updates for systems running supported Microsoft Windows or Linux operating systems. This facilitates generation of comparison reports and establishing update baselines of repositories.
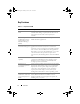
drm.book Page 8 Thursday, June 23, 2011 12:27 PM Key Features Table 1-1. Key Features of RM Feature Description RM in Server and Client In the Server mode, all the export options and tabs are mode available while editing a repository. In the Client mode, only features relevant to the client repository are available. Customize repositories for Dell Client System Update (DCSU) and Dell Client Manager (DCM) In the Client mode, you can customize repositories for DCM and DCSU applications.
drm.book Page 9 Thursday, June 23, 2011 12:27 PM Table 1-1. Key Features of RM (continued) Feature Description Display of disclaimer when a Dell– recommended bundle is modified In the Server mode, when you modify a Dell– recommended bundle by modifying its attributes such as name and version or remove components, a disclaimer prompting you to test the bundle before deploying it appears.
drm.book Page 10 Thursday, June 23, 2011 12:27 PM Table 1-1. Key Features of RM (continued) Feature Description Ability to save a catalog without its associated DUPs You can save the catalog file, excluding the DUPs associated with it, in a location of your choice on your system.
drm.book Page 11 Thursday, June 23, 2011 12:27 PM Table 1-1. Key Features of RM (continued) Feature Description Indication of the size of the selected Bundles /Components The size of the Bundles or Components you select in the Bundles/Components screen, is indicated at the top of the lists on the Bundles/Components screen. Digital certificate publisher alert and prompt for acceptance When you download a Catalog.cab file or an individual Dell update package from ftp.dell.
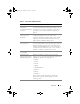
drm.book Page 12 Thursday, June 23, 2011 12:27 PM Other Documents You Might Need In addition to this guide, you can access the following guides available at support.dell.com/manuals. On the Manuals page, click SoftwareSystems Management. Click the appropriate product link on the right-side to access the documents.
drm.book Page 13 Thursday, June 23, 2011 12:27 PM 2 User Scenarios This chapter describes the various uses of Dell Repository Manager (RM) and the user scenarios. Launching RM Using Command Line Options To launch RM using the command line options, use: • RepositoryManager.exe to load a specific repository at start up. • RepositoryManager.exe -server to launch the application in Server mode. or RepositoryManager.exe -client to launch the application in Client mode.
drm.book Page 14 Thursday, June 23, 2011 12:27 PM Upgrading to the Latest Version of RM To upgrade an earlier version of the RM that is installed on your system: 1 Download the Repository Manager.msi file from support.dell.com. For more information, see the Dell Repository Manager - Quick Installation Guide available at support.dell.com/manuals. 2 Install RM. For more information, see the Dell Repository Manager - Quick Installation Guide available at support.dell.com/manuals.
drm.book Page 15 Thursday, June 23, 2011 12:27 PM You perform the following tasks in the Bundles tab: • Import bundles. For more information, see Importing Bundles. • Create custom bundles. For more information, see Creating Custom Bundles. • Create bundle clones. For more information, see Cloning Bundles. • Compare bundles. For more information, see Comparing Bundles. • Export bundles to a raw driver pack or to a lightweight deployment pack. For more information, see Exporting Bundles.
drm.book Page 16 Thursday, June 23, 2011 12:27 PM • Export components. For more information, see Exporting Components. • View component properties. For more information, see Viewing Component Properties. • Remove components. For more information, see Removing Components. Using RM to Create and Manage a Client Repository To create and manage a repository in the Client mode: 1 Launch RM and select the Client mode option. 2 Create or import a new repository.
drm.book Page 17 Thursday, June 23, 2011 12:27 PM • Download components. For more information, see Downloading Components. • Export components. For more information, see Exporting Components. • View component properties. For more information, see Viewing Component Properties. • Remove components. For more information, see Removing Components. Using RM to Search for Updates To search for updates using RM: 1 Import a repository while launching RM in Server or Client mode.
drm.book Page 18 Thursday, June 23, 2011 12:27 PM Using RM to Update or Save SUU and Deployment Media Plugins To update the Deployment Media or SUU plugin using RM: 1 Configure the Plugin Settings. For more information, see Configuring the New Plugin Notification Settings. 2 On the Repository Manager screen, click the Plugin icon located at the top right-hand corner. 3 Download the SUU and Deployment Media plugins. For more information, see Downloading SUU and Deployment Media Plugins.
drm.book Page 19 Thursday, June 23, 2011 12:27 PM Upgrading and Uninstalling Repository Manager 3 This chapter lists the pre-requisites and procedures to upgrade, modify, repair, and uninstall Dell Repository Manager (RM). Pre-Requisites for Installing Repository Manager Table 3-1.
drm.book Page 20 Thursday, June 23, 2011 12:27 PM Table 3-2.
drm.book Page 21 Thursday, June 23, 2011 12:27 PM Repairing Repository Manager RM facilitates repair of errors such as missing or corrupt files and shortcuts, and registry entries that occur while installing the application. To repair the installation errors: 1 Double-click the Repository Manager.msi located on your system. 2 In the Dell - Repository Manager - InstallShield Wizard, click Next. 3 Select Repair and click Next. 4 In the Ready to Repair the Program, click Install. 5 Click Finish.
drm.
drm.book Page 23 Thursday, June 23, 2011 12:27 PM Using Repository Manager in Server Mode 4 Table 4-1 lists the tasks you can perform in the Server mode. Table 4-1.
drm.book Page 24 Thursday, June 23, 2011 12:27 PM Creating a New Repository To create a repository: 1 Launch RM. 2 In the Welcome window, click Import a Repository. If the Welcome window is closed, you can click the Open link on the Repository Manager screen to add a repository. If you click Import Repository, the Load Repository Manager window appears with the status of the remote repository download process. For more information, see Importing an Existing Repository.
drm.book Page 25 Thursday, June 23, 2011 12:27 PM 10 In the Additional Component(s) window, click Yes if you want your repository to include additional components not included in the bundle(s) you selected. Click View Components for a list of additional components, and click Next. You can view the bundle(s) and components in this repository from the Bundles and Components tabs. too.
drm.book Page 26 Thursday, June 23, 2011 12:27 PM Selecting a Source for the Repository You can select a source for the repository you want to create, in the Select Source Repository window. Select one of the options listed in Table 4-2. Table 4-2. Repository Sources Options Details Empty Repository Creates an empty repository. You can add bundle(s) and components to the new repository. For information on adding bundle(s), see Importing Bundles. (Server) ftp.dell.com Imports the default repository.
drm.book Page 27 Thursday, June 23, 2011 12:27 PM Selecting Operating Systems You can select one or more operating systems for the repository you want to create, in the Select Operating System(s) window. Select one of the options listed in Table 4-3. Table 4-3. Operating Systems Options Details All Operating Systems Allows to select component(s) pertaining to all the Windows and Linux operating systems supported by RM, and the components that are independent of an operating system.
drm.book Page 28 Thursday, June 23, 2011 12:27 PM Table 4-4. System Models (continued) Options Details Select Model(s) Displays all the available systems based on the form factor you selected. You can select individual or multiple systems as required from the list box. For example, if you select Tower as the form factor, selecting Select Model(s) displays all the Dell tower systems. You can then choose the tower system(s) whose DUPs you want to include in the repository.
drm.book Page 29 Thursday, June 23, 2011 12:27 PM 4 In the Select Source Repository window: • Select (Server) ftp.dell.com to import a repository from ftp.dell.com. NOTE: You cannot edit bundle(s) and components contained in the repository stored on ftp.dell.com. Therefore, the Add, Save, and Remove buttons on the Bundles and Components tabs are disabled while viewing the ftp repository. • Select Local Repository to import a repository stored on your system.
drm.book Page 30 Thursday, June 23, 2011 12:27 PM Table 4-5 below lists the options in the Comparison Options window. Table 4-5. Compare Repositories Window - Options Field Description Base Repository Select the initial repository that you want to use for comparison. Comparison Repository Select the repository with which you want to compare your base repository. Newer Versions Select to view newer version of the same components in the comparison repository.
drm.book Page 31 Thursday, June 23, 2011 12:27 PM Saving the Repository Repositories can be saved as: • entire repositories including the catalog and the packages defined in it — For more information, see Creating a New Repository. • catalog only — For more information, see Saving the Catalog. Saving the Catalog You can save the catalog.xml or catalog.cab file, which contain details of the repository you created or customized, to your local system.
drm.book Page 32 Thursday, June 23, 2011 12:27 PM When a catalog is being saved, the following message is displayed: "Catalog save successful" "Catalog successfully saved to:" 6 Click Close to return to the Repository Manager screen. Editing a Repository You can only edit the name and description of a selected repository, if the repository is editable. To edit a repository: 1 Select the repository you want to edit.
drm.book Page 33 Thursday, June 23, 2011 12:27 PM Working With Bundles A bundle is a collection of Dell Update Packages (DUPs), called components, that are related to a certain platform, for example, PowerEdge R410 and operating system, for example, Microsoft Windows 2003. You can use RM to: • Create or import and customize bundle(s). For more information, see Creating Custom Bundles. • Clone existing bundle(s). For more information, see Cloning Bundles. • Compare bundle(s).
drm.book Page 34 Thursday, June 23, 2011 12:27 PM Viewing the Size of Bundles In the Bundles tab, you can view the size of all the bundle(s) you select in the repository, at the top of the bundle(s) list. The size is displayed in MB or GB. You can also view the size of individual bundle(s) in the Size column, in the bundle(s) list. To view the size of a bundle, click the Get Size link corresponding to the bundle.
drm.book Page 35 Thursday, June 23, 2011 12:27 PM 8 In the Select Platforms window, select the required platform(s) required, and click Next. The Import Summary window displays the properties of the custom bundle you created. 9 Click Finish. The custom bundle is added under the list of bundle(s) on the Bundles tab. Custom bundle(s) you create are indicated by ’User’ in the Author column and Dell default bundle(s) are indicated by ’DELL’.
drm.book Page 36 Thursday, June 23, 2011 12:27 PM 7 In the Select Form Factor window, select the form factor of the systems associated with the bundle you want to import, and click Next. For example, if you want to import the bundle for a tower system, select Tower. 8 In the Select Operating System(s) window, select one of the following, and click Next.
drm.book Page 37 Thursday, June 23, 2011 12:27 PM Cloning Bundles You can create an exact copy of an existing bundle, and specify a new name and version for the copy. To clone a bundle: 1 On the Bundles tab, select a bundle you want to copy from the list of displayed bundle(s), and click Clone. 2 In the Clone Bundle window, the Bundle Name field displays the bundle that you selected to be copied or cloned. 3 In the New Name field, enter a name for the cloned bundle.
drm.book Page 38 Thursday, June 23, 2011 12:27 PM 7 Select Updates to Add to view updates that are present in the comparison bundle but not in the base bundle. 8 Select Updates to Remove to view updates that are present in the base bundle but not in the comparison bundle. 9 Click Compare to view the comparison report for the selected bundle(s) based on the criteria you specified. 10 You can also click Comparison Report to save the report as a HTML file and view it in a Web browser.
drm.book Page 39 Thursday, June 23, 2011 12:27 PM 6 Click Finish to complete the export. The following message is displayed: "Bundles exported successfully" 7 Click OK.
drm.book Page 40 Thursday, June 23, 2011 12:27 PM Table 4-6. Export Destination (continued) Options Details Export to light weight deployment scripts Exports the bundle(s) in the form of deployment scripts. Select a location to save these bundle(s). RM saves the scripts for bundle(s) pertaining to Microsoft Windows in the .bat format and Linux in the .sh format. You can then run the .bat and .sh scripts on Microsoft Windows and Linux systems respectively.
drm.book Page 41 Thursday, June 23, 2011 12:27 PM Table 4-6. Export Destination (continued) Options Details Deployment Media (Using Linux Bundle) Updates the system irrespective of the operating system installed on them. It can be used to update systems that do not have an operating system installed. The Deployment Media option exports the bundle(s) as ISO images.
drm.book Page 42 Thursday, June 23, 2011 12:27 PM Exporting as a SUU You can export a selected Dell recommended or a custom bundle as a fully functional SUU. To export a Dell recommended or a custom bundle as a functional SUU: 1 Load or import a repository. 2 Click the Bundles tab. 3 Select the bundle(s) you want to export from the list of displayed bundle(s), and click Export. 4 In the Export Bundle(s) window, select Export as SUU, and select one of the following, and click Next.
drm.book Page 43 Thursday, June 23, 2011 12:27 PM • If you attempt installing plugins by clicking the Click here to install the plugin, when ftp.dell.com is not accessible and plugins do not exist on your system, the following error message is displayed. "Plugin file not found in configured location. Press "OK" to open Plugin update settings." NOTE: Ensure the system connects to the Internet and the ftp.dell.com is accessible.
drm.book Page 44 Thursday, June 23, 2011 12:27 PM 4 Under the Source of Plugin Update, select Online (ftp.dell.com) to download the latest version of the plugin. Alternatively, select the Folder option to update the plugin from a local folder on your system. Click Browse to navigate to the location where the plugin update is located. 5 Click OK. Downloading SUU and Deployment Media Plugins You can update the SUU and Deployment Media plugins for bundle(s) or download and save them on your system.
drm.book Page 45 Thursday, June 23, 2011 12:27 PM Customizing Bundles You can customize the Dell recommended bundle(s) as per your needs by removing components, adding DUPs, or modifying the titles of bundle(s). To customize bundle(s): 1 In the Components tab, select the system bundle you want to customize, from the Selected Bundles drop-down list. 2 When you add or remove components, the following message is displayed: "You are about to modify a Dell recommended bundle(s).
drm.book Page 46 Thursday, June 23, 2011 12:27 PM • Replace default script with custom script to execute the customized script instead of the Dell default script. Click Browse to navigate to the folder where the customized script is located. • Append custom script to default script to execute the customized script after the Dell default script is executed. NOTE: Ensure the customized script is of ’.sh’ format. NOTE: Ensure that the script is edited and saved in UNIX format.
drm.book Page 47 Thursday, June 23, 2011 12:27 PM 9 Select the USB key as the boot target. 10 Select option 1 in the UNetBootIn menu’s boot menu to proceed with the component updates. Working With Components Components are also known as Dell Update Packages (DUPs). They are used for updating the Basic Input Output System (BIOS), firmware, and drivers on specific platforms. The list of components you add appear in the Components tab.
drm.book Page 48 Thursday, June 23, 2011 12:27 PM Adding Components You can add components from other bundle(s) and repositories to the bundle or repository you select. To add components: 1 Select the repository to which you want to add the component. 2 On the Components tab, click Add. 3 In the Select DUP File to Add window, select the component that you want to add. You can browse and search for the component from all the repositories available on your system.
drm.book Page 49 Thursday, June 23, 2011 12:27 PM If the selected components are assigned to any bundle in the repository, the following message is displayed: "Do you want to remove the selected component(s) from these bundles: " 2 Click Yes to proceed. NOTE: The component removed from the bundle is available in the repository. Downloading Components You can download one or multiple components to the local drives on your system.
drm.book Page 50 Thursday, June 23, 2011 12:27 PM After the components are exported, the number of components exported and the number of bundle(s) they are exported to, appear in the Export Components screen. If any errors or warnings occur during the export of components, click Errors/Warnings to view the details in the Errors and Warnings window. Selecting a Destination for Component Exports You can select an export destination for the components, in the Export Destination window.
drm.book Page 51 Thursday, June 23, 2011 12:27 PM Viewing Component Properties You can view properties of components in the Components tab. To view component properties: 1 In the Components tab, select the component whose properties you want to view. 2 Click Properties.
drm.book Page 52 Thursday, June 23, 2011 12:27 PM Working With Filters RM has an extensive search mechanism that allows you to query repositories, create filters, save, and load filters. Using the filtering capability of RM, you can view specific bundle(s) and Dell Update Packages (DUPs) from any selected repository.
drm.book Page 53 Thursday, June 23, 2011 12:27 PM Creating Filters You can create filters at the bundle level or component level. To create a filter: 1 On the Repository Manager screen, select a repository whose bundle(s) and components you want to search, from the Repository Information drop-down. The bundle(s) and components for that repository are displayed on the right side. 2 Select the desired filter options to create a filter.
drm.book Page 54 Thursday, June 23, 2011 12:27 PM Table 4-8. Filter Properties (continued) Property Description Criticality Filters bundle(s) and component(s) based on the criticality of the update. The options available are: • Optional • Recommended • Urgent For example, if you select Urgent, RM displays all the bundle(s) and components that you require to update your system immediately. NOTE: This filter displays the bundle(s) only if they have components matching the search criteria.
drm.book Page 55 Thursday, June 23, 2011 12:27 PM Table 4-8. Filter Properties (continued) Property Description Dell Update Filters component(s) based on the Dell Update Package format. The Package options available are: Format • All • Windows • Linux • Other For example, if you select Windows, RM displays all components applicable to the Windows operating system. If you select Other, RM displays components of non DUP format. NOTE: This filter is available only in the Components tab.
drm.book Page 56 Thursday, June 23, 2011 12:27 PM Table 4-8. Filter Properties (continued) Property Description Supported Platforms Filters bundle(s) and component(s) based on the selected platform. The options available are: • All • Selected For example, if you select PowerEdge R200, RM displays the bundle(s) and components applicable to the Dell PowerEdge R200 system. NOTE: When you select a platform, RM displays all the applicable updates relevant to that platform.
drm.book Page 57 Thursday, June 23, 2011 12:27 PM Table 4-8. Filter Properties (continued) Property Description PCI Device Filters bundle(s) and component(s) based on the PCI devices. The Information options available are: • All • Contains NOTE: This filter displays the bundle(s) only if they have components matching the search criteria. Driver Packs Filters component(s) based on the Driver Pack.
drm.book Page 58 Thursday, June 23, 2011 12:27 PM Managing Filters The drop-down list on the left side of RM displays the filters that you created and saved. To view a summary of the all existing filters, click Manage Search Filters in the drop-down list. The Manage Filters window is displayed. Table 4-9 lists the options in the Manage Filters window. Table 4-9. Options in the Manage Filter Window Option Description Properties Edit the name and description of a selected filter.
drm.book Page 59 Thursday, June 23, 2011 12:27 PM 5 Using Repository Manager in Client Mode Table 5-1 lists the tasks you can perform in the Client mode. Table 5-1.
drm.book Page 60 Thursday, June 23, 2011 12:27 PM Creating a New Repository To create a repository: 1 Launch RM. 2 In the Welcome window, click Import a Repository. If the Welcome window is closed, you can click the Open link on the Repository Manager screen to add a repository. If you click Import Repository, the Load Repository Manager window appears with the status of the remote repository download process. For more information, see Importing an Existing Repository.
drm.book Page 61 Thursday, June 23, 2011 12:27 PM The name of the repository and the number of component files downloaded added to the repository appears in the window. You can customize repositories for Dell Client System Update (DCSU) and Dell Client Manager (DCM) applications. In this version, DCSU 1.1.1 A03, DCM 3.1 SP1, and higher versions are supported. NOTE: You can customize the filename of the repository while saving it.
drm.book Page 62 Thursday, June 23, 2011 12:27 PM Selecting Line of Business You can select a line of business of the Dell system model(s) for the repository you want to create in the Select Line of Business window. Select the option(s) listed in Table 5-3. Table 5-3. Line of Business Options Details Optiplex Includes Dell Update Packages (DUPs) for the available Optiplex systems in the repository. Latitude Includes DUPs for the available Latitude systems in the repository.
drm.book Page 63 Thursday, June 23, 2011 12:27 PM Importing an Existing Repository To import an existing repository: 1 Launch RM. 2 In the Welcome window, click Import Repository. If the Welcome window is closed, click the Open link located at the top of the Repository Manager screen to add a repository. If you click Import Repository, the Load Repository Manager window is displayed with the status of the remote repository download process.
drm.book Page 64 Thursday, June 23, 2011 12:27 PM 5 In the Summary window, click Finish to complete the import of the repository. The number of DUPs imported and the name of the DUPs imported appear in the Adding Components to Repository screen. You can view the components in this repository from the Components tab. Comparing Repositories For more information, see Comparing Repositories.
drm.book Page 65 Thursday, June 23, 2011 12:27 PM Working With Components Components are also known as Dell Update Packages (DUPs). They are used for updating the Basic Input Output System (BIOS), firmware, and drivers on specific platforms. The list of components you add appear in the Components tab. You can sort the list of components based on file name, type, version, criticality, date on which the component was created, and size of the component.
drm.book Page 66 Thursday, June 23, 2011 12:27 PM Adding Components You can add components from other repositories to the repository you select. To add components: 1 Select the repository to which you want to add the component. 2 Click Add. 3 In the Select DUP File to Add window, select the component that you want to add. You can browse and search for the component from all the repositories available on your system.
drm.book Page 67 Thursday, June 23, 2011 12:27 PM Exporting Components To export components: 1 Select the repository to which you want to export the component. 2 On the Components tab, select the component(s) to export. 3 Click Export. 4 In the Export Component(s) window, click Next. 5 In the Export Destination window, select any of the following: • Copy component(s) into an Existing Repository — to export components to an existing repository. Select the repository to export the components.
drm.book Page 68 Thursday, June 23, 2011 12:27 PM Working With Filters RM has an extensive search mechanism that allows you to query repositories, create filters, and save and load filters. Using the filtering capability of RM, you can view specific Dell Update Packages (DUPs) from any selected repository.
drm.book Page 69 Thursday, June 23, 2011 12:27 PM Table 5-5 lists the properties of the filters that you can base your search on: Table 5-5. Filter Properties Property Description Text Search Filters component(s) based on the search text you have provided. For example, if you enter Latitude, RM displays all the latest repositories and components applicable to the Latitude systems. NOTE: You can enter only regular search syntax in this field.
drm.book Page 70 Thursday, June 23, 2011 12:27 PM Table 5-5. Filter Properties (continued) Property Description Component Version Filters component(s) based on the version of the component. If you select: • All: Displays all the components in the selected repository irrespective of the component version. • Most Recent: Displays the most recent version of the component in the selected repository. • Contains: Displays all the components whose version contain the text you entered.
drm.book Page 71 Thursday, June 23, 2011 12:27 PM Table 5-5. Filter Properties (continued) Property Description Supported Devices Filters component(s) based on supported hardware devices. The options available are: • All • NIC • Video • Audio • Chipset For example, if you select NIC, RM displays all the components that contain updated Network Interface Cards (NICs). NOTE: This filter displays the bundles only if they have components matching the search criteria.
drm.book Page 72 Thursday, June 23, 2011 12:27 PM 3 Click Save Filter to save your search and use it in the future. 4 In the Save Filter window, specify a name and description for your filter. 5 Click Save. The following message is displayed: "Search Filter Saved..." You can access the saved search/filter from the drop-down list located above the Text Search field. Managing Filters For more information, see Managing Filters.
drm.book Page 73 Thursday, June 23, 2011 12:27 PM Frequently Asked Questions 6 This section lists some frequently asked questions about RM. I do not see the Welcome screen everytime I launch the application. How can I make it appear? On the Welcome screen, when you select the Do not show again check box, the Welcome screen does not appear when you launch the application each time. To make the Welcome screen appear, delete the file DoNotShow.
drm.book Page 74 Thursday, June 23, 2011 12:27 PM I see an update present in support.dell.com but when I load the repository from ftp.dell.com using RM, I do not see that update. RM loads the latest ftp.dell.com repository that is supported by Dell OpenManage. The content in this repository is released quarterly and follows a robust testing process. Occasionally, updates may be available on support.dell.com before the contents of the repository on ftp.dell.com are updated.