Dell Repository Manager Data Center Version 2.
Notes, Cautions, and Warnings NOTE: A NOTE indicates important information that helps you make better use of your computer. CAUTION: A CAUTION indicates either potential damage to hardware or loss of data and tells you how to avoid the problem. WARNING: A WARNING indicates a potential for property damage, personal injury, or death. Copyright © 2014 Dell Inc. All rights reserved. This product is protected by U.S. and international copyright and intellectual property laws.
Contents 1 Overview.................................................................................................................6 What Is New In This Release................................................................................................................. 6 Accessing documents from Dell support site...................................................................................... 7 Other Documents You May Need............................................................................
Opening From My Repositories.................................................................................................... 29 Saving Repository In Multiple Locations...................................................................................... 29 Deleting From My Repositories.................................................................................................... 30 Scheduling Repository Search..........................................................................................
Searching Dell Support Site................................................................................................................ 58 Exporting Updates From Support Site.......................................................................................... 59 Filter Options For Search Results................................................................................................. 60 Scheduling Automatic Search...............................................................................
Overview 1 The Dell Repository Manager (DRM) ensures that the Dell systems are up-to-date with the latest BIOS, driver, firmware, and software.
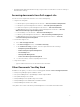
• Configuring New Catalog Notification-Helps you get an alert or notification for new FTP catalog or new Dell online catalog. Accessing documents from Dell support site You can access the required documents in one of the following ways: • Using the following links: – For all Enterprise Systems Management documents — dell.com/softwaresecuritymanuals – For Enterprise Systems Management documents — dell.com/openmanagemanuals – For Remote Enterprise Systems Management documents — dell.
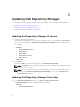
Updating Dell Repository Manager 2 You can update the Dell Repository Manager to the latest available version using the following methods: • Updating Dell Repository Manager At Launch • Updating Dell Repository Manager From Help • Updating Dell Repository Manager Using Updater Updating Dell Repository Manager At Launch 1. Launch the Dell Repository Manager. The Dell Repository Manager checks for the latest available version of the application at ftp.dell.com.
2. 2. New Version: 3. Release Date: 4. New Release Location: 5. Release Notes: • What’s New The Dell Repository Manager checks for the latest available version of the application at ftp.dell.com. If a newer version is available, the application prompts you to install the same. NOTE: The Update button is enabled only when the version of the Dell Repository Manager installed on the system is out-of-date. You can click Skip to retain the existing version of the Dell Repository Manager.
NOTE: In systems running Microsoft Windows Server 2012 (64-bit Operating Systems), you can start the update by running the RMUpdater.exe file at: c:\Program Files (x86)\Dell\Dell Repository Manager vx.x.x\RMUpdater.exe.
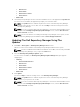
System Requirements And Uninstalling The Dell Repository Manager 3 This chapter lists the systems requirements and procedures to uninstall DRM. Related Topic • Hardware Requirements • Software Requirements • Optional Requirements • Uninstalling Dell Repository Manager • Repairing Repository Manager Prerequisites For Installing The Dell Repository Manager This section lists the specific prerequisites for installing the DRM.
Requirement Details Supported Internationalized Operating Systems • • • • • • • • English French German Spanish Japanese Simplified Chinese Russian Portuguese NOTE: The Dell Repository Manager user interface is displayed only in English irrespective of the language of the operating system on which it is installed. Optional Requirements Internet connectivity and DVD burning software are optional requirements. You can use the local repositories on DRM without Internet connectivity.
NOTE: If you click Cancel, a pop-up window is displayed. Click Yes to finish or No to return to the Ready to Repair the Program window. 5. Click Finish. The repaired Dell Repository Manager is installed on the system.
Using The Dell Repository Manager 4 You can perform the following tasks: • Setting up a Source Catalog from the DRM Welcome Page • Create repositories • Import legacy repositories • Update repositories • Export catalog • Export repositories • Modify repository • Work with bundles • Work with components • Search repositories based on different criterion by setting the filters • Work with jobs queue • Search Dell Support Site • Scheduling Automatic Search Related Topics • Setting
• New Dell Online • New Local Source To set up a source catalog: 1. Launch the Dell Repository Manager. 2. On the Welcome window, up-right corner click New Dell Online. You can populate the DRM database with the help of latest Dell Online Catalog. DRM dialog box is displayed. It may take few seconds before it proceed further.
Configuring Source Repository To configure a default repository: 1. In the Dell Repository Manager window, click Application → Settings → Source Repository. In the Source Repository window, you can create a Local Repository. NOTE: If Check the update of Local Source Catalog while starting check box is selected, DRM checks for an update on every launch. NOTE: If Check the update of Dell Online Catalog while starting check box is selected, DRM checks for an updated version of the new catalog on every launch.
3. Under Update Settings, select one of the following options: • Automatically download new plugins when application is launched • Notify me of new plugins when application is launched • Manually check for new plugins NOTE: Once you select any of these options that remain same for the next execution cycle. 4. Under the Source of Plugin Update, select one of the following options: • Online (ftp.dell.com) — Downloads the plug-in from the FTP site.
NOTE: The Used Size: field provides the details of the FileStore size. The Available: field provides the details of the available blank space of the system (by default DRM creates the FileStore at C) drive. The Use Default button is enabled when another location is selected for the FileStore. 4. Click Ok to move the FileStore, or click Cancel to exit without making any changes. If you select Ok, a warning appears for further confirmation.
NOTE: The discovery takes 5–10 minutes to detect the URL. It is recommended to manually type the URL in the MS Exchange URL. 8. Select the correct MS Exchange Version from the drop-down list. The supported versions are: Exchange2007_SP1, Exchange2010, Exchange2010_SP1, Exchange2010_SP2 and Exchange2013. You must have one email client installed in the system for further communication. NOTE: Contact your system administrator, in case you are not sure about the MS Exchange Version. 9.
NOTE: Click Cancel at any time to exit without creating a new repository. 4. Select a source for the repository. The options available are: 5. • Dell Online Catalog — You can import the bundle(s) and components from the Dell Online Catalog into the repositories you create. • Local Source Repository — During repository creation, local source is an option/feature, to use a repository or a catalog that is available and maintained locally (can be on any accessible network) as the source repository.
• ONLY include most recent and custom bundle(s) — Provides the list of the most recently created bundles (latest versions) and user created (custom) bundles. • Select Bundle(s) — Allows you to select specific bundle(s) from the list of available bundles. 13. Click Next. The Optional Components window is displayed. 14. Click Select Components to include optional components in the repository, which are not included in the bundle(s) that you selected. 15.
4. • My Custom Repositories — Allows you to select an existing repository as the base repository. Click Next. The Connect to OME Server window is displayed. 5. Provide the host details to access Dell OpenManage Essentials in the Create Repository for Dell OpenManage Essentials window. 6. Provide the Host Name or IP Address and Port Number to access Dell OpenManage Essentials. NOTE: Select Use different user credentials, if the user identification is different from the Windows login credentials. 7.
Creating A Repository With iDRAC Inventory To create an update repository for Integrated Dell Remote Access Controller (iDRAC): 1. In the Dell Repository Manager window, click My Repositories tab, and click New→Dell iDRAC inventory. Create Repository for Dell iDRAC dialog box appears. 2. Type the Name: and Description: and click Next. NOTE: Click Cancel at any time to exit without creating a new repository. The Base Repository window is displayed. 3. Select a source for the repository.
• Windows x64 Bundles and Components • Linux Bundles and Components NOTE: The types of bundles or components are selected by default based on the inventory file that is being used. However, you can inter change the selections. NOTE: By default Windows x32 Bundles and Components option is selected. 9. Click Finish to create the repository. Please wait... dialog box is displayed while comparing the updates. New Repository from inventory box appears, once the new iDRAC repository is created. 10.
• Appliance Administrator Password: • Registered vCenter Server IP or Host: • vCenter Server Username: • vCenter Server Password: NOTE: Based on the version of the Dell virtual appliance, you may have to enter the Dell Management appliance administrator password. If this box is grayed out, the password is not required. The Please wait while getting inventory from Dell Management Appliance... window is displayed while getting list of systems. It may take several minutes to complete this process.
The Create Repository with Dell Modular Chassis Inventory window is displayed. 2. Type the Name: and Description:. 3. Click Next. The Base Repository window is displayed. NOTE: Click Cancel at any time to exit without creating a new repository. 4. 5. Select a source for the repository. The available options are: • Dell Online Catalog — You can import the bundle(s) and components from the Dell Online Catalog into the repositories you create.
Creating A Repository With Dell Generic Inventory To create an update repository with Dell Generic Inventory: 1. In the Dell Repository Manager screen, click My Repositories tab, and then click New → Dell Generic Inventory. The Create Repository with Generic Inventory window is displayed. 2. Type the Name: and Description: and click Next. Click Cancel at any time to exit without creating a new repository. The Base Repository window is displayed. 3. Select a source for the repository.
Creating Inventory files from the Inventory Collector for the Generic Inventory Dell Repository Manager provides an easy method for creating and maintaining repositories based on the inventory obtained from Dell Server(s). Inventory file is generally a part of an Inventory Collector in the form of an Extensible Markup Language (XML).
repositories using Run a Comparison once a repository is open. During the installation, Dell Repository Manager creates a database in the system. Functionalities Of My Repositories Create New repositories using any of the following options: • Create New Repository — Allows you to create a new repository by selecting a source for the repository. • Dell OpenManage Essentials (OME) inventory — Allows you to create a new repository by using the inventory data generated by the Dell OpenManage Essentials.
An Export Catalog window appears with the successfully saved message displaying the location where the catalog is saved. 6. If you want to generate report, select the check box corresponding to Generate report. NOTE: Once the job is completed, you can click the correspond job and then click Details. Job Execution Details dialog box is displayed. You can view the Report and the Log details. Deleting From My Repositories 1.
5. – Linux (32–bit & 64–bit) Click the Next tab, and select one of the following options: • Save updates to a local repository — This option is selected by default. If you want to save the update file locally, then click Browse to navigate to that location where you want to save the update file. 6. • Replace old files with new files in all bundles(DUP only) Click Next. 7. Set the start date, settings and security options in the following fields: 8.
Tab Description Summary View the comparison summary of the selected repositories. The summary displays the number of new version files, changed files, and obsolete files. This also displays the total number of files that are different among these repositories. The Summary tab is displayed by default. Newer Versions Click to view the latest versions of the updates available in the source repository.
To edit a repository: 1. In the Dell Repository Manager window, click My Repositories tab, select the repository you want to edit, and then click Open to view the repository. 2. Click Repository —>Properties. 3. In the Repository Properties window, edit the Name: or Description: information. 4. Click OK to apply the changes or click Cancel to exit without making any changes. Opening The Dell Online Catalog To open the Dell online catalog directly: 1.
Viewing The Properties Of A Repository To view the properties of a repository: 1. In the Dell Repository Manager window, click My Repositories tab, select the desired repository, and then click Open. 2. Click Properties. The Repository Properties window is displayed. The following details are displayed: 3.
4. Under Select the repository content to import:, select one of the following. • 5. Import only the catalog reference file (e.g. catalog.xml) • Import the catalog reference file and download the actual update files contained within it Click Import. NOTE: Click Cancel to exit the Import Repository window. Import Repository Queued window is displayed indicating that the job has been added to the Jobs Queue. NOTE: The job is submitted to the Jobs Queue.
Importing Bundles To import a bundle: 1. In the Dell Repository Manager screen, click My Repositories tab, select the repository to which you want to add the bundle, and click Open. 2. On the Bundles screen, click + Add. The Import Bundle(s) window is displayed. 3. On the Import Bundle(s) window, click Next. The Import or Create window is displayed. 4. On the Import or Create window, select Import bundle(s) from an existing repository, and click Next. The Select Repository window is displayed. 5.
• Include All — Includes Dell Update Packages (DUPs) for all available systems based on the form factor and operating system you selected, in your repository. For example, if you selected between Include All and Select Model(s), as the form factor, selecting Include All includes DUPs of all the Dell tower system(s) in the repository. • Select Model(s) — Displays all the available systems based on the form factor and operating system you selected.
• Select all Operating Systems • Select specific Operating Systems NOTE: The options are available only when the selected OS Type in the previous window is Windows or Linux. The Select Platform(s) window is displayed. 9. On the Select Platform(s) window, select one of the following, and click Next: • No platform is specified — Selects the platform by default. • Select specific Platform(s) — Allows you to select multiple platforms by pressing and holding and using the left-mouse button.
To clone a bundle: 1. In the Dell Repository Manager screen, click My Repositories tab select the desired repository, and click Open. 2. On the Bundles screen, select a single bundle you want to copy from the list of displayed bundle(s), and click Clone. The Clone Bundle window is displayed. The options available are: 3. • Bundle Name: Displays the bundle that you selected to be copied or cloned. • New Name: Displays the new name of the copied or cloned bundle.
Deleting Components From Bundles You can customize the Dell recommended bundle(s) by removing components, adding DUPs, or modifying the titles of bundle(s). To customize bundle(s): 1. In the Dell Repository Manager screen, click My Repositories tab, select the repository from which you want to delete the component, and click Open. 2. In the Bundles tab, select the bundle(s) you want to customize. 3. Click the Component tab. 4.
• Move Up — Select the component that you want to deploy first and click Move Up to bring that component at the top. • Move Down — Select the component that you want to deploy later and click Move Down to bring that component down to that list. • Default Order — Default Order is the order of the component added to the bundle or its order when it was imported from a catalog file.
* PowerVault – Network * Supported Platforms Force 10 Filters components based on the selected platform. The available options are: • • All Selected For example, if you select PowerEdge R720, Dell Repository Manager displays the components applicable to the Dell PowerEdge R720 system. NOTE: When you select a platform, Dell Repository Manager displays all the applicable updates relevant to that platform. However, not all these updates may be available at www.dell.com/support.
• Select the mapped network as the destination location. 1. In the Dell Repository Manager window, click My Repositories tab, select the required repository, and click Open. 2. Click the Bundles tab. 3. Select the bundle(s) you want to export from the list of displayed bundle(s), and click Export. The Select Destination window is displayed. 4. On the Select Destination window, select the destination from the following options, and click Next.
NOTE: Bundle(s) containing Linux components are skipped during the export process. Only bundle(s) containing INF/SYS files are exported. For every exported bundle(s), a folder is created with the name of the bundle(s). To install the updates for the required drivers, navigate to the required bundle folder and run the DellDrvrInstall.bat file. • Export to light weight deployment scripts — Exports the bundle(s) in the form of deployment scripts. Select a location to save these bundle(s).
3. Select the bundle(s) you want to export from the list of displayed bundle(s), and click Export. The Select Destination window is displayed. 4. In the Select Destination page, select Export to light weight deployment scripts, click Next to continue. The Select Deployment Options window is displayed. 5. In the Select Deployment Options window, select one or both options: • Force scripts to upgrade regardless of version or date. • Combine selected bundles into one folder.
• Replace default script — To execute the customized script instead of the Dell default script. Click Browse to navigate to the folder where the customized script is located. • Append to default script — To execute the customized script after the Dell default script is executed. NOTE: Ensure that the customized script is of .sh format. NOTE: Ensure that the script is edited and saved in UNIX format. Scripts with Windows endline characters are unusable. NOTE: This step applies if you select Yes in Step 8.
The version number of the plug-in found is also displayed. • • The Select Plugins shows the following details: Plug-in type Installed Version Generate 32– Bit SUU* Status SUU version Generate 64– Bit SUU** Status SUU version When ftp.dell.com is accessible and the latest plug-in does not exist on the system, DRM will download the required plug-ins in the run time. NOTE: * — Only 32–bit Windows bundles or any Linux bundles can be included in 32–bit plug-in.
DUP Dependency DRM 1.9 onwards, DRM supports for DUP Dependency. This feature displays the relationship among different DUPs. Dependency exists when a DUP depends on another DUP for execution. This feature helps to determine the order in which the DUPs have to be installed. There are two types of dependencies: Hard Dependency and Soft Dependency. In case, the component has dependency(s), there is one > symbol displayed against that DUP. To view the dependent component(s), you need to expand the control.
The Select DUP File to Add window is displayed. 8. In the Select DUP File to Add window, select the components that you want to add, and then click Open. You can browse through and search through for the components from all the repositories available on the system. NOTE: Select the component(s) you want to remove from the existing list, and then click Remove. 9. Under Import Options, select the component(s) you want to add. 10. Select any of the following options.
NOTE: Select the component(s) you want to remove from the existing list, and then click Remove. 6. Select any of the following options. • Add to repository only • Add to repository and all the following bundles: If you are not selecting any bundle, all the bundles will be displayed under the list. You can select the desired bundles from the list. 7. Click OK or click Cancel to exit without making any changes. A Security Warning appears do you want to accept this file? if the certificate has issued.
NOTE: You can only choose Select specific Operating Systems if you have selected Windows. This function is disabled if you selected Linux or OS Independent in Step 4. NOTE: The options listed above are available only when the selected OS Type in the previous window is Windows or Linux. The Select Model(s) window is displayed. 8. Select one of the following and click Next . • No platform is specified — This option is selected by default.
Copying Components To copy to components: 1. In the Dell Repository Manager window, click My Repositories tab select the desired repository, and then click Open. 2. On the Components tab, select the component(s) to copy. 3. Click Copy To. The Copy Component(s) window is displayed. 4. Click Next. The Select Destination window is displayed. 5.
c. Click Finish. The Bundle Disclaimer window appears. Here, you have the option to test the bundle before you deploy it to the real environment. Click Ok to proceed or click Cancel to exit without modifying any bundle. The Copy Components window is displayed with the details in the Selected Components: and Destination Components: fields. NOTE: If any error or warnings are found in the export, a message is displayed on Copy Components window. Click the Errors/Warnings button to view the details. d.
3. On the Components screen, select the component(s) you want to delete, and click Delete. The Delete Component(s) window is displayed. 4. 5. In the Delete Component(s) window, select one of the following: • Delete from all Bundles — Deletes the component from all the bundles. • Delete from Repository — Deletes the component from the corresponding repository. • Cancel — Exits the Delete Component(s) window.
For example, if you select PowerEdge T710, Dell Repository Manager displays the components applicable to the Dell PowerEdge T710 system. NOTE: When you select a platform, Repository Manager displays all the applicable updates relevant to that platform. However, not all these updates may be available at www.dell.com/support. Component Version Filters components based on the version of the component.
• Driver Packs Contains Filters components based on the Driver Packs. The available options are: • • PE Maintenance USC Working With Filters The Dell Repository Manager has an extensive search mechanism that allows you to query repositories, create filters, save, and load filters. Using the filtering capabilities of the Dell Repository Manager, you can view specific bundle(s) and Dell Update Packages (DUPs) from any selected repository.
The Save Filter window is displayed. 4. Type a Name: and Description: for your filter. 5. Click Save or click Cancel to exit without making any changes. You can access the saved search/filter from the drop-down list located above the Keyword Search field. The following message displays: Search Filter Saved... 6. Click OK to close the pop-up window. Managing Filters The drop-down box on the left side of the Dell Repository Manager displays the filters that you created and saved.
Removing Jobs In The Jobs Queue Select the job from the Jobs Queue, and click Remove to delete that particular job. NOTE: You must first Stop a job and then it can be Removed from the queue. This only applies if that particular job is running at the time. If the job is in the queue, it can be removed without stopping it first. You can select multiple jobs together and remove them from the Jobs Queue.
NOTE: To remove a model from the selected items, select the model from the Selected: box and click Remove. Repeat the step, if you want to remove more models from the selected items. 4. Under Search Options (File Format):, select one of the following options: • Dell Update Packages — This is the default option. You can import all the DUPs to the local repository when you use the default option. • 5.
• Create new bundle — Creates a new bundle for different platforms and operating systems with generic names. 10. The Support Files download Queued window is displayed. A Support file export job has been submitted to the Jobs Queue. 11. Click OK to close the window. Filter Options For Search Results You can use the following filters in the Dell Repository Manager: Keyword Search • Allows you to filter the search based on the keywords that you are providing.
Availability • Filters based on the availability of the update file. You can select from the following options: – All available files — Lists all the possible files from the catalog file. – New files not in Dell FTP Catalog — Lists the files that are posted later than the FTP catalog date. – All files not in Dell FTP catalog — Lists the files that are already part of the Dell FTP catalog. Dates • Filters updates based on the selected time period.
Repeat step 3 to add more models to the selected items list. The model(s) selected are displayed on the right. NOTE: The Service Tag option allows you to search a device based on the Service Tag provided. NOTE: To remove a model from the selected items, select the model from the Selected: box and click Remove. Repeat the step, if you want to remove more models from the selected items. 5.
• Security Options — You can set the type of security. NOTE: The Save button becomes active after all of the options have been selected. 9. Click Email tab The Email Configuration window displays the details of Default Email Address: Email Type: and the relevant Server: information. Refer Configuring Email Settings to know more about, how you can configure and test emails using DRM. 10. You can use the Notify Additional Email Accounts option to Add>> or Remove<< more recipients.
NOTE: Auto Discover takes 5 - 10 minutes to detect the URL. It is recommended to manually type the URL in the MS Exchange URL. 8. Select the correct MS Exchange Version from the drop down list. The supported versions are: Exchange2007_SP1, Exchange2010, Exchange2010_SP1, Exchange2010_SP2 and Exchange2013. NOTE: Contact your system administrator, in case you are not sure about the MS Exchange Version. 9. After the configuring, click Send Test Email to verify the mail setup.
NOTE: The transmitted attachment is a zip file. Due to security reasons, .zip extension is removed during transmission. After saving the attachment, rename the file with .zip extension to retrieve the data.