User’s Guide Dell S2319H/S2319HN/S2319NX Model No.
Notes, Cautions, and Warnings NOTE: A NOTE indicates important information that helps you make better use of your computer. CAUTION: A CAUTION indicates potential damage to hardware or loss of data if instructions are not followed. WARNING: A WARNING indicates a potential for property damage, personal injury or death. _________________________ Information in this document is subject to change without notice. © 2018–2019 Dell Inc. All rights reserved.
Contents About Your Monitor................................................................. 5 Package Contents....................................................................................... 5 Product Features.........................................................................................6 Identifying Parts and Controls.................................................................. 7 Plug and Play Capability...........................................................................
Setting the Maximum Resolution.......................................................... 30 Using the Tilt.............................................................................................. 31 Troubleshooting.....................................................................32 Self-Test......................................................................................................32 Built-in diagnostics...................................................................................
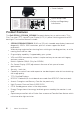
About Your Monitor Package Contents Your monitor ships with the components shown below. Ensure that you have received all the components and Contact Dell if something is missing. NOTE: Some items may be optional and may not ship with your monitor. Some features or media may not be available in certain countries. NOTE: To set up with any other stand, please refer to the respective stand setup guide for setup instructions.
∞∞ Power Adapter Dell S2319H/S2319HN/S2319NX 1 3 2 4 5 HDMI HDMI HDMI 2 HDMI i 6 1 ∞∞ Quick Setup Guide ∞∞ Safety and Regulatory Information i Dell.com/S2319H Dell.com/S2319HN Dell.com/S2319NX © 2018 Dell Inc. or its subsidiaries. 2018-03 Q41G78S170073A (DELL P/N:K88MH rev.A00) Product Features The Dell S2319H_S2319HN_S2319NX flat panel display has an active matrix, ThinFilm Transistor (TFT), Liquid Crystal Display (LCD), In-plane Switching panel and LED backlight.
Identifying Parts and Controls Front View 1 2 Front panel controls Label Description 1 Function buttons (For more information, see Operating your Monitor) 2 Power On/Off button (with LED indicator) NOTE: For displays with glossy bezels the user should consider the placement of the display as the bezel may cause disturbing reflections from surrounding light and bright surfaces.
Back View 4 SVC Tag: 1234567 Express Service Code: 123 456 789 0 S2319H S2319H 51817 (For Korea only) (For Korea only) 1 Date of Mfg/⭕ӝᰛᵕ ⭕⭘ᰛᵕ: Nov. 2017 2 S2319Hc S/N: CN-12MWYTV100-7B1-001L -A00 UA.TR.001 S2318Hc S2319H SVC Tag: 1234567 Express Service Code: 123 456 789 0 S2319H S2319Hc S/N: CN-12MWYTV100-7B1-001L -A00 51817 UA.TR.001 S2318Hc (For Korea only) (For Korea only) Consumo de energía en operación: 23 Wh Consumo de energía en modo de espera: 0.
Bottom View S2319H 1 2 3 4 5 6 2 3 4 5 6 7 S2319HN/S2319NX Bottom view without monitor stand Label 1/7 Description Use Speaker Build-in Speaker(3W)x2 2 Power-adapter port To connect the monitor power cable using a 12V DC adapter for transition. 3 Audio Line Out port Connect to external speakers (Optional Purchase)* 4 Audio Line In port Connects the audio cable (Optional Purchase) from the source device to the monitor.
Plug and Play Capability You can install the monitor in any Plug and Play-compatible system. The monitor automatically provides the computer system with its Extended Display Identification Data (EDID) using Display Data Channel (DDC) protocols so the system can configure itself and optimize the monitor settings. Most monitor installations are automatic, you can select different settings if desired. For more information about changing the monitor settings, see Operating Your Monitor.
Setting Up the Monitor Connecting the Stand NOTE: The stand is detached when the monitor is shipped from the factory. NOTE: The following steps is applicable for a monitor with a stand. To attach the monitor stand: 1. Place the monitor on a soft cloth or cushion. 2. Fit the stand riser and stand base together, and then turn the screw in the stand base. 3. Fit the two tabs on the upper part of the stand to the groove on the back of the monitor. Press the stand until it snaps into place.
4. Inserting the stand until the snap locked. Connecting Your Monitor WARNING: Before you begin any of the procedures in this section, follow the Safety Instructions. NOTE: Do not connect all cables to the computer at the same time. To connect your monitor to the computer: 1. Turn Off your computer and disconnect the power cable. 2. Connect the VGA/HDMI/audio cable from your monitor to the computer.
Connecting the HDMI cable Connecting the audio cable(Optional Purchase) Organizing Cables After you connect all necessary cables to your monitor and computer, organize all cables as shown above. NOTE: After the cables are connected, they will have to be disconnected again to route them through the hole.
Removing the Monitor Stand NOTE: To prevent scratches on the LCD screen while removing the stand, ensure that the monitor is placed on a soft and clean surface. NOTE: The following steps is applicable for a monitor with a stand. To remove the stand: 1. Place the monitor on a soft cloth or cushion. 2. Tilt the stand downwards to access to the release button. 3. Use a long and thin screwdriver to push the release button.
4. While pressing on the release button, pull the stand out.
Operating Your Monitor Power On the Monitor Press the button to turn On the monitor. Using the Front Panel Controls Use the control buttons on the front of the monitor to adjust the image being displayed. 1 2 3 4 1 2 3 4 5 The following table describes the front panel buttons: Front Panel Button 1 Description Use this button to choose from a list of preset modes.
2 Use the buttons to adjust the volume. Minimum is ‘0’ (-). Maximum is ‘100’ (+). Shortcut key/Volume 3 Menu 4 Use the MENU button to launch the On-Screen Display (OSD) and select the OSD Menu. See Accessing the OSD menu. Use this button to go back to the main menu or exit the OSD main menu. Exit 5 Use the Power button to turn the monitor On and Off. Power On/Off button (with Solid white light indicates the monitor is On and LED indicator) fully functional.
OSD controls Use the buttons on the front of the monitor to adjust the image settings. 1 2 34 Front Panel Button Description Use the Up button to increase values or move up. 1 Up Use the Down button to adjust (decrease ranges) items in the OSD menu. 2 Down Use the OK button to confirm your selection. 3 OK Use the Back button to go back to the previous menu.
Using the On-Screen Display (OSD) Menu Accessing the OSD menu NOTE: If you change the settings and then either proceed to another menu or exit the OSD menu, the monitor automatically saves those changes. The changes are also saved if you change the settings and then wait for the OSD menu to disappear. 1. Press the button to display the OSD main menu. Main Menu for analog (VGA) input Dell 23 Monitor Brightness / Contrast Auto Adjust 75% Input Source 75% Color Display Audio Menu Personalize Others 2.
Icon Menu and Submenus Description Brightness/ Contrast Use this menu to activate Brightness/Contrast adjustment. Dell 23 Monitor Brightness / Contrast Auto Adjust 75% Input Source 75% Color Display Audio Menu Personalize Others Brightness Brightness adjusts the luminance of the backlight. Press the the 100). button to increase the brightness and press button to decrease the brightness (min. 0 / max. NOTE: Manual adjustment of Brightness is disabled when Dynamic Contrast is switched on.
Auto Adjust Use this key to activate automatic setup and adjust menu. Dell 23 Monitor Brightness / Contrast Auto Adjust Press to adjust the screen automatically. Input Source Color Display Audio Menu Personalize Others The following dialog appears on a black screen as the monitor self-adjusts to the current input: Auto Adjustment in Progress... Auto Adjustment allows the monitor to self-adjust to the incoming video signal.
Input Source Use the Input Source menu to select between the different video signals that may be connected to your monitor. Dell 23 Monitor Brightness / Contrast VGA Auto Adjust HDMI Input Source Auto Select Color Reset Input Source On Display Audio Menu Personalize Others Auto Select VGA HDMI Select Auto Select to scan for available input signals. Select VGA input when you are using the analog (VGA) connector. Push to select the VGA input source.
Preset Modes When you select Preset Modes, you can choose Standard, ComfortView, Multimedia, Movie, Game, Warm, Cool or Custom Color from the list. ∞∞ Standard: Loads the monitor's default color settings. This is the default preset mode. ∞∞ ComfortView: Decreases the level of blue light emitted from the screen to make viewing more comfortable for your eyes. ∞∞ Movie: Loads color settings ideal for movies. ∞∞ Game: Loads color settings ideal for most gaming applications.
Display Use the Display to adjust image. Dell 23 Monitor Aspect Ratio Horizontal Position Brightness / Contrast Aspect Ratio Auto Adjust Horizontal Positon Input Source Vertical Position Color Sharpness Display Pixel Clock Audio Phase Menu Dynamic Contrast Personalize Response Time Others Reset Display Wide 16:9 50 Normal Adjusts the image ratio to Wide 16:9, 4:3 or 5:4. Use or the buttons to adjust image left and right. Minimum is '0' (-). Maximum is '100' (+).
Audio Dell 23 Monitor Brightness / Contrast Volume 50 Auto Adjust Audio source 50 Input Source Speaker Enable Color Reset Audio Display Audio Menu Personalize Others Volume (Only S2319H) Use the buttons to adjust the volume. Minimum is ‘0’ (-). Maximum is ‘100’ (+). Audio Source Allows you to set the Audio Source mode to: ∞∞ PC Audio ∞∞ HDMI Speaker Allows you to enable or disable speaker function. (Only S2319H) Reset Audio Menu Select this option to restore default display settings.
Personalize Users can choose a feature from Shortcut Key 1, Shortcut Key 2, Power Button LED or Reset Personalization, Preset Modes or Brightness/Contrast and set it as a shortcut key.
DDC/CI DDC/CI (Display Data Channel/Command Interface) allows your monitor parameters (brightness, color balance and etc.) to be adjustable via the software on your computer. You can disable this feature by selecting Disable. Enable this feature for best user experience and optimum performance of your monitor.
OSD Warning Messages When the Dynamic Contrast feature is enabled (in these preset modes: Game or Movie), the manual brightness adjustment is disabled. Dell 23 Monitor To allow manual adjustment of brightness, the Dynamic Contrast will be switched off. Do you want to continue? Yes No S2319H When the monitor does not support a particular resolution mode, the following message is displayed: Dell 23 Monitor The current input timing is not supported by the monitor display.
Dell 23 Monitor ? No VGA signal from your device. Press any key on the keyboard or move the mouse to wake it up. If there is no display, press the monitor button again to select the correct input source. S2319H If VGA or HDMI cable is not connected, a floating dialog box as shown below appears. The monitor will enter Power Save Mode after 4 minutes if left at this state. Dell 23 Monitor ? No VGA Cable The display will go into Power Save Mode in 4 minutes. www.dell.
Setting the Maximum Resolution To set the maximum resolution for the monitor: In Windows 7, Windows 8, Windows 8.1 and Windows 10: 1. For Windows 8 and Windows 8.1, select the Desktop tile to switch to classic desktop. 2. Right-click on the desktop and click Screen Resolution. 3. Click the Dropdown list of the Screen Resolution and select 1920 x 1080. 4. Click OK. If you do not see 1920 x 1080 as an option, you may need to update your graphics driver.
Using the Tilt NOTE: This is applicable for a monitor with a stand. When any other stand is bought, please refer to the respective stand setup guide for set up instructions. Rotating the Monitor Before you rotate the monitor, your monitor should be fully vertically extended and fully tilted up to avoid hitting the bottom edge of the monitor. NOTE: The stand is detached when the monitor is shipped from the factory.
Troubleshooting WARNING: Before you begin any of the procedures in this section, follow the Safety Instructions. Self-Test Your monitor provides a self-test feature that allows you to check if your monitor is functioning properly. If your monitor and computer are properly connected but the monitor screen remains dark, run the monitor self-test by performing the following steps: 1. Turn off both your computer and the monitor. 2. Disconnect the video cable from the back of the computer.
NOTE: You can run the built-in diagnostics only when the video cable is unplugged and the monitor is in self-test mode. 1 2 3 4 5 To run the built-in diagnostics: 1. Ensure that the screen is clean (no dust particles on the surface of the screen). 2. Unplug the video cable(s) from the back of the computer or monitor. The monitor then goes into the self-test mode. 3. Press and hold Button 1 for 5 seconds. A gray screen appears. 4. Carefully inspect the screen for abnormalities. 5.
Common Problems The following table contains general information about common monitor problems you might encounter and the possible solutions: Common Symptoms What You Experience Possible Solutions No Video/Power LED off No picture ∞∞ Ensure that the video cable connecting the monitor and the computer is properly connected and secure. ∞∞ Verify that the power outlet is functioning properly using any other electrical equipment.
No sound or sound is low Monitor has no ∞∞ Make sure the audio cable is properly connected to the sound or sound monitor. is low ∞∞ Adjust the volume settings of both your monitor and computer. ∞∞ Make sure the computer sound card driver is properly installed and activated. ∞∞ Make sure the audio source is correct on the OSD. Horizontal/ Vertical Lines Screen has one or more lines ∞∞ Reset the monitor to Factory Settings(Factory Reset).
Video Ghosting or Overshooting Moving image ∞∞ Change the Response Time in the Display OSD to Fast appears to have or Normal depending on your application and usage. trailing shadow or bright edge.
Product-Specific Problems Specific Symptoms What You Experience Possible Solutions Screen image is too small Image is centered ∞∞ Check the Aspect Ratio setting in the Display on screen, but settings OSD. does not fill entire ∞∞ Reset the monitor to Factory Settings (Factory viewing area Reset) . Cannot adjust the monitor with the buttons on the side panel OSD does not appear on the screen ∞∞ Turn Off the monitor, unplug the power cord, plug it back, and then turn On the monitor.
Appendix WARNING: Safety Instructions WARNING: Use of controls, adjustments, or procedures other than those specified in this documentation may result in exposure to shock, electrical hazards, and/or mechanical hazards. WARNING: For displays with glossy bezels the user should consider the placement of the display as the bezel may cause disturbing reflections from surrounding light and bright surfaces. For information on safety instructions, see the Product Information Guide. FCC Notices (U.S.
Setting Up Your Monitor Setting the display resolution For maximum display performance with Microsoft Windows operating systems, set the display resolution to 1920 x 1080 pixels by performing the following steps: In Windows 7, Windows 8, Windows 8.1 and Windows 10: 1. For Windows 8 and Windows 8.1, select the Desktop tile to switch to classic desktop. 2. Right-click on the desktop and click Screen Resolution. 3. Click the Dropdown list of the Screen Resolution and select 1920 x 1080. 4. Click OK.
7. After installing the drivers for your graphics adapter, attempt to set the resolution to 1920 x 1080 again. NOTE: If you are unable to set the recommended resolution, contact the manufacturer of your computer or consider purchasing a graphics adapter that will support the video resolution.
Monitor Specifications Flat Panel Specifications Model S2319H/S2319HN/S2319NX Screen type Active matrix - TFT LCD Panel type In-plane Switching Viewable image Diagonal 58.42 cm (23 in) Horizontal, Active Area 509.18 mm (20.05 in) Vertical, Active Area 286.41 mm (11.28 in) Area 1458.34 cm2 (226.04 inch2) Pixel pitch 0.
Preset Display Modes Display Mode Horizontal Frequency (kHz) Vertical Frequency (Hz) Pixel Clock (MHz) Sync Polarity (Horizontal / Vertical) VESA, 720 x 400 31.5 70.1 28.3 -/+ VESA, 640 x 480 31.5 60.0 25.2 -/- VESA, 640 x 480 37.5 75.0 31.5 -/- VESA, 800 x 600 37.9 60.3 40.0 +/+ VESA, 800 x 600 46.9 75.0 49.5 +/+ VESA, 1024 x 768 48.4 60.0 65.0 -/- VESA, 1024 x 768 60.0 75.0 78.8 +/+ VESA, 1152 x 864 67.5 75.0 108.0 +/+ VESA, 1280 x 1024 64.0 60.0 108.
Physical Characteristics Model S2319H S2319HN/S2319NX Signal cable type ∞∞ Digital: detachable, HDMI, 19 pins. ∞∞ Digital: detachable, HDMI, 19 pins. ∞∞ Analog: detachable, D-Sub, 15 pins ∞∞ Analog: detachable, D-Sub, 15 pins Front frame gloss (minimum) Black frame - 85 gloss unit Black frame - 85 gloss unit Dimensions (with stand) Height 404.0 mm (15.91 in) 404.0 mm (15.91 in) Width 522.2 mm (20.56 in) 522.2 mm (20.56 in) Depth 152.8 mm (6.01in) 152.8 mm (6.01in) Height 312.3 mm (12.
Environmental Characteristics Model S2319H/S2319HN/S2319NX Temperature Operating 0°C to 40°C (32°F to 104°F) Non-operating Storage ∞∞ -20°C to 60°C (-4°F to 140°F) ∞∞ -20°C to 60°C (-4°F to 140°F) Shipping Humidity Operating 10% to 80% (non-condensing) Non-operating ∞∞ Storage: 5% to 90% (non-condensing) ∞∞ Shipping: 5% to 90% (non-condensing) Altitude Operating (maximum) 5,000 m (16,400 ft) Non-operating (maximum) 12,192 m (40,000 ft) Thermal dissipation ∞∞ 116.01 BTU/hour (maximum) ∞∞ 78.
Power Consumption Pon 16 W Total Energy Consumption (TEC) 50.81 kWh NOTE: Pon: Power consumption of on mode measured with reference to Energy Star test method. TEC: Total energy consumption in kWh measured with reference to Energy Star test method. ** Maximum power consumption with max luminance. This document is informational only and reflects laboratory performance.
Pin Assignments VGA Connector Pin Number 1 2 3 4 5 6 7 8 9 10 11 12 13 14 15 15-pin Side of the Connected Signal Cable Video-Red Video-Green Video-Blue GND Self-test GND-R GND-G GND-B Computer 5V/3.
HDMI Connector Pin Number 1 2 3 4 5 19-pin Side of the Connected Signal Cable T.M.D.S. Data 2T.M.D.S. Data 2 Shield T.M.D.S. Data 2+ T.M.D.S. Data 1+ T.M.D.S. Data 1 Shield 6 7 8 9 10 11 12 13 14 15 16 17 18 19 T.M.D.S. Data 1 T.M.D.S. Data 0+ T.M.D.S. Data 0 Shield T.M.D.S. Data 0T.M.D.S. Clock + T.M.D.S. Clock Shield T.M.D.S. Clock CEC Reserved (N.C.