Dell Smart Plug-in Version 3.0 For HP Operations Manager 9.
Notes, Cautions, and Warnings NOTE: A NOTE indicates important information that helps you make better use of your computer. CAUTION: A CAUTION indicates either potential damage to hardware or loss of data and tells you how to avoid the problem. WARNING: A WARNING indicates a potential for property damage, personal injury, or death. © 2012 Dell Inc.
Contents Notes, Cautions, and Warnings...................................................................................................2 Overview..........................................................................................................................................4 Prerequisites...................................................................................................................................5 Software Requirements For Management Server....................................
Overview This guide provides information on software prerequisites and requirements to install and uninstall Dell Smart Plug-in (SPI) Version 3.0 for Hewlett Packard Operations Manager (HPOM) 9.0 for Microsoft Windows. NOTE: This plug-in is applicable for 64–bit systems. The Dell SPI installer (Dell Smart Plug-in v3.0_x64.msi), Installation Guide and the Readme file are packaged in the selfextracting executable Dell Smart Plug-in v3.0_Axx.exe file. You can download the executable from support.dell.com.
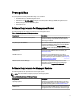
Prerequisites The prerequisites for installing the Dell Smart Plug-in are as follows: • Install Dell SPI only on HPOM management server • Administrator and HP_OVE_ADMIN privileges on the HP Operations Manager (HPOM) management server • WinRM privileges to monitor Dell ESXi systems • .Net Framework 3.5 Software Requirements For Management Server The following table lists the software requirements on the management server. Table 1.
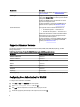
Requirement Description node. For more information, see Related Documents and What To Do Next? SNMP agent Configure the SNMP agent to change the community name, enable Get operations, and send traps to the HPOM management server. Configure the SNMP service trap destination to receive traps on the management server. For more information on configuring the SNMP agent on Windows and Linux systems, see Related Documents.
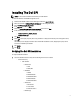
Installing The Dell SPI NOTE: You must close the HPOM console before you install Dell SPI. To install the Dell SPI on the HPOM management server: 1. Download the Dell SPI installer from the Dell support website at support.dell.com . 2. Extract the contents of Dell Smart Plug-in v3.0_Axx.exe on the management server. 3. Run the Dell Smart Plug-in v3.0_x64.msi. 4. In the Welcome screen, click Next. 5. Select the I accept the terms in the license agreement option and click Next. 6.
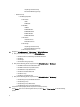
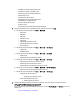
1. EqualLogic PS-Series Arrays 2. PowerVault MD Storage Arrays – Nodes Hierarchy * Dell Managed Systems a. Dell Chassis 1. CMC 2. DRAC/ MC b. Dell DRAC 1. DRAC5 2. iDRAC6 Modular 3. iDRAC6 Monolithic 4. iDRAC7 Modular 5. iDRAC7 Monolithic c. Dell Servers 1. Modular Servers 2. Monolithic Servers d. Dell Storage 1. EqualLogic PS-Series Arrays 2. PowerVault MD Storage Arrays 2. e. Dell Unresponsive Devices Navigate to Policy Management → Policy Groups → SPI for Dell Devices.
4. – Dell DRAC and Chassis Scheduled Status Poll – Dell DRAC and Chassis Traps (Manual Ack) – Dell EqualLogic Arrays Scheduled Status Poll – Dell EqualLogic Traps – Dell Hardware Autogroup Policy – Dell MD Storage Arrays Scheduled Status Poll – Dell OOB Server Traps (Manual Ack) – Dell Server Scheduled Status Poll – Dell Server Traps – Dell Connections License Manager Scheduled Status Poll Verify that the following tools are displayed under their respective folders under Tools.
– Using The Repair Option In The Installer – Removing Dell SPI Using The Installer
What To Do Next? After you complete installing the Dell SPI, configure the SNMP parameters for Dell Windows, Linux Servers, Dell DRAC, Dell Chassis, EQL devices, DCLM parameters for OOB server monitoring, and WSMAN parameters for ESXi systems to ensure that communication between the management server and the Dell systems is established correctly. To configure the communication parameters, run the DellSPICongfigUtility.exe that is part of the Dell SPI installer.
Option Description individual parameters except wsmanusername, wsmanpassword,dclmusernameand dclmpassword and displays them on the screen. -resetdefaults Resets all the configurable values to the default values. NOTE: This option does not reset the values for thewsmanusername,wsmanpassword,dclmusernameand dclmpassword options. -help Displays the help for using this tool. -wsmanusername Specifies user name of a local or a domain account on the ESXi system.
When you specify the value for wsmanpassword , type the following command: DellSPIConfigUtility.exe -wsmanpassword and press Enter. You do not need to specify = after wsmanpassword. When you specify the password for the first time, you need to enter the password twice. When you modify the password, the utility prompts you to enter the old password and then the new password twice. NOTE: The utility prompts you to change the password even when you change the username.
Configuring Modular Disk (MD) Storage Manager Console 1. Install the Modular Disk (MD) Storage Manager Client on the management server. 2. Select Tools → Dell Tools → Dell Storage → Dell PowerVault MD Storage Arrays. 3. On the right pane, select MD Storage Manager Console and right-click, and then click Properties from the pop-up menu. The MD Storage Manager Console Properties window is displayed. 4. In the MD Storage Manager Console Properties window, click the Details tab. 5.
3. On the right pane, select OpenManage Essentials Console and right-click, and then click Properties from the popup menu. The OpenManage Essentials Console Properties window is displayed. 4. In the OpenManage Essentials Console Properties window, click the Details tab. 5. In the Command Type: (Required) drop-down list, select URL. 6. In the Command: (Required) box, enter the URL path of the OME Console. The default URL path is https://localhost:2607/Web/Default.
Creating Connections License Manager Domain Groups The following groups are created in the Windows Server Active Directory during installation of Dell Connections License Manager: • Dell Connections License Administrators • Dell Connections License Operators • Dell Connections License Users If the above domain groups are not automatically created during installation, then manually create the above groups.
Removing Dell Devices To remove a Dell device from the HPOM console: 1. Remove a Dell device from the HPOM console. To remove a Dell device from the HPOM console, see the section Delete, copy, and move managed nodes under Maintaining nodes in the HP Operations Manager online help. 2. If you are deleting an iDRAC7 device, perform the following steps: a. Launch the command prompt on the management server. b. Navigate to DellSPIConfigUtility.exe .
Using The Modify Option In The Installer The Modify option in the Dell SPI installer, modifies the program features that are installed. This option retains the schedules you have set for the various policies. To modify the program features: 1. Disable all the Dell SPI policies that are running on the management server in the HP Operations Manager (HPOM) console. 2. Run the Dell Smart Plug-In v3.0_x64.msi from the extracted folder. The Welcome screen is displayed. 3. Click Next.
Using The Repair Option In The Installer If you accidentally delete any of the policies from the SPI for Dell Devices policy group, or from the Policy Inventory of the management server, use the Repair option in the Dell SPI installer to re-install the policies. The Repair option installs the missing Dell SPI policies, and automatically deploys all the policies on the management server.
Upgrading From Dell SPI Version 2.0 And 2.1 If you have Dell SPI version 2.0 or 2.1 installed on the management server, you can upgrade the same to version 3.0. When you upgrade from version 2.0 or 2.1, the existing policies upgrade to the version 3.0 and the existing Dell groups from nodes and services are removed and recreated automatically. NOTE: The Upgrade process does not preserve the schedule settings for the policy files. The schedules are reset to the default settings. Upgrading Dell SPI 1.
Uninstalling The Dell SPI You can uninstall the Dell SPI from the Windows Control Panel or use the Remove option in the Dell SPI installer. Uninstall removes Dell SPI components such as files, registry, and scripts from the installed system. Before you uninstall Dell SPI, ensure the following: • Dell policies are not running on the management server. • All the Dell SPI policies are either removed or undeployed from the HPOM management server node on the HPOM console.
1. Launch the HPOM console and ensure that the SPI for Dell Devices policy group under Policy Management → Policy Group is removed. 2. Click Nodes and ensure that the Dell Managed Systems Group is removed. 3. Click Service → System Infrastructure and ensure that the Dell Hardware service, Dell SPI Licensing service and the services tree for all Dell devices is removed. 4. Click Tools and ensure that the Dell Tools folder is removed. 5.
Related Documents In addition to this guide, you can access the following guides available on the Dell support website at support.dell.com/ manuals. On the Manuals page, click Software → Systems Management. Click the appropriate product link on the rightside to access the documents. For example to view Dell SPI documentation on the Systems Management page, from the list of product, select Dell OpenManage Connections → Dell Smart Plug-in for HP Operations Manager Version 9.