
Setup Guide


e Remove the four handles from the sides of the expansion enclosure chassis.
f Slide the expansion enclosure chassis into the rack.
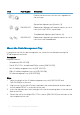
Figure 8. Mount the Expansion Enclosure into the Rack
8 If the drives, fans, PSUs, and EMMs were removed from the expansion enclosure
chassis, reinstall these components in the chassis.
9 Secure the expansion enclosure chassis and top cover.
a Install the six clip nuts (106-569-307) into the rack holes that align with the
shoulder screws on the front of the expansion enclosure chassis.
b Use the orange enclosure latch handles to push the expansion enclosure chassis
completely into the rack.
Make sure that the self-locking latches are pushed in and fully engaged to
prevent the expansion enclosure chassis from sliding out of the rack.
c Secure the expansion enclosure chassis to the rack using the orange shoulder
screws.
d If the top cover is secured by two small shipping screws, remove the screws.
e Secure the top cover of the expansion enclosure chassis to the rack using the
shoulder screws.
Setting Up the Expansion Enclosure
15