
Administrator Guide

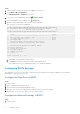
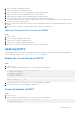
Table Of Contents
- About This Guide
- Dell Storage Integration Tools for VMware Version 6.0 Administrator's Guide
- Installing DSITV
- Replay Manager Service for VMware
- Dell Storage vSphere Client Plugin
- DSITV Application Troubleshooting

Setting Up DSITV
After deploying DSITV, configure the time on the DSITV virtual appliance and then log on to the virtual appliance to configure
the time zone and network settings.
Configuring the Time on the DSITV Virtual Appliance
Make sure the time on the ESXi host is correct and then configure the DSITV virtual appliance to synchronize its time with the
ESXi host.
Steps
1. Start the vSphere Client and connect to the VMware vCenter Server.
2. Select Menu > Hosts and Clusters.
The Hosts and Clusters view opens.
3. Select the ESXi host in the left navigation pane and click the Configure tab.
4. Click Edit.
The Edit Time Configuration page opens.
5. If the time or date is incorrect
a. Select whether to manually set the time or to use NTP.
b. For manual configuration, enter current date and time.
c. For NTP configuration, enter the server or servers to use, select Start NTP Service and choose the NTP Service
Startup Policy.
6. Click OK.
7. Select Menu > VMs and Templates.
The Virtual Machines & Templates view opens.
8. Select the DSITV virtual appliance and click
(Edit Settings).
The Edit Settings dialog box opens.
9. Click the VM Options tab and expand the VMware Tools option.
10. Make sure the Synchronize guest time with host check box is selected.
11. Click OK.
Logging In to DSITV
Use the vSphere Client to log in to DSITV.
Installing DSITV
7