
Administrator Guide


5 Click Leave . The Leave Active Directory Domain dialog box opens.
6 Click OK.
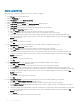
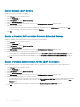
View Open Files
You can view up to 1,000 open les.
1 In the Storage view, select a FluidFS cluster.
2 Click the File System tab.
3 In the File System view, select Client Activity.
4 Click Open Files. The Open Files dialog box opens.
The bottom portion of the dialog box displays a list of the currently open les.
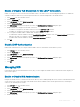
Filter Open Files
You can lter open les by le name, user, protocol, or maximum number of open les to display.
1 In the Storage view, select a FluidFS cluster.
2 Click the File System tab.
3 In the File System view, select Client Activity.
4 Click Open Files. The Open Files dialog box opens.
5 In the top portion of the dialog box, ll in one or more of the elds (File name, User, Protocol, Number of Files to Display).
6 Click Apply Filter/Refresh.
The dialog box displays a list of the currently open les that match the lters.
Managing LDAP
In environments that use Lightweight Directory Access Protocol (LDAP), you can congure the FluidFS cluster to authenticate UNIX and
Linux clients using LDAP for access to NFS exports. The LDAP database can be provided by either an LDAP server or Active Directory.
The FluidFS clusters supports the following LDAP congurations:
• Anonymous LDAP – The connection from the FluidFS cluster to the LDAP servers is not authenticated. The data is sent in plain text.
• Authenticated LDAP – The connection from the FluidFS cluster to the LDAP servers is authenticated using a user name and
password. The data is sent in plain text.
• LDAP over TLS/SSL – The connection from the FluidFS cluster to the LDAP servers is authenticated and encrypted. To validate the
certicate used by the LDAP server, you must export the SSL certicate from the LDAP server and upload it to the FluidFS cluster.
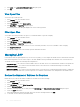
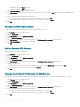
Reduce the Number of Subtrees for Searches
FluidFS allows you to narrow the number of subtrees in an LDAP tree used for searching.
1 In the Storage view, select a FluidFS cluster.
2 Click the File System tab.
3 In the File System view, select Client Accessibility.
4 Click the Directory Services tab.
5 In the NFS USer Repository (NIS or LDAP) area, click Edit Settings. The Edit Active Directory Settings dialog box opens.
6 Select the LDAP radio button.
7 In the Filtered Branches eld, type the LDAP name to be used for searching and then click Add.
8 To use LDAP on Active Directory extended schema:
396
FluidFS Administration