Dell Storage vSphere Web Client Plugin Version 5.
Notes, cautions, and warnings NOTE: A NOTE indicates important information that helps you make better use of your product. CAUTION: A CAUTION indicates either potential damage to hardware or loss of data and tells you how to avoid the problem. WARNING: A WARNING indicates a potential for property damage, personal injury, or death. © 2019 Dell Inc. or its subsidiaries. All rights reserved. Dell, EMC, and other trademarks are trademarks of Dell Inc. or its subsidiaries.
Preface About this Guide The Dell Storage vSphere Web Client Plugin Administrator’s Guide provides instructions for installing, configuring, and using the Dell Storage vSphere Web Client Plugin. The plugin provides management of Dell storage with the VMware vSphere Web Client.
Contents 1 Getting Started............................................................................................................................ 7 Introduction to vSphere Web Client Plugin........................................................................................................................ 7 Key Features.....................................................................................................................................................................
Viewing Dell Storage Information.................................................................................................46 Viewing the Dell Settings for a Host................................................................................................................................. 46 Connectivity Legends...................................................................................................................................................
Select Source/Destination Pair......................................................................................................................................... 74 Select Volume...................................................................................................................................................................... 75 Select Volume QoS Profile to Apply............................................................................................................................
1 Getting Started Introduction to vSphere Web Client Plugin The Dell Storage vSphere Web Client Plugin provides management of Dell Storage. NOTE: Use the VMware vSphere Web Client to perform all procedures in this guide, unless instructed otherwise.
• QoS Definition: A Quality of Service (QoS) definition must be set up on the source Storage Center for replication. See the Dell Storage Manager Administrator’s Guide for instructions on creating QoS definitions. If you are using iSCSI connections for replications: • • The destination Storage Center must be defined as an iSCSI Remote System on the source Storage Center. The source Storage Center must be defined as an iSCSI Remote Connection on the destination Storage Center.
• • • Dell Storage Manager Server – Type the hostname or IP address of the Dell Storage Manager server. Dell Storage Manager Port – Type the port number for the Dell Storage Manager in the field. Dell Storage Manager User and Password – Type the username and password of a Dell Storage Manager user with administrator privileges. The Dell Storage Manager user credentials control which Storage Centers can be managed in the vSphere Web Client Plugin.
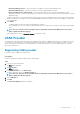
Figure 2. Registering VASA provider 6. In vCenter Password, type the password of the vCenter user. 7. In Dell Storage Manager Password, type the password of a Storage Manager user with administrator privileges. 8. Select the Please select check box for VASA provider Registration/ Unregistration to register VASA provider. 9. Click Submit. Unregistering VASA provider Follow these steps to unregister a VASA provider. Steps 1. Log in to the vSphere Web Client. The Home page is displayed. 2. Click (Go home).
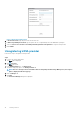
Figure 3. Unregistering VASA provider 6. In vCenter Password, type the password of the vCenter user. 7. In Dell Storage Manager Password, type the password of a Storage Manager user with administrator privileges. 8. Select the Please select check box for VASA provider Registration/ Unregistration to register VASA provider. 9. Select Unregister VASA provider check box. 10. Click Submit.
Figure 4. Connection Manager Credentials Dialog Box 5. Click Edit. The Connection Manager dialog box opens. 6. Modify the vCenter and Dell Storage Manager credentials as needed and click Submit. To delete the vCenter and Dell Storage Manager credentials, click Delete. Displaying Storage Center Information The Summary tab on the Dell Storage page displays summary information for Storage Center. The Monitor tab displays performance and usage charts for Storage Center.
Figure 5. Storage Center Summary Information Label Description Controller Information Displays network and status information about the Storage Center controllers. Storage Type Information Displays the Storage Types defined on the Storage Center. FluidFS Summary Information The following figure shows summary information for a FluidFS cluster.
Figure 6. FluidFS Summary Information Page Label Description FluidFS Cluster Information Shows the details of FluidFS appliances and associated controller details. NAS Pool Capacity Statistics Displays pool capacity and space information about the NAS pool. Display Dell Storage Monitoring Information Display performance and usage information for Storage Center on the Monitor tab. Steps 1. Log in to the vSphere Web Client. (Go home). 2. Click The Home page opens. 3.
Figure 7.
Label Description Unused (Reserved) Space Size of the storage that is statically allocated to the NAS volume Unused (Unreserved) Space Space allocated for the NAS pool that has not been used Total Used Amount of all space that has been used Usage The Usage tab displays disk space information for Storage Centers and FluidFS clusters. Storage Center Usage Information The following figure shows an example of the usage information for a Storage Center. Figure 9.
Figure 10. FluidFS Cluster Usage Information Label Description Total Capacity Total capacity of the NAS pool Free Space Amount of free space for the NAS pool Used Space Storage space occupied by writes to the NAS volume (user data and snapshots) Unused (Unreserved) Space Space allocated for the NAS pool that has not been used Unused (Reserved) Space A portion of a thin-provisioned NAS volume that is dedicated to the NAS volume (no other volumes can take the space).
2 Working With Dell Storage Introduction to Dell Storage An administrator can use the Dell Storage vSphere Web Client Plugin to manage Dell storage on a Storage Center. A Storage Center configures and uses storage based on the following settings. Storage Term Description Storage Tier Storage tiers represent the classification of all physical storage media in the Storage Center. Storage Center automatically populates storage tiers with the available media in the Assigned disk folder.
Storage Term Description • Low Priority: Use the Low Priority profile only for volumes that contain data you want to keep in tier 3 storage. That is, applying the Low Priority profile to a volume prevents the volume data from migrating to another tier. You can create and modify Storage Profiles within a Storage Center, if you have licensed Data Progression software.
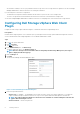
Steps 1. Select an object in inventory that can be a parent of a datastore: • • • Datacenter Host Cluster 2. Select Actions > All Dell Storage Actions > Add Datastore. The Add Datastore wizard opens. 3. Select the VMFS datastore type and click Next. The vSphere Web Client Plugin loads the Storage Center information. 4. If necessary, select one or more hosts to which to map the new volume. 5. Select the Storage Center and/or active controller for volume creation. Click Next. 6.
3. If necessary, select one or more hosts to which to map the new volume, and click Next. 4. Select the Storage Center and/or active controller that contains the volume to be mapped. 5. Select Map Existing Dell Volume, and click Next. a) Find and select an existing Dell volume to map as a datastore, and click Next. NOTE: The Dell volume must be a VMFS volume. b) Specify the LUN for mapping the volume, and click Next. 6. If necessary, select the protocol for mapping, and click Next.
h) Specify the LUN for mapping the volume, and click Next. i) Select the VMFS version, and click Next. NOTE: The option to select the VMFS version is shown only if the host is running ESXi 6.0 or 6.5. 6. If necessary, select the protocol for mapping, and click Next. NOTE: If FE-SAS is supported on the Storage Center, the SAS option is listed as available. 7. Type a name for the datastore, and select an inventory location in the datastore properties.
Adding an RDM to a Virtual Machine Use the Add Dell Storage wizard to add a Raw Device Mapping (RDM) to a virtual machine. Add an RDM Using a New Dell Volume An RDM can be created and mapped to a virtual machine using the vSphere Web Client Plugin. Steps 1. Select the virtual machine in inventory to which to add an RDM. 2. Select Actions > All Dell Storage Actions > Add Raw Device. The Add Storage wizard starts with the Device Configuration page open. 3.
Add an RDM Using an Existing Dell Volume An RDM can be created from an existing Dell volume and mapped to a virtual machine using the vSphere Web Client Plugin. Steps 1. Select the virtual machine in inventory to which to add an RDM. 2. Select Actions > All Dell Storage Actions > Add Raw Device. The Add Storage wizard starts with the Device Configuration page open. 3. Select Map Existing Raw Device Mapping to Hosts and Clusters and select a virtual device node. 4. Click Next. The Storage Center page opens.
Host Selection Protocol Selection Select Raw Device Resizing a Datastore or RDM Use the Resize Datastore or Extend Raw Device Mapping wizard to increase the capacity of a datastore or RDM. Resize a Datastore The size of a datastore can be changed using the vSphere Web Client Plugin. Steps 1. Select a datastore in inventory. 2. Select Actions > All Dell Storage Actions > Resize Datastore. The Resize Datastore Storage wizard starts. 3.
• • • Datacenter Host Cluster 2. Select a datastore in inventory. 3. Select Actions > All Dell Storage Actions > Remove Datastore. The Remove Datastores page opens. By default, the VMFS tab is selected. 4. Click to select the datastores to remove. To select all datastores, click Choose All. 5. Select a retention option for the datastore. 6. Click Next. The Ready to Complete page opens. 7. Click Finish.
2. Select Actions > All Dell Storage Actions > Snapshot > Set Snapshot Profile. The Configure Data Instant Snapshot wizard starts. 3. Select one or more Snapshot Profiles to apply to the datastore. 4. Click Next. The Ready to Complete page opens. 5. Click Finish. Related reference Snapshot Profile Configure Data Instant Snapshot for RDMs on a Virtual Machine Data Instant Snapshot can be configured for an RDM using the vSphere Web Client Plugin. Steps 1. Select a virtual machine in inventory. 2.
2. Select Actions > All Dell Storage Actions > Snapshot > Create Snapshot. The Create Snapshot wizard starts. 3. Specify a time after which you want the snapshot to expire. To set the snapshot to never expire, select the Never Expire checkbox. 4. Click Next. The Snapshot Options page opens. 5. To create a temporary VMware snapshot of the virtual machine prior to snapshot creation, select the Create Temporary VMware Snapshot checkbox. 6.
Recovering Data From a Snapshot Use the Storage Center Storage Manager Recovery wizard to recover data from a Storage Center snapshot. The wizard allows you to select the snapshot from which you want to recover data and then exposes and maps the snapshot to allow you to copy data for recovery. Recover a Datastore From a Storage Center Snapshot A datastore can be recovered using the vSphere Web Client Plugin. Prerequisites A snapshot of the datastore must exist. Steps 1.
The Ready to Complete page opens. 7. Click Finish. Related reference Snapshot Selection VM Selection Create and Manage Replications and Live Volumes The Dell Storage vSphere Web Client Plugin supports two basic models for migrating data between Storage Centers: • • Replications Live Volumes A replication copies volume data from one Storage Center to another Storage Center to safeguard data.
Related reference Replication Options Storage Center for Replication Replicating an RDM Use the vSphere Web Client Plugin to create an RDM replication. Prerequisites If you are using iSCSI connections for replications, the following conditions must be met: • • The destination Storage Center must be defined as an iSCSI Remote System on the source Storage Center. The source Storage Center must be defined as an iSCSI Remote Connection on the destination Storage Center.
The Replication Options page opens. 5. To change the replication type, select a type from the drop-down menu. NOTE: If you choose to change the replication type from a replication to a Live Volume, a warning dialog box opens. You must select the checkbox to confirm that you want to make the conversion, and then click OK. 6. Modify the other replication settings as needed. 7. If you confirmed that you want to convert the replica to a Live Volume, the Live Volume Options page opens.
5. Specify removal options for the replications. 6. Click Next. The Ready to Complete page opens. 7. Click Finish. Related reference Replication Delete Options Remove an RDM Replication Remove an RDM replication after the replication is no longer needed. Steps 1. Select the virtual machine with the RDM from which you want to remove a replication. 2. Select Actions > All Dell Storage Actions > Replications/Live Volume > Remove. The Remove Replication/Live Volume wizard starts. 3.
9. (Optional) Clear the option labeled Automatically Swap Primary Storage Center. 10. If you keep the checkbox enabled for Automatically Swap Primary Storage Center, click Advanced. The Advanced options are shown. Modify the values for the following options: • • • Min. data written to secondary before swap Min. % of I/O on secondary before swap Min. time as primary before swap 11.
Replication Options Live Volume Options Storage Center for Replication Modify a Live Volume Datastore or RDM Replication The vSphere Web Client Plugin can modify Live Volume datastore and RDM replications, and convert the replication type between a Live Volume and a replication. Modifying a Live Volume Datastore Modify the settings of an existing Live Volume datastore. Steps 1. Select the datastore that is being replicated. 2.
4. Click Next. The Replication Options page opens. 5. To change the replication type, select a type from the drop-down menu. NOTE: If you choose to change the replication type from a replication to a Live Volume, a warning dialog box opens. You must select the checkbox to confirm that you want to make the conversion, and then click OK. 6. Modify the other replication settings as needed. 7. Click Next. If you did not choose to convert from a Live Volume to a replication, the Live Volumes Settings page opens.
5. Specify removal options for the replications. 6. Click Next. The Ready to Complete page opens. 7. Click Finish. Related reference Replication Delete Options Select Replications Configure Live Volume Automatic Failover and Restore You can enable Storage Center Automatic Failover and Automatic Restore from the vSphere Web Client Plugin on Live Volumes that meet certain criteria.
Results The following figure shows a Live Volume with automatic failover and automatic repair enabled. Figure 11.
3 Working With Virtual Machines The Dell Storage vSphere Web Client Plugin provides the ability to provision virtual machines and recover virtual machine data from a Replay.
Related reference Customization Datastore Lookup Datastore Options Name and Location Template Selection Deploy Virtual Machines to a New VMFS Datastore Use the Create Virtual Machines wizard to deploy one or more virtual machines to a new datastore. Prerequisites A virtual machine template must be created from which new virtual machines can be deployed. For information about creating or updating a virtual machine template, refer to the vSphere help topics on virtual machine templates.
g) Verify the name and inventory location for the datastore, and click Next. The Customization page opens. 12. (Optional) Select Create Replication/Live Volume if you want to replicate the volume data to a second Storage Center and allow both Storage Centers to process I/O requests for the volume. For information, see Live Volume Operations. 13. (Optional) Select Replication Options if you want to replicate a datastore. For information, see Replication Options. 14.
NOTE: Use the Customization Specification Manager in vSphere to create and manage customization specs. 10. Select the destination host on which to deploy the virtual machine clone, and click Next. The Datastore page opens. 11. Select the datastore to store the virtual machine files and click Next. The Ready to Complete page opens. 12. Click Finish.
4 Managing Disaster Recovery Use the Dell Storage vSphere Web Client Plugin to manage Disaster Recovery for VMFS datastores. Topics: • • • Activate Disaster Recovery Restore/Start Disaster Recovery Predefine Disaster Recovery Activate Disaster Recovery Activate Disaster Recovery for the corresponding datastore on the associated Storage Center. Prerequisites Valid restore points must be defined. Steps 1. Select a datacenter. 2. Select Actions > All Dell Storage Actions > Disaster Recovery > Activate.
Restore/Start Disaster Recovery Use the Restore/Start Disaster Recovery page to restore the Disaster Recovery activated volume for the corresponding datastore. Prerequisites Valid restore points must be defined. Steps 1. Select a datacenter. 2. Select Actions > All Dell Storage Actions > Disaster Recovery > Restore/Restart. The Restore/Restart Disaster Recovery wizard starts, and the Select SAN array source/destination page opens. 3.
A page opens that shows the selected restore points. 4. (Optional) To modify the settings, click Edit Settings. The Edit Activate Disaster Recovery Setting page opens. 5. Modify the settings: • • • • Click Change next to Server to specify the server to which the activated volume will be mapped when DR is activated. Check the Use Original Volumes Folder checkbox to use the source volume folder path for the activated DR volume.
5 Viewing Dell Storage Information Viewing the Dell Settings for a Host Use the Dell Storage Settings tab to display information about the Fibre Channel and iSCSI connections between the ESXi host and the Storage Center. The Dell Storage Settings page is accessible from the Configure tab of an ESXi host. Figure 12. Dell Storage Settings for a Host NOTE: The method for viewing Adapter Details varies depending on the version of ESXi that is running on the host.
Icon Label Description Disconnected FC A Fibre Channel connection between the HBA and Storage Center does not exist. Connected iSCSI An iSCSI connection between the HBA and Storage Center exists. Disconnected iSCSI An iSCSI connection between the HBA and Storage Center does not exist. Connected Storage Center The Storage Center is connected to the ESXi host. Partially Connected Storage Center The Storage Center is partially connected to the ESXi host.
Label Description Status Status of the adapter Storage Details Table 3.
Label Description Storage Center Storage Center on which the volume resides Dell SN Dell serial number of the volume Dell Index Object index for the volume Size Size of the volume Disk Folder Storage Center disk folder location Folder Folder location of the volume Storage Type Storage type of the volume Status Current status for the volume, as well as the controller on which the volume is active Snapshot Profiles Snapshot Profiles applied to the volume Storage Profiles Storage profile f
Label Description FluidFS Cluster Name Name of the cluster FluidFS Cluters IP Address IP address of the cluster Storage Center Servers Information about any connected Storage Centers Usage Statistics Tab The Usage Statistics tab displays usage information about the selected Dell volume. Storage Center Statistics Information The following figure shows an example of usage statistics for a Storage Center. Figure 15.
FluidFS Statistics Information The following figure shows an example of usage statistics for a FluidFS cluster. Figure 16. Usage Statistics for a FluidFS Cluster The following table describes the FluidFS usage statistics information. Label Description NAS Volume Name Name of the volume Size Size of the volume Unused (Reserved) Space A portion of a thin-provisioned NAS volume that is dedicated to the NAS volume (no other volumes can take the space).
Figure 17. Connectivity Information for a Storage Center The following table describes connectivity information for a Storage Center. Label Description Server Port Server name and port Storage Port Storage port on the Storage Center LUN Mapping LUN Type Protocol (Fibre Channel or iSCSI) Status Status for the path Volume Snapshots Tab The Volume Snapshots tab displays information about the Replays for the selected Dell volume.
Figure 18. Volume Snapshots Tab The following table describes the information in the Volume Snapshots tab.
Figure 19. Replications/Live Volume Tab The following table describes the information in the Replications/Live Volume tab.
Viewing Dell Charts Use Dell Charts to display Storage Center performance information for an ESXi host. The Dell Charts view is accessible from the Performance page on the Monitor tab of a host, cluster, datastore, datastore cluster, virtual machine, or datacenter. The following figure shows KB/sec and IO/sec charts for a Storage Center. Figure 20. Example of KB/sec Chart and IO/sec Chart for a Storage Center The following figure shows an example of a latency chart for a Storage Center.
Figure 21. Example of Latency Chart for a Storage Center For each Storage Center connected to the ESXi host, the header includes information described in the following table. Label Description Parent Name of the Storage Center Name Name of the VMware object Type Type of object Charts The following table describes the type of Storage Center performance data displayed in charts.
6 Wizard Page Reference Add Storage (Storage Center) Use the Add Storage page to select how you want to add storage. • • Create New Dell Volume—Select this option to create a new Dell volume to map. Map Existing Dell Volume—Select this option to select an existing Dell volume to map. Compatibility Mode Use the Compatibility Mode page to select the access mode for the virtual disk. • • Physical—Select this option to allow the guest operating system direct access to the hardware.
Create Multiple Datastores Use the Create Multiple Datastores page to specify the number and name of datastores to create. • • • Number of Datastores—Type the number of datastores to create. Start numbering at—Type the number from which to start the numbering of volume names and datastore names. Edit—Select a datastore and click Edit to open the Datastore Properties dialog box, from which you can change the volume name, datastore name, and datastore size.
Customization For Clone Virtual Machine Use the Customization page to customize settings for cloning virtual machines. • Use Customization Spec—Select this checkbox to choose from predefined customization specifications. Datastore Lookup Use the Datastore Lookup page to select the datastore in which to store the virtual machine files.
Datastore Name Use the Datastore Name page to specify the name and location for the recovered datastore. • • • Datastore Name—Type a name for the recovered datastore. Use original datastore name—Select this checkbox to use the original datastore name and the Replay time as the name of the recovered datastore. Location—Select the location for the recovered datastore. Datastore Options When provisioning a virtual machine, use the Datastore Options page to select a datastore to hold the virtual machine.
Datastore Properties Use the Datastore Properties page to specify properties for the datastore. • • • Datastore name—Type a name for the datastore. Maximum file size—If the file system version is VMFS-3, select the file system block size option for the datastore. The block size affects the maximum file size the new datastore can support. NOTE: VMFS-5 uses a unified 1-MB file block size. Therefore, the Maximum file size option is not displayed if the file system version is VMFS-5.
Device Configuration Use the Device Configuration page to select the option for adding a raw device. • • • Add New Raw Device Mapping to Virtual Machine—Select this option to create a new volume to be mapped as an RDM to the virtual machine. Virtual Device Node—If the Add New Raw Device Mapping to Virtual Machine option is selected, select the node for the raw device mapping.
• • • • Server—Allows you to change the server. Use Original Volumes Folder—Select this option to indicate that the original volume folder should be used for the Disaster Recovery operations. Use Active Snapshot—Select this option to indicate that active snapshots should be used in the Disaster Recovery operations. Snapshot Profile List—Opens a list of snapshot profile to be used. Edit Volume Use the Edit Volume Settings page to modify settings for a datastore. Figure 22.
Extend RDM Size Use the Expansion Size page to specify a new, expanded size for an RDM of an existing volume. • • • Original Size—Displays the current size of the volume. Extend to—Type a new, resized value for the volume. Storage Size Type—Select a unit of measure—GB or TB. Host Selection Use the Host Selection page to select one or more hosts to which to map the raw storage.
Host/Cluster Use the Host/Cluster page to select a host or cluster on which to run the virtual machine. Hosts and Clusters Use the Hosts and Clusters page to select one or more hosts or clusters to which to add the datastore.
Host Selection for Snapshot Recovery Use the Host Selection page to select the host or cluster on which to expose the recovered data. Live Volumes Use the Live Volumes page to specify the values for Live Volume replication. • • • • • • 66 Secondary QoS Definition – Select a secondary Quality of Service (QoS) definition for the Live Volume. For information about creating or modifying QoS definitions, see the Dell Storage Manager Administrator’s Guide.
Mapping LUN Use the Mapping LUN page to select the LUN to which to map the Dell volume. When creating multiple datastores, the assignment of LUNs starts at the specified LUN and increments using the available LUNs. Name and Location Use the Name and Location page to specify the name and location for the virtual machines. • • • Base Name—Type a base name for the virtual machines to create. Number of VMs to Create—Specify the number of virtual machines to create.
The following options are available if Front-End SAS is supported on the Storage Center selected. • • • • 68 SAS—Select this option to use the Front-End SAS protocol. Fibre Channel—Select this option to restrict mapping to Fibre Channel paths only. iSCSI—Select this option to restrict mapping to iSCSI paths only. Any available—Select this option to use any available path between the host and the storage.
Recover/Restart Disaster Recovery Warning Use the Recover/Restart Disaster Recovery Warning page to select recovery options. • • Mirror Back Only—Skip the step of recreating the replication in the original direction and use the Disaster Recovery site as the source. Automatically Deactivate Destination—Automatically remove server mappings from the activated volume without requiring administrator intervention.
• • Delete Destination Volume—Select this checkbox if you do not want to retain the deleted destination volume in the Recycle Bin— not recommended. CAUTION: If you delete the destination volume, you cannot recover the volume on the destination (target) Storage Center. The volume is permanently deleted. Delete Restore Point—Select this checkbox if you want to delete the restore point for the replication.
• Replication Type – Select one of the following types: • • • • • • • Replication, Asynchronous Replication, Synchronous – High Availability Replication, Synchronous – High Consistency Live Volume, Asynchronous Live Volume, Synchronous – High Availability Live Volume, Synchronous – High Consistency For information about these replication types, see the Dell Storage Manager Administrator’s Guide.
Resource Pool Use the Resource Pool page to select a resource pool in which to run the virtual machine. Select Raw Device Use the Select Raw Device page to select the raw devices to replicate or remove.
Select RDM Use the Select RDM page to select the RDM to extend. Select Replications Use the Select Replications page to select one or more replications to modify or remove.
Select Restore Points Use the Select Restore Points page to select the datastores identified as restore points for Disaster Recovery operations. Select Source/Destination Pair Use the Select Source/Destination Pair page to select the array pairs to be used in a Disaster Recovery operation.
Select Volume Use the Select Volume page to search for and select an existing Dell volume to map as storage. The selected volume must already be formatted as a VMFS datastore. Select Volume QoS Profile to Apply Use the Select Volume QoS Profile to Apply page to select a QoS profile to apply to the volume. Select a QoS profile for the volume. For information about creating or modifying QoS definitions, see the Storage Manager Administrator’s Guide.
Snapshot Options Use the Snapshot Options page to take a temporary VMware snapshot and specify options for the Replay. • • • Create Temporary VMware Snapshot—Select this checkbox to take a temporary VMware snapshot before taking a Replay. Include memory—Select this checkbox to capture the virtual machine memory in the Replay. Quiesce file systems (if available)—Select this checkbox to pause running processes in the guest operating system before taking the Replay.
• Select Snapshot Profiles—Select one or more SnapshotProfiles to associate with the volume. NOTE: To deselect a Snapshot Profile, press the Ctrl key and click the selected Profile. • Schedule—Displays the Snapshot schedule for the selected Snapshot Profile. Snapshot Properties Use the Snapshot Properties page to specify properties for the Replay. • • • Expiration—Specify the time after which you want the Replay to expire.
Snapshot Selection Use the Select Snapshots page to select the Replays from which to recover data or to select the Replays to delete. • • Select one or more Replays to use to recover data. To recover data, select oneReplays per volume that you want to recover. If more than one RDM is mapped to the virtual machine, you must select one Replays for each volume to recover. Select one or more Replays that you want to delete (expire).
NOTE: The Select Active Controller option is not available if the Storage Center user in Storage Manager only has volume manager privileges. Storage Center for Replication Use the Storage Center page to select the destination Storage Center for replication. Template Selection Use the Template Selection page to select a virtual machine template on which to base a new virtual machine. • • Select Virtual Machine template—Select a VM template from the drop-down list of available templates.
Template Selection for Clone Virtual Machine Use the Template Selection page to select a virtual machine template on which to clone a virtual machine. • • • Select Virtual Machine template—Select a VM template from the drop-down list of available templates. Select Virtual Machine—Select a VM from the drop-down list of available virtual machines. Details—Displays details about the currently selected VM template.
Volume Use the Volume page to specify attributes for a new Dell volume. • • • Volume Name—Type a name for the volume. Size—Specify the volume size. Volume Folder—Select the folder location for the volume. Volume Retention Use the Volume Retention page to specify retention options for removing the volume or raw device. • • • Unmap volume—Select this option to unmap the volume from the host. The unmapped volume remains on the Storage Center.
Volume Settings Use the Volume Settings page to specify the options for a datastore. NOTE: The Volume Settings page opens only if the Allow Storage Profile Selection user-preference setting is set for the Storage Center user in Storage Manager. NOTE: The values for Storage Profile and Disk Folder can be modified only if the preferences for the Storage Center have been set to Allow.