Storage Manager 2018 R1 Installationshandbuch
Anmerkungen, Vorsichtshinweise und Warnungen ANMERKUNG: Eine ANMERKUNG macht auf wichtige Informationen aufmerksam, mit denen Sie Ihr Produkt besser einsetzen können. VORSICHT: Ein VORSICHTSHINWEIS warnt vor möglichen Beschädigungen der Hardware oder vor Datenverlust und zeigt, wie diese vermieden werden können. WARNUNG: Mit WARNUNG wird auf eine potenziell gefährliche Situation hingewiesen, die zu Sachschäden, Verletzungen oder zum Tod führen kann. © 2017 – 2018 Dell Inc. oder ihre Tochtergesellschaften.
Inhaltsverzeichnis Wissenswertes zu diesem Handbuch/zu dieser ............................................................................................... 5 Versionsverlauf................................................................................................................................................................... 5 Zielgruppe.................................................................................................................................................................
Konfigurieren von Storage Manager Virtuelles Gerät..................................................................................................26 Konfigurieren des Virtuelles Gerät als primären Data Collector............................................................................26 Migrieren eines vorhandenen Data Collector mit dem Storage Manager Virtuelles Gerät..................................... 27 Migrationsanforderungen für Data Collector......................................................
Vorwort Wissenswertes zu diesem Handbuch/zu dieser In diesem Handbuch/in dieser wird beschrieben, wie Sie Komponenten von Storage Manager installieren und konfigurieren. Versionsverlauf Dokumentnummer: 680-028-024 Revision Datum Beschreibung A März 2018 Erstausgabe für Storage Manager 2018 R1 B Mai 2018 Aktualisiert für Storage Manager 2018 R1.2 C August 2018 Aktualisiert für Storage Manager 2018 R1.10 D November 2018 Aktualisiert für Storage Manager 2018 R1.
• Dell Storage Center API PowerShell SDK Getting Started Guide (Dell Storage Center API PowerShell SDK Handbuch zum Einstieg) Enthält Installationsanweisungen und Beispiele für Dell Storage-API für PowerShell. Storage Center-Dokumente • Storage Center Release Notes (Storage Center Versionshinweise) Enthält Informationen zu den Funktionen und offenen bzw. gelösten Problemen einer bestimmte Produkt-Version.
• FluidFS FS8600 Appliance 1Gb to 10Gb Upgrade Procedure (Verfahren für die Aktualisierung von FluidFS FS8600-Geräten von 1 Gb auf 10 Gb) Enthält Informationen über die Aktualisierung eines Fibre Channel FS8600-Geräts von 1Gb-Ethernet-Client-Konnektivität auf 10GbEthernet-Client-Konnektivität. Die Zielgruppe für dieses Dokument sind Installationstechniker von Dell oder zertifizierte Vertragspartner die Hardware-Service für FS8600-Geräte durchführen.
1 Einführung in Storage Manager Mit dem Storage Manager können Sie Storage Center SANs, FluidFS Cluster und PS Series-Gruppen über eine zentralisierte Verwaltungskonsole überwachen, verwalten und analysieren. Der Storage Manager Data Collectorspeichert Daten und Warnungen, die er von verwalteten Speichergeräten in einer externen Datenbank oder einer integrierten Datenbank sammelt.
Komponente Beschreibung Dokumentation für das Setup Remote-Storage Manager Data Collector Storage Manager Data Collector, der mit dem primären Storage Manager Data Collector verbunden ist und zur Aktivierung eines NotfallWiederherstellungsstandorts verwendet werden kann, wenn der primäre Storage Manager Data Collector nicht verfügbar ist.
Anforderungen für Data Collector Die folgende Tabelle zeigt die Anforderungen für Storage Manager Data Collector. ANMERKUNG: Um optimale Ergebnisse zu erzielen, installieren Sie den Data Collector auf einem Windows Server-VM auf einem traditionellen Volume aus einem gemeinsamen Speicher. Verwenden Sie keine VVol für den Data Collector VM.
Komponente Anforderungen • • • Microsoft SQL Server 2016 MySQL 5,6 MySQL 5,7 ANMERKUNG: Die eingebettete Datenbank auf dem Dateisystem kann anstelle einer externen Datenbank verwendet werden. Die eingebettete Datenbank ist jedoch auf 64 GB begrenzt und enthält nur die Daten der letzten 30 Tage. Die eingebettete Datenbank wird nicht für Produktionsumgebungen empfohlen.
Komponente Anforderungen • • • • • • • Windows Server 2019 Red Hat Enterprise Linux 7.1 Red Hat Enterprise Linux 7.2 Red Hat Enterprise Linux 7.3 SUSE Linux Enterprise 12 Oracle Linux 6.5 Oracle Linux 7.0 ANMERKUNG: Windows Server Core wird nicht unterstützt. CPU 32-Bit(x86)- oder 64-Bit(x64)-Prozessor ANMERKUNG: Linux-Versionen des Storage Manager Client unterstützen nur 64-Bit-Mikroprozessoren. Software Microsoft .NET Framework 4.
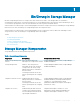
Komponente Anforderungen • Windows Server 2019 CPU 64-Bit (x64) Mikroprozessor Software Microsoft .NET Framework 4.5 (vollständig) Von Storage Manager verwendete Standardports Der Storage Manager Komponenten verwenden Netzwerkverbindungen, um miteinander und mit anderen Netzwerkressourcen zu kommunizieren. Die folgende Tabelle zeigt die Standardnetzwerkports an, die Storage Manager Data Collector, Storage Manager Client, und Storage Manager Server Agent. Viele der Ports sind konfigurierbar.
Schnittstelle Protokoll Name Zweck 1199 TCP SIMS RMI Kommunikation mit verwalteten PS Series-Gruppen 1433 TCP Microsoft SQL Server Verbinden zu einer externen Microsoft SQL Server-Datenbank 3033 TCP SSL Kommunikation mit verwalteten Storage Center 3306 TCP MySQL Verbinden zu einer externen MySQL-Datenbank 8080 TCP VMware SDK Kommunikation mit VMware-Servern 27355 TCP Server Agent-SockelÜberwachungsport Storage Manager Server Agent-Kommunikation 35451 TCP FluidFS Kommunikation
Schnittstelle Protokoll Name Zweck 8080 Legacy-Webdienst-Port Kommunizieren mit dem Data Collector TCP IPv6-Unterstützung Storage Manager Data Collector kann IPv6 verwenden, um Verbindungen von Storage Manager Client anzunehmen und mit verwalteten Storage Center-SANs zu kommunizieren. Um IPv6-Adressen zu verwenden, weisen Sie IPv6-Adressen wie in der folgenden Tabelle beschrieben zu.
2 Planung und Vorbereitung Planen Sie Ihre Konfiguration und installieren Sie die erforderliche Software, bevor Sie Storage Manager installieren. ANMERKUNG: Wenn Sie planen, einen neuen Storage Manager Data Collector zu installieren, anstatt eine bereits vorhandene Data Collector-Installation zu aktualisieren, muss eine neue Data Collector-Datenbank während der Installation erstellt werden.
Erforderliche Installationsinformationen sammeln Drucken Sie vor der Installation der Komponenten des Storage Manager diese Seite aus und notieren Sie die folgenden Informationen. Datenbankinformationen erfassen Wenn Sie eine SQL-Datenbank verwenden möchten, notieren Sie die für die Installation benötigten Informationen.
Abbildung 1. Registerkarte „IP-Adressen“ des Dialogfelds „TCP/IP-Eigenschaften“ e f 6 Aktivieren des TCP/IP-Protokolls: a b 7 Stellen Sie sicher, dass bei IPALL der TCP-Port eine zulässige Portnummer aufweist. Der TCP-Standardport für SQL Server lautet 1433. Klicken Sie auf Übernehmen und dann auf OK, um das Dialogfeld zu schließen. Klicken Sie im Navigationsfensterbereich auf Protokolle für MSSQLSERVER oder Protokolle für SQLEXPRESS.
3 Installieren und Konfigurieren von Data Collector Installieren Sie den Data Collector und konfigurieren Sie Einstellungen mit dem Data Collector Setup-Assistenten. Data Collector installieren Installieren Sie den Data Collector auf einem Windows-Server, der über eine Netzwerkverbindung mit Ihrem Storage Center verfügt. Voraussetzungen • Der Windows-Server muss die Anforderungen erfüllen, die unter Anforderungen für Data Collector beschrieben sind.
Wenn Sie kein Kennwort angeben, erstellt Data Collector bei Ersteinrichtung ein 13-stelliges Standardkennwort für den Datenbankbenutzer „compmsauser“. 11 Klicken Sie auf Weiter. Die Seite Ports wird angezeigt. a b c d Um eine andere Portnummer für den Webserver-Dienst anzugeben, geben Sie die Portnummer in das Feld WebserverDienstport aktivieren ein. Zur Aktivierung von Server Agent-Diensten aktivieren oder deaktivieren Sie das Kontrollkästchen Server Agent-Dienstports aktivieren.
Migrieren eines vorhandenen Data Collector auf einen neuen Data Collector Zur Verwendung eines neuen Data Collector als primärer Data Collector migrieren Sie einen vorhandenen Data Collector auf einen neuen Data Collector.
b c 8 Navigieren Sie zu dem Ordner, in den Sie Data Collector installieren möchten. Klicken Sie auf OK. Klicken Sie auf Weiter. Die Seite Data Collector wird angezeigt. 9 10 Wählen Sie die Optionsschaltfläche Von vorhandenemData Collector aus migrieren. a b Geben Sie den Hostnamen oder die IP-Adresse des vorhandenen Data Collector in das Feld Hostname oder IP-Adresse ein. Geben Sie im Feld Webserver-Port die Portnummer des vorhandenen Data Collector-Webdiensts ein. c d e Der Standard-Port ist 3033.
4 Installieren und Konfigurieren von Storage Manager Virtuelles Gerät Dieser Abschnitt enthält Anweisungen zum Installieren und Konfigurieren von Storage Manager Virtuelles Gerät. Virtuelles Gerät – Anforderungen für vSphere Das Storage Manager Virtuelles Gerät setzt die folgenden Bedingungen vom vSphere-Server voraus. • Das Virtuelles Gerät muss auf einem standardmäßigen Datenspeicher bereitgestellt werden. Stellen Sie das Virtuelles Gerät nicht auf einem VVols-Datenspeicher bereit.
11 Bestätigen Sie die Details für die Virtuelles Gerät und klicken Sie auf Weiter. Die Seite Lizenzvereinbarung wird angezeigt. 12 Wählen Sie das Kontrollkästchen Ich stimme den Bedingungen der Lizenzvereinbarung zu und klicken Sie auf Weiter. 13 Klicken Sie auf Weiter. Die Seite Speicher auswählen wird angezeigt. 14 Wählen Sie Thin Provision aus dem Drop-Down-Menü Virtual Disk-Format wählen Drop-Down -Menü.
Die Seite Ports wird angezeigt. 7 8 So ändern Sie die Portnummer eines Dienstes oder aktivieren/deaktivieren einen Dienst: a Wählen Sie den Dienst aus, der geändert werden soll, und klicken Sie auf Bearbeiten. b c d Das Dialogfeld Port bearbeiten wird geöffnet. Zum Ändern der Portnummer des Dienstes geben Sie eine andere Portnummer in das Feld Port ein. Zum Aktivieren oder Deaktivieren des Dienstes aktivieren oder deaktivieren Sie das Kontrollkästchen Aktiviert. Klicken Sie auf OK.
• Interne Datenbankinformationen Migrationsanforderungen für Data Collector Die folgenden Anforderungen müssen erfüllt sein, um von einer Windows-Installation des Data Collector zu einer Storage Manager Virtuelles Gerät zu migrieren. • Der Data Collector und Storage Manager Virtuelles Gerät müssen dieselbe Version der Storage Manager Data Collector Software ausführen. • Auf der Windows-Installation des Data Collector dürfen keine laufenden Aufgaben vorliegen.
Es wird ein Bestätigungs-Dialogfeld angezeigt. 11 Klicken Sie auf Ja. Der Data Collector wird neu gestartet und die Anmeldeseite für Unisphere Central wird angezeigt. 12 Stoppen Sie nach Abschluss der Migration Abschluss den Storage Manager Data Collector Service auf dem Windows-Server. Nächste Schritte nach der Migration Je nach Konfiguration des vorhandenen Data Collector müssen Sie eventuell einige zusätzliche Setup-Aufgaben durchführen.
5 Installieren und Konfigurieren von Storage Manager-Clients Installieren Sie den Client auf einem Windows-Computer und verwenden Sie ihn zum Herstellen einer Verbindung mit dem Data Collector. Verbinden mit der Storage Manager Anwendungsseite Nach Installation und Konfiguration des Storage Manager Data Collector können Sie eine Verbindung mit der Storage Manager Anwendungsseite herstellen und Storage Manager Client herunterladen.
Voraussetzungen • Der Host-Computer muss die Anforderungen erfüllen, die unter Anforderungen an Storage Manager Client beschrieben sind. • Der Benutzer muss Root-Zugriff auf den Linux-Computer haben. • Der Linux-Computer muss über eine vollständige X-Windows-Umgebung verfügen. Schritte 1 Laden Sie das Storage Manager Client-Installationsprogramm vom Data Collector herunter.
Abbildung 2. Ansicht „Speicher (SAN/NAS)“ in Storage Manager Client Hinzufügen von Storage Center zu Storage Manager Verwenden Sie den Storage Manager Client, um die Storage Center hinzuzufügen, die Sie zentral in Storage Manager Data Collector verwalten möchten. Voraussetzungen • • • • Sie müssen über den Hostnamen oder die IP-Adresse des Storage Center verfügen. Sie müssen den Benutzernamen und das Kennwort für ein Storage Center-Benutzerkonto kennen.
4 Klicken Sie auf Fertigstellen. • Wenn das Kontrollkästchen Einstellungen von einem vorhandenen Storage Center übernehmen nicht markiert ist, wird das Storage Center zu Storage Manager hinzugefügt. • 5 Wenn das Kontrollkästchen Einstellungen vom bestehenden Storage Center erben ausgewählt wurde, wird das Dialogfeld „Einstellungen erben“ angezeigt. (Nur Einstellungen übernehmen) Wählen Sie aus, welcheStorage Center-Einstellungen übernommen werden sollen.
6 Aktualisieren der Storage Manager-Software Verwenden Sie die folgenden Aufgaben zur Aktualisierung von Storage Manager Data Collector, Storage Manager Client, Storage Manager Server Agent, und Storage Manager Virtuelles Gerät. Aktualisieren von Storage Manager Data Collector Befolgen Sie die nachstehenden Schritte zum Aktualisieren von Storage Manager Data Collector auf eine neuere Version. Voraussetzungen • Der Storage Manager Data Collector den Sie aktualisieren muss Version 15.3.1 oder höher sein.
Der Server lädt das Server Agent Installationsprogramm vom Data Collector herunter. 3 Öffnen Sie das Server Agent-Installationsprogramm und folgen Sie den Anweisungen zum Aktualisieren von Server Agent.