Dell Storage Integration Tools for VMware Version 4.
Notes, cautions, and warnings NOTE: A NOTE indicates important information that helps you make better use of your product. CAUTION: A CAUTION indicates either potential damage to hardware or loss of data and tells you how to avoid the problem. WARNING: A WARNING indicates a potential for property damage, personal injury, or death. © 2018 Dell Inc. or its subsidiaries. All rights reserved. Dell, EMC, and other trademarks are trademarks of Dell Inc. or its subsidiaries.
Contents Preface..........................................................................................................................................................................................4 Revision history...................................................................................................................................................................... 4 Audience...................................................................................................................
Preface This guide provides instructions for installing the Dell Storage Integration Tools for VMware (DSITV) and configuring the following applications: • • Dell Replay Manager Service for VMware (RMSV) Dell Storage vSphere Web Client Plugin Revision history Document Number: 680-131-001 Table 1. Revision history Revision Date Description A February 2017 DSITV version 4.
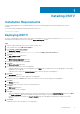
1 Installing DSITV Installation Requirements The Dell Storage Integration Tools for VMware Release Notes list the minimum hardware and software requirements for DSITV installation. For information about installing and configuring VMware software, see: www.vmware.com/support Deploying DSITV The DSITV virtual appliance is delivered as an OVA (Open Virtual Appliance) file. The OVA file is named DSITV-04.01.00.nnn.ova and is deployed to a VMware vCenter Server using the Deploy OVF Template wizard. Steps 1.
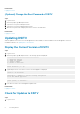
18. Click Close when the Completed Successfully message is displayed. Next steps Assign a daily Replay Profile to the Storage Center volume on which DSITV is being deployed to allow the DSITV virtual appliance to be recovered. Setting Up DSITV After deploying DSITV, configure the time on the DSITV virtual appliance and then log on to the virtual appliance to configure the time zone and network settings.
# Version - 4.x.x.x # ################################################################ 1. 2. 3. 4. 5. Item ---------------------------------------------------Set the time zone (Current: UTC) .................... Configure network (eth0) ............................ Configure RMSV ...................................... Register vSphere Web Client Plugin with vCenter Unregister vSphere Web Client Plugin with vCenter 11. 12. 13. 14. 15. 16.
Related tasks Logging In to DSITV (Optional) Change the Root Password of DSITV Steps 1. Log in to DSITV. 2. At the CLI prompt, type 13 and press Enter. 3. Type the new root password and press Enter. 4. Type the new root password again and press Enter. 5. When the root password is changed, press Enter to return to the main menu. Related tasks Logging In to DSITV Updating DSITV When an updated version of the DSITV virtual appliance becomes available, it can be installed from the virtual appliance.
2. At the CLI prompt, type 15 and press Enter. The following options are displayed: ------------------------------------------1. Appliance version 2. Check for updates 3. Install update 4. Return to main menu Enter selection [1 - 4]: 3. Type 2 and press Enter. • If an update is not found, the following message is displayed: • No available updates found If an update is found, the version number of the update is displayed. 4. Press Enter to return to the virtual appliance update menu.
Rebooting DSITV Updating DSITV at a Dark Site When DSITV is installed at a site without Internet access, updates to DSITV must be obtained from Dell Technical Support. The updates can then be made available using an internal web server or they can be copied directly to the virtual appliance. Copy Updates to a Web Server Steps 1. Contact Dell Technical Support to obtain the latest DSITVUpdate.zip file. 2. Extract the contents of theDSITVUpdate.
Related tasks Logging In to DSTV Rebooting DSITV Prerequisites CAUTION: Before rebooting DSITV, make sure no scheduled backups or restore operations are in progress. Steps 1. Log in to DSITV. 2. At the CLI prompt, type 12 and press Enter. 3. Type y and press Enter. The following messages are displayed: Broadcast message from root... The system is going down for reboot NOW! 4. When the login prompt appears, log back in to DSITV.
2 Replay Manager Service for VMware RMSV Data Migration Upgrading from earlier versions of DSITV requires a migration of RMSV data. You can choose to migrate the RMSV data created in DSITV 4.x to DSITV 4.1 during the RMSV configuration process. DSITV prompts you to migrate data unless one of the following conditions is met: • • You have already migrated data from DSITV 4.x to DSITV4.1. You chose to configure DSITV4.1 without migrating the earlier data.
DSITV authenticates the host and asks if you want to continue connecting. b) Type yes when asked to confirm that you want to continue connecting. DSITV adds the host to the list of known hosts, stops the Replay Manager on that host, and begins copying the RMSV data files. c) After the files are migrated, DSITV disables the Replay Manager on that host, restarts Replay Manager, and indicates that the data migration has completed. Continue with step 4. 4.
3 Dell Storage vSphere Web Client Plugin Installing the Dell Storage vSphere Web Client Plugin To install the Dell Storage vSphere Web Client Plugin, register the plugin with VMware vCenter. Prerequisites • • • • Deploy DSITV and configure the time zone and network settings. Identify the host name or IP address of the VMware vCenter Server. Identify the user name and password of a VMware vCenter user with administrator privileges.
• Identify the user name and password of a VMware vCenter user with administrator privileges. Steps 1. Log in to DSITV. 2. At the CLI prompt, type 5 and press Enter. 3. Type the host name or IP address of the VMware vCenter and press Enter. 4. Type the user name of a VMware vCenter user with administrator privileges and press Enter. 5. Type the password of the user with administrator privileges and press Enter. 6. Type y and press Enter to remove the vSphere Web Client Plugin. 7.
A DSITV Application Troubleshooting To handle any issues with the DSITV application: • • Use the RMSV troubleshooting procedures to troubleshoot issues with Dell Replay Manager Service for VMware. Use the vSphere Web Client Plugin troubleshooting procedures to troubleshoot issues with Dell Storage vSphere Web Client Plugin.
4. Use Secure Copy (SCP) to copy the zip file from the virtual appliance to a local computer. When the zip file is on a local computer, it can be sent to Dell Technical Support.
In addition, ensure that the vSphere Web Client Plugin can validate the datastore with the registered Dell Storage Manager configuration. View vSphere Web Client Log Files For additional information, refer to the following publications: About this task • • To view the vSphere Web Client log files, refer to the VMware Knowledge Base article Location of vSphere Web Client 5.x service logs (2004090).