
White Papers


Configure SC9000 storage array
8 Deploying the 385TB Data Warehouse Fast Track Reference Architecture for Microsoft SQL Server 2017 using
Dell EMC PowerEdge R940 and SC9000 | 4033-CD-SQL
4 Configure SC9000 storage array
This section describes the configuration of the SC9000 storage array.
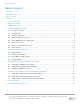
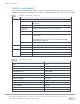
4.1 Configure local ports
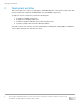
Configure the FC ports to use two fault domains in virtual port mode. Put ports 1 and 2 from each HBA on
each controller into fault domain 1, and put ports 3 and 4 from each HBA on each controller into fault domain
2.
4.2 Configure disks
Put all 48 disks in the Assigned disk folder. The distributed spare feature introduced in SCOS 7.3.1 makes all
disks active, so none are reserved as dedicated spares.
4.3 Configure storage type
Configure the Assigned disk folder for single redundancy, using a 512 KB page size.
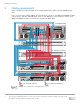
4.4 Allow storage profile selection
To create a custom storage profile, you must allow the selection of storage profiles in your storage
preferences.
To allow storage profile selection, perform the following steps:
1. Open the Dell Storage Manager (DSM) client and connect to the SC Series array.
2. Click the Storage tab.
3. Right-click the SC Series array and select Edit Settings.
4. Click the Preferences tab.
5. Under Storage, below the Storage Profile drop-down list, select Allow Storage Profile Selection.
6. Click OK.
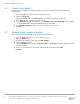
4.5 Create RAID 5 All Tiers storage profile
All SQL Server data volumes will use a custom storage profile to ensure that RAID 5 is always used.
To create the custom storage profile, perform the following steps:
1. Open the DSM client and connect to the SC Series array.
2. Click the Storage tab.
3. Right-click Storage Profiles and select Create Storage Profile. The Create Storage Profile dialog
box appears.
4. In the Name textbox, type RAID 5 All Tiers.
5. Under Data Writes, in the Write RAID Type drop-down list, select Parity (RAID 5 / RAID 6).
6. Under Snapshot Data, set the Snapshot RAID Type for Tier 1, Tier 2, and Tier 3 to Parity (RAID 5 /
RAID 6).
7. Click OK.