
Users Guide
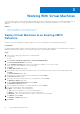
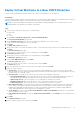

Table Of Contents
- About this Guide
- Dell Storage vSphere Client Plugin Version 6.0 Administrator’s Guide
- Getting Started
- Working With Dell Storage
- Working With Virtual Machines
- Viewing Dell Storage Information

Deploy Virtual Machines to a New VMFS Datastore
Use the Create Virtual Machines wizard to deploy one or more virtual machines to a new datastore.
Prerequisites
A virtual machine template must be created from which new virtual machines can be deployed. For information about creating or
updating a virtual machine template, see the vSphere help topics on virtual machine templates.
NOTE: The options that appear when deploying a virtual machine change depending on the volume preferences of the
Storage Manager user-defined in the vSphere Client Plugin.
Steps
1. Select an object that can be the parent of a virtual machine:
● Datacenter
● Host
● Cluster
2. Select Actions > All Dell Storage Actions > Provision Virtual Machine.
The Provision Virtual Machine wizard starts.
3. On the Template Selection page, select the virtual machine template to use for the new VM.
Details of the selected template are shown on the page.
4. Click Next.
The Name and Location page opens.
5. Specify a base name for the VMs, the number of VMs to create, and an inventory location for new virtual machines, and
click Next.
The Host and Clusters page opens.
6. Select the host or cluster on which to run virtual machines, and click Next.
The Resource Pool page opens.
7. Specify the resource pool within which to run virtual machines, and click Next.
The Datastore Options page opens.
8. Select Create VMFS Datastore, and click Next.
The Storage Center page opens.
9. Select the Storage Center on which to create the volume, and click Next.
The Volume page opens.
10. Enter the name and size for the new volume, select the volume folder, and click Next.
11. Select the volume settings:
● Storage Type—A Storage Type is a pool of storage with a single datapage size. The Storage Type is set at the disk
folder level, and once set it cannot be changed without assistance from technical support. (This entry appears only if the
preferences are set in Storage Center).
● Storage Profile—A Storage Profile controls how the Storage Center manages volume data.
○ Recommended (All Tiers)—Select this option for most volumes. The Recommended profile allows the system to
automatically progress data between and across all storage tiers based on the type of data and usage.
○ High Priority (Tier 1)—Select this option to force volume data to remain in tier 1 storage.
○ Medium Priority (Tier 2)—Select this option to force volume data to remain in tier 2 storage.
○ Low Priority (Tier 3)—Select this option to force volume data to remain in tier 3 storage.
● Data Reduction Profile—Data Reduction uses compression and deduplication to decrease the amount of disk space
that is used by volume data. Compression reduces the amount of space that is used by a volume by encoding data.
Deduplication finds duplicate pages and removes them, conserving the disk space that would be used by additional
copies. When deduplication is used, compression is also applied to a volume.
● Cache Settings—Select or clear the Read Cache Enabled and Write Cache Enabled check boxes to set the default
cache settings for the new volume.
● Selected Volume QoS Profile—Accept the Volume QoS Profile Default or click Change it to select a different QoS
Profile.
12. Click Next.
The Snapshot Profile page opens.
13. Select a Snapshot Profile for the Volume and click Next.
Working With Virtual Machines
27