
Users Guide


11. (Optional) Select Replication Options if you want to replicate a datastore.
12. Click Next.
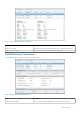
The Ready to Complete page opens.
13. Click Finish.
Related reference
Add Storage
Datastore Properties
File System Version
Hosts and Clusters
Mapping LUN
Replication Options
Snapshot Profile
Protocol Selection
Storage Center
Volume
Volume Settings
Map an Existing Dell Volume as a Datastore
An existing Dell volume can be mapped as a datastore using the vSphere Web Client Plugin.
Prerequisites
• The active controller option is not available if the Storage Center user in Storage Manager has only volume manager privileges.
• The SAS mapping protocol selection is available only on Storage Centers that support Front-end SAS: SCv2000 series and
SC4020Storage Centers.
Steps
1. Select an object in inventory that can be a parent of a datastore:
• Datacenter
• Host
• Cluster
2. Select Actions > All Dell Storage Actions > Add Datastore.
The Add Datastore wizard starts.
3. If necessary, select one or more hosts to which to map the new volume, and click Next.
4. Select the Storage Center and/or active controller that contains the volume to be mapped.
5. Select Map Existing Dell Volume, and click Next.
a) Find and select an existing Dell volume to map as a datastore, and click Next.
NOTE:
The Dell volume must be a VMFS volume.
b) Specify the LUN for mapping the volume, and click Next.
6. If necessary, select the protocol for mapping, and click Next.
NOTE:
If FE-SAS is supported on the Storage Center, the SAS option is listed as available.
7. Specify the name for the datastore. The Dell volume name is used by default.
• To change the name of the datastore, clear the Keep existing datastore name check box and type a new name in the Datastore
name field.
• To rename the Dell volume to match the new datastore name, select the Rename volume to match datastore name checkbox.
8. (Optional) Select Create Replication/Live Volume if you want to replicate the volume data to a second Storage Center and allow
both Storage Centers to process I/O requests for the volume.
9. Click Next.
The Ready to Complete page opens.
10. Click Finish.
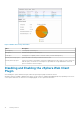
20
Working With Dell Storage