Dell Storage vSphere Web Client 插件 管理员指南 版本 3.
注、小心和警告 注: “注”表示可以帮助您更好地使用计算机的重要信息。 小心: “小心”表示可能会损坏硬件或导致数据丢失,并说明如何避免此类问题。 警告: “警告”表示可能会造成财产损失、人身伤害甚至死亡。 版权所有 © 2016 Dell Inc. 保留所有权利。本产品受美国、国际版权和知识产权法律保护。Dell ™和 Dell 徽标是 Dell Inc. 在美国和/或其他管辖区域的商标。所有此处提及的其他商标和产品名称可能是其各自所属公司的商标。 2016- 03 Rev.
目录 前言............................................................................................................................. 6 修订历史记录..........................................................................................................................................6 读者对象................................................................................................................................................. 6 相关出版物............................................................................
查看 NAS 卷快照和计划..................................................................................................................37 管理 NAS 卷快照和快照计划.......................................................................................................... 39 创建和管理复制和 Live Volume........................................................................................................... 41 复制操作..........................................................................................................................
为克隆虚拟机选择数据存储..................................................................................................................82 设备配置...............................................................................................................................................83 扩展 RDM 大小.................................................................................................................................... 84 文件系统版本..................................................................................
前言 Dell Storage vSphere Web Client 插件管理员指南提供关于安装、配置和使用 Dell Storage vSphere Web Client 插件的说明,该插件提供使用 VMware vSphere Web Client 管理 Dell 存储的功能。 修订历史记录 文件编号:680-054-005 修订版 日期 说明 A 2016 年 3 月 Dell Storage vSphere Web Client 插件版本 3.
联系 Dell Dell 提供了多个联机及电话支持和服务选项。服务会因所在国家和地区以及产品的不同而有所差异,您所在的 地区可能不提供某些服务。如要联系 Dell 解决有关销售、技术支持或客户服务问题,请转至: dell.
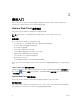
1 使用入门 Dell Storage vSphere Web Client 插件为存储管理员提供使用 VMware vSphere Web Client 管理 Dell Storage Center 和 Dell Fluid File System (FluidFS) 群集的功能。 vSphere Web Client 插件简介 Dell Storage vSphere Web Client 插件提供 Dell 存储的管理功能。 注: 除非特别声明,否则本指南中的所有步骤均在 VMware vSphere Web Client 中执行。 主要功能 Dell Storage vSphere Web Client 插件提供以下功能: • 在 Storage Center 上添加和移除 VMFS 存储(数据存储和原始设备映射) • 在 FluidFS 群集上添加和移除 NFS 数据存储 • 在 Dell 存储上配置虚拟机 • 在 Dell 存储上配置 VMware ESXi 主机 • 为 VMFS 数据存储创建和管理 Storage Center Replays • 创建和管理 NFS
VMFS 数据存储的复制要求 要将数据从一个 Storage Center 复制到另一个 Storage Center,请确保满足以下要求: • Storage Center:源和目标 Storage Center 均必须在 Enterprise Manager 中配置。二者均必须配置在配 置 Dell Storage vSphere Web Client 插件中提供给 vSphere Web Client 插件的 Enterprise Manager 用户 凭据。 • QoS 定义:必须在用于复制的源 Storage Center 上设置了服务质量 (QoS) 定义。请参阅 Enterprise Manager Administrator’s Guide(Enterprise Manager 管理员指南)以了解有关创建 QoS 定义的说明。 如果使用 iSCSI 连接进行复制: • 目标 Storage Center 必须在源 Storage Center 上定义为 iSCSI 远程系统。 • 源 Storage Center 必须在目标 Storage Center 上定义为 iSCSI 远
图 1: Dell 存储使用入门页面 5. 在 Basic Tasks(基本任务)标题下,单击 Manage Credentials(管理凭据)。 图 2: Connection Manager Credentials(连接管理器凭据)对话框 6. 在 vCenter Password(vCenter 密码)字段中输入 vCenter 用户的密码。 vCenter User(vCenter 用户)字段显示用于登录到 vSphere Web Client 的用户。要为不同的 vCenter 用户配置 vSphere Web Client 插件,请注销 vSphere Web Client 并使用该用户重新登录。 注: vSphere Web Client 插件关闭后,vSphere Web Client 插件使用 vCenter 用户凭据继续运行任 务。 7. 在 Enterprise Manager Server(Enterprise Manager 服务器)字段中输入 Enterprise Manager 服务器 的主机名或 IP 地址。 8.
要将 Storage Center 或 FluidFS 群集添加到 vSphere Web Client 插件中,请使用相同的用户凭据登录 Enterprise Manager 客户端,并添加要管理的 Storage Center 或 FluidFS 群集。请参阅 Enterprise Manager Administrator’s Guide(Enterprise Manager 管理员指南)以了解有关向 Enterprise Manager 添加 Storage Center 的说明。请参阅 Dell FluidFS 4.0 FS8600 Appliance Administrator’s Guide(Dell FluidFS 4.0 FS8600 设备管理员指南)以了解有关向 Enterprise Manager 添加 FluidFS 群集的说明。 10.
图 3: 显示连接到 Enterprise Manager 的 Getting Started(使用入门)页面 注: Enterprise Manager 用户管理的 Storage Center 和卷越多,显示 Dell Storage(Dell 存储)页 面花费的时间就越长。 5. 在 Basic Tasks(基本任务)标题下,单击 Manage Credentials(管理凭据)。此时会显示 Manage(管 理)选项卡。 图 4: Connection Manager Credentials(连接管理器凭据)对话框 6.
图 5: Connection Manager(连接管理器)对话框 7. 根据需要修改 vCenter 和 Enterprise Manger 凭据,然后单击 Submit(提交)。 要删除 vCenter 和 Enterprise Manger 凭据,请单击 Delete(删除)。 显示 Storage Center 和 FluidFS 信息 Dell Storage(Dell 存储)页面上的 Summary(摘要)选项卡显示 Storage Center 和 FluidFS 群集的摘要信 息。Monitor(监测)选项卡显示 Storage Center 和 FluidFS 群集的性能和使用情况图表。 显示 Dell 存储摘要信息 在 Summary(摘要)选项卡上显示 Storage Center 控制器和 FluidFS 信息以及存储类型信息。 1. 登录 vSphere Web Client。 2. 单击 3. 在 Administration(管理)窗格中,单击 Dell Storage(Dell 存储)。此时会显示 Dell Storage(Dell 存 储)页面。 4.
图 6: Storage Center 摘要信息 标签 说明 Controller Information(控制器信息) 显示关于 Storage Center 控制器的网络和状态信息 Storage Type Information(存储类型信 息) 显示 Storage Center 上定义的存储类型 FluidFS 摘要信息 图 7: FluidFS 摘要信息页面显示了 FluidFS 群集的摘要信息。 14 使用入门
图 7: FluidFS 摘要信息页面 标签 说明 FluidFS Cluster Information(FluidFS 群 集信息) 显示 FluidFS 设备的详细信息以及关联控制器的详细信息 NAS Pool Capacity Statistics(NAS 池容 量统计信息) 显示关于 NAS 池的池容量和空间信息 显示 Dell 存储监测信息 在监测选项卡上显示 Storage Center 和 FluidFS 群集的性能和使用情况信息。 1. 登录 vSphere Web Client。 2. 单击 3. 在 Administration(管理)窗格中,单击 Dell Storage(Dell 存储)。此时会显示 Dell Storage(Dell 存储)页面。 4. 单击监测选项卡。 5.
Storage Center 图表信息 图 8: Storage Center 图表信息显示了 Storage Center 的图表。 图 8: Storage Center 图表信息 插图 标签 说明 1 KB/sec Chart (KB/秒图表) Read KB/sec(读取 KB/秒)- 以千字节每秒表示的读取操作传输速率 Total KB/sec(总 KB/秒)- 以千字节每秒表示的读取和写入操作的合并传输 速率。 Write KB/sec(写入 KB/秒)- 以千字节每秒表示的写入操作传输速率 2 IO/sec Chart (IO/秒图表) Read IO/sec(读取 IO/秒)- 以每秒 I/O 操作数表示的读取操作传输速率 Total IO/sec(总 IO/秒)- 以每秒 I/O 操作数表示的读取和写入操作合并传 输速率 Write IO/sec(写入 IO/秒)- 以每秒 I/O 操作数表示的写入操作传输速率 FluidFS 图表信息 图 9: FluidFS 群集图表信息显示了 FluidFS 群集的图表。 16 使用入门
图 9: FluidFS 群集图表信息 标签 说明 Total Capacity(总容量) NAS 池的总容量 Unused (Reserved) Space(未使用 [保留] 空间) 以静态形式分配给 NAS 卷的存储大小。 Unused (Unreserved) Space(未使用 分配给 NAS 池的尚未使用的空间 [非保留] 空间) Total Used(已用总量) 已使用的所有空间量 使用情况 Usage(使用情况)选项卡显示 Storage Center 和 FluidFS 群集的磁盘空间信息。 Storage Center 使用情况信息 图 10: Storage Center 使用情况信息显示了 Storage Center 的使用情况信息。 使用入门 17
图 10: Storage Center 使用情况信息 标签 说明 Total Disk Space(总磁盘空间) Storage Center 的磁盘提供的磁盘空间总量 Total space allocated for volume use (为卷分配的可用总空间) Storage Center 的磁盘上已分配的磁盘空间量 Allocated space used by volumes(用于 卷的已分配空间) Storage Center 上由卷使用的磁盘空间量 Total free space(总可用空间) 可供 Storage Center 使用的磁盘空间量 Space reserved by system(系统保留的 空间) Replays 和 RAID 开销占用的空间 Savings vs.
图 11: FluidFS 群集使用情况信息 标签 说明 Total Capacity(总容 量) NAS 池的总容量 Free Space(可用空 间) NAS 池的可用空间量 Used Space(已用空 间) 向 NAS 卷的写入(用户数据和快照)所占用的存储空间 Unused (Unreserved) 分配给 NAS 池的尚未使用的空间 Space(未使用 [非保留] 空间) Unused (Reserved) Space(未使用 [保留] 空间) 精简配置的 NAS 卷中专用于 NAS 卷的部分空间(任何其他卷都不能占用该空 间)。由存储管理员指定保留空间容量。保留空间先于非保留空间使用。 禁用和启用 vSphere Web Client 插件 安装 vSphere Web Client 插件后,向 VMware vCenter 注册该插件即可启用它。 使用 vSphere 可以启用或禁用所有插件。启用和禁用插件的步骤因 vSphere Web Client 版本而异。有关如何 管理插件的说明,请参阅 vSphere 说明文件。 使用入门 19
2 使用 Dell 存储 Dell Storage vSphere Web Client 插件与 Enterprise Manager 通信并为管理 Dell 存储提供支持。 Dell 存储简介 管理员可以使用 Dell Storage vSphere Web Client 插件管理 Storage Center 或 FluidFS 群集上的 Dell 存储。 Storage Center 基于以下设置来配置和使用存储。 存储术语 说明 存储层 存储层代表 Storage Center 中的所有物理存储介质的分类。Storage Center 使用已分配磁盘文件夹中的可用介质自动填充存储层: 物理介质分类 • • • 存储类型 RAID 级别和页面大小 在每个层内,可以采用以下方式存储数据: • • • • 卷 逻辑存储单元 第 1 层:包含速度最快的介质,适合经常使用的关键任务数据。 第 1 层介质通常是价格最贵的介质。 第 2 层:包含中等质量的介质,适合中等优先级数据。 第 3 层:包含低速的低价格介质,适合备份副本、Replays 以及低 优先级、很少使用的数据。 非冗余:R
存储术语 说明 • • • 允许系统根据数据类型和使用情况,在存储类型以及所有存储层 之间自动分级管理数据。 High Priority(高优先级):高优先级配置文件应仅用于包含要保 留在第 1 层存储中的数据的卷。也就是说,将高优先级配置文件 应用到某个卷会阻止卷数据迁移到另一个层。 Medium Priority(中优先级):中优先级配置文件应仅用于包含 要保留在第 2 层存储中的数据的卷。也就是说,将中优先级配置 文件应用到某个卷会阻止卷数据迁移到另一个层。 Low Priority(低优先级):低优先级配置文件应仅用于包含要保 留在第 3 层存储中的数据的卷。也就是说,将低优先级配置文件 应用到某个卷会阻止卷数据迁移到另一个层。 如果您还拥有许可的 Data Progression 软件,则可以在 Storage Center 内创建和修改存储配置文件。 Replays 和 Replay 配置文件 Storage Center Replay 是时间点数据副本。因此,可以公开和映射 应用到卷,以确定创建 Replays 的频 Replay 以允许恢复数据存储或虚拟机。Replay 配置文件确定卷
在 Storage Center 上创建和管理 VMFS 数据存储和原始设备 映射 使用 vSphere Web Client 插件可以在 Storage Center 上创建和管理作为 VMFS 数据存储映射至 ESX/ESXi 主 机或群集的 Dell 卷,以及作为原始设备映射 (RDM) 映射至虚拟机的卷。 注: 在创建和管理数据存储和 RDM 时显示的选项,随在 vSphere Web Client 插件中定义的 Enterprise Manager 用户的 Storage Center 用户首选项而有所不同。 以下各节介绍如何创建和管理数据存储: • 添加数据存储 • 添加多个数据存储 • 将 RDM 添加到虚拟机 • 调整数据存储或 RDM 的大小 • 移除数据存储或 RDM 添加 VMFS 数据存储 使用 Add Datastore(添加数据存储)向导添加 Dell 存储作为 VMFS 数据存储。 添加 VMFS 数据存储时,在 Storage Center 上创建和/或映射 Dell 卷。请参阅 Dell 存储简介以了解有关 Dell 卷的详细信息。 要添加 VMFS 数据
注: 以下步骤可能随 Enterprise Manager 中的 Storage Center 用户首选项设置而发生变化。 a. 输入新卷的名称和大小,再选择卷文件夹,然后单击 Next(下一步)。 b. 如果需要,选择用于创建卷的页面池,然后单击 Next(下一步)。 c. 如果需要,为卷选择存储配置文件,然后单击 Next(下一步)。 注: Dell 建议为大多数卷使用 Recommended (All Tiers)(推荐 [所有层])配置文件。 d. 如果需要,为卷选择 Replay 配置文件,然后单击 Next(下一步)。 e. 指定用于映射卷的 LUN,然后单击 Next(下一步)。 f. 如果需要,选择文件系统版本,然后单击 Next(下一步)。 6. 如果需要,选择映射协议,然后单击 Next(下一步)。 7. 输入数据存储的名称,并选择资源清册位置。 如果文件系统版本是 VMFS-3,则为数据存储选择最大文件大小和块大小。 8.
5. 选择 Map Existing Dell Volume(映射现有 Dell 卷),然后单击 Next(下一步)。 a. 查找并选择要映射为数据存储的现有 Dell 卷,然后单击 Next(下一步)。 注: Dell 卷必须是 VMFS 卷。 b. 指定用于映射卷的 LUN,然后单击 Next(下一步)。 6. 如果需要,选择映射协议,然后单击 Next(下一步)。 7. 指定数据存储的名称。默认情况下,使用 Dell 卷名称。 • 要更改数据存储的名称,清除 Keep existing datastore name(保留现有数据存储名称)复选框,并 在 Datastore name(数据存储名称)字段中输入新名称。 • 要重命名 Dell 卷以匹配新数据存储名称,选中 Rename volume to match datastore name(重命名 卷以匹配数据存储名称)复选框。 8.
注: 以下步骤可能随 Enterprise Manager 中的 Storage Center 用户首选项设置而发生变化。 d. 如果需要,选择用于创建卷的页面池,然后单击 Next(下一步)。 e. 如果需要,为卷选择存储配置文件,然后单击 Next(下一步)。 注: Dell 建议为大多数卷使用 Recommended (All Tiers)(推荐 [所有层])配置文件。 f. 如果需要,为卷选择 Replay 配置文件,然后单击 Next(下一步)。 g. 指定用于映射卷的 LUN,然后单击 Next(下一步)。 注: 为多个数据存储分配 LUN 时,从指定的 LUN 开始分配,并使用可用 LUN 递增。 h. 如果需要,选择文件系统版本,然后单击 Next(下一步)。 i. 如果需要,选择映射协议,然后单击 Next(下一步)。 3. 输入数据存储的名称,并选择资源清册位置。 4. 单击 Next(下一步)。 如果文件系统版本是 VMFS-3,则为数据存储选择最大文件大小和块大小。 此时会打开 Create Multiple Datastores(创建多个数据存储)页面。 5.
4. 单击 Next(下一步)。 此时会打开 Storage Center 页面。 5. 选择用于创建卷的 Storage Center 和/或活动控制器,然后单击 Next(下一步)。 注: 如果 Enterprise Manager 中的 Storage Center 用户仅拥有卷管理员权限,则活动控制器选项不 可用。 6. 如果需要,选择要将新 Dell 卷映射到的一个或多个主机,然后单击 Next(下一步)。 7. 选择 Create New Dell Volume(创建新 Dell 卷),然后单击 Next(下一步)。 注: 以下步骤可能随 Enterprise Manager 中的 Storage Center 用户首选项设置而发生变化。 a. 输入新卷的名称和大小,再选择卷文件夹,然后单击 Next(下一步)。 b. 如果需要,选择用于创建卷的页面池,然后单击 Next(下一步)。 c. 为卷选择存储配置文件,然后单击 Next(下一步)。 注: Dell 建议为大多数卷使用 Recommended (All Tiers)(推荐 [所有层])配置文件。 d.
5. 选择用于创建卷的 Storage Center 和/或活动控制器,然后单击 Next(下一步)。 注: 如果 Enterprise Manager 中的 Storage Center 用户仅拥有卷管理员权限,则活动控制器选项不 可用。 6. 如果需要,选择要将新 Dell 卷映射到的一个或多个主机,然后单击 Next(下一步)。 7. 选择 Map Existing Dell Volume(映射现有 Dell 卷),然后单击 Next(下一步)。 8. 查找并选择要映射为原始设备的现有 Dell 卷,然后单击 Next(下一步)。 9. 选择用于映射卷的 LUN,然后单击 Next(下一步)。 10. 如果需要,选择映射协议,然后单击 Next(下一步)。 11. 选择原始设备的兼容模式,然后单击 Next(下一步)。 此时会打开 Ready to Complete(已准备好完成)页面。 12.
调整数据存储或 RDM 的大小 使用 Resize Datastore(调整数据存储大小)或 Extend Raw Device Mapping(扩展原始设备映射)向导以 增加数据存储或 RDM 的容量。 调整数据存储大小 使用 vSphere Web Client 插件可以更改数据存储的大小。 1. 在资源清册中选择一个数据存储。 2. 选择 Actions(操作) → All Dell Storage Actions(所有 Dell 存储操作) → Resize Datastore(调整数 据存储大小)。 Resize Datastore Storage(调整数据存储的存储大小)向导将启动。 3. 在 Resize to(大小调整为)字段中输入数据存储的新大小,然后从 Storage Size Type(存储大小类型) 下拉菜单中选择度量单位。 4. 单击 Next(下一步)。 此时会打开 Ready to Complete(已准备好完成)页面。 5.
移除数据存储或 RDM 使用 Remove Storage(移除存储)向导移除数据存储或 RDM。 移除 VMFS 数据存储 使用 vSphere Web Client 插件可以移除 VMFS 数据存储。 1. 在资源清册中选择可作为数据存储父级的对象: • 数据中心 • 主机 • 群集 2. 在资源清册中选择一个数据存储。 3. 选择 Actions(操作) → All Dell Storage Actions(所有 Dell 存储操作) → Remove Datastore(移除 数据存储)。 此时会打开 Remove Datastores(移除数据存储)页面。默认情况下,选中 VMFS 选项卡。 4. 点击以选择要移除的数据存储。要选择所有数据存储,请单击 Choose All(全选)。 5. 选择数据存储的保留选项。 6. 单击 Next(下一步)。 此时会打开 Ready to Complete(已准备好完成)页面。 7. 单击 Finish(完成)。 相关链接 卷保留 移除 RDM 使用 vSphere Web Client 插件可以移除 RDM。 1.
创建和管理 NFS 数据存储 使用 vSphere Web Client 插件可以在 NAS 卷上创建和管理 NFS 导出,这些 NAS 卷作为 NFS 数据存储被映射 至 ESX/ESXi 主机或群集。 您可以创建 NFS 数据存储,如下所示: • 使用新的或现有的 NAS 卷,并在 FluidFS 群集中创建新 NFS 导出。 • 使用 FluidFS 群集中的现有 NFS 导出。 以下各节介绍如何创建和管理 NFS 数据存储: • 创建新 NFS 数据存储 • 使用现有 NFS 导出添加 NFS 数据存储 • 移除 NFS 数据存储 创建新 NFS 数据存储 使用 vSphere Web Client 插件可以创建 NFS 数据存储。 1. 2.
使用现有 NFS 导出添加 NFS 数据存储 可通过使用 FluidFS 群集中的现有 NFS 导出来创建新 NFS 数据存储。 1. 2. 在资源清册中选择可作为数据存储父级的对象: • 数据中心 • 主机 • 群集 选择 Actions(操作) → All Dell Storage Actions(所有 Dell 存储操作) → Add Datastore(添加数据 存储)。 Add Datastore(添加数据存储)向导将启动,并打开 Select Type(选择类型)页面。 3. 选择 NFS,然后单击 Next(下一步)。 4. 选择要将 NFS 导出映射到的一个或多个主机,然后单击 Next(下一步)。 5. 选择用于创建卷的 FluidFS 群集,然后单击 Next(下一步)。 6. 选择 Map an Existing NFS Export(映射现有 NFS 导出),然后单击 Next(下一步)。 7. 从可用 NFS 导出列表中选择一个 NFS 导出。 8.
配置、创建和恢复 Replays 使用 Dell Storage vSphere Web Client 插件可以配置 Data Instant Replay、创建 Replays、使 Replays 过期 以及从 Replays 恢复数据。 注: 在配置、创建和恢复 Replays 时显示的选项会根据 Enterprise Manager 用户在 vSphere Web Client 插件中定义的卷首选项而有所不同。 注: Replays 仅适用于作为 VMFS 数据存储而挂载的卷,不适用于 NFS 数据存储。 以下各节介绍如何配置和管理 Replays: • 配置 Data Instant Replay • 创建 Replay • 使 Replay 过期 • 从 Replay 恢复数据 配置 Data Instant Replay 配置 Data Instant Replay 是指将 Replay 配置文件指定给与某个虚拟机关联的一个数据存储(Dell 卷)或所有 卷,以建立用于自动创建 Replays 的计划。 只有已在 Storage Center 上定义的 Replay 配置文件可供选
如果该虚拟机具有多个 RDM,则重复步骤 2。配置完所有 RDM 后,将显示 Ready to Complete(已准 备好完成)页面。 4. 单击 Finish(完成)。 相关链接 Replay 配置文件 创建 Replay 除基于 Replay 配置文件按计划自动创建 Replay 之外,还可以创建即时(计划外)Replay。在 Replay 创建过 程中,可以指定 Replay 的过期时间。请注意,如果使用 Never Expire(永不过期)选项创建 Replay,则 Replay 会一直保留在 Storage Center 上,直到手动使之过期。 创建数据存储的 Replay 使用 vSphere Web Client 插件可以创建数据存储的 Replay。 1. 选择要为其创建 Replay 的数据存储。 2. 选择 Actions(操作) → All Dell Storage Actions(所有 Dell 存储操作) → Replays (Replay) → Create Replay(创建 Replay)。 Create Replay(创建 Replay)向导将启动。 3.
Replay 属性 快照选项 使 Replay 过期 创建 Replay 时,为 Replay 指定了过期时间。但是,您可以通过明确地让 Replay 过期来覆盖过期时间。使 Replay 过期将从 Storage Center 中移除该 Replay。 使数据存储的 Replays 过期 可以使用 vSphere Web Client 插件来使数据存储的 Replay 过期。 1. 选择要使其 Replays 过期的数据存储。 2. 选择 Actions(操作) → All Dell Storage Actions(所有 Dell 存储操作) → Replays (Replay) → Expire Replays(使 Replay 过期)。 Expire Storage Center Replay(使 Storage Center Replay 过期)向导将启动。 3. 选择要使其过期的 Replays。 4. 单击 Next(下一步)。 此时会打开 Ready to Complete(已准备好完成)页面。 5.
步骤 1. 选择要恢复其数据的数据存储。 2. 选择 Actions(操作) → All Dell Storage Actions(所有 Dell 存储操作) → Replays → Recover VM Data from Replay(从 Replay 恢复虚拟机数据)。 Storage Center Replay Recovery(Storage Center Replay 恢复)向导将启动。 3. 选择要从其恢复数据的一个或多个 Replays。 注: 每个卷只能选择一个 Replay。 4. 单击 Next(下一步)。 此时会打开 Host Selection(主机选择)页面。 5. 选择用于访问被恢复的数据存储的主机。 6. 请单击 Next(下一步)。 此时会打开 Datastore Name(数据存储名称)页面。 7. 为被恢复的数据存储指定名称和位置。 8. 单击 Next(下一步)。 9. 选择用于映射被恢复的数据存储的 LUN。 此时会打开 Mapping LUN(映射 LUN)页面。 10.
虚拟机选择 创建和管理 FluidFS NAS 卷快照和快照计划 Storage Center 为 Dell Fluid File System (FluidFS) 群集提供一定量的容量(NAS 池,由 NAS 卷组成)。创建 NFS 数据存储时(请参阅创建和管理 NFS 数据存储),将在 FluidFS 群集中创建关联的 NAS 卷。NFS Export (NFS 导出)文件夹的路径对应于 NAS 卷并在 ESXi 主机上挂载。 vSphere Web Client 插件可用于创建和管理与 NFS 数据存储关联的 NAS 卷的快照(类似于 Replay),并设 置创建、保留和删除快照的计划。 关于 FluidFS NAS 卷快照 NAS 卷快照是 NAS 卷的时间点副本,可用于数据恢复。NAS 卷快照类似于 VMFS Replay,不同的只是 Replay 作为 VMFS 数据存储挂载,而快照作为 NFS 数据存储挂载。创建的首个快照包含整个 NAS 卷的内 容。在该基线后创建的所有快照仅表示自上一个快照以来所做的更改。 使用 Dell Storage vSphere Web Client 插件,您可以
注: 如果您输入的快照名称已存在,则不会创建快照,并将显示 Snapshot name already exists(快照名称已存在)。 4. (可选)如果您想为快照设置过期日期,则选择 Enable Expiration(启用过期)并从日历中选择一个日 期。也可指明小时和分钟。 后续步骤 您也可能想设置快照计划以定期创建 NAS 卷的快照。请参阅创建 NAS 卷快照计划。 创建 NAS 卷快照计划 设置一个快照计划以在指定时间段内定期创建 NAS 卷的快照。 1. 选择资源清册中的 NFS 数据存储。 2. 选择要为其创建快照的 NAS 卷。 3. 选择 Actions(操作) → All Dell Storage Actions(所有 Dell 存储操作) → Snapshots(快照) → Create Snapshot Schedule(创建快照计划) Create Snapshot Schedule(创建快照计划)向导将启动。 4. 输入快照计划的名称。名称最多可以有 230 个字符,包括特殊字符(左右尖括号、反斜线、连字符、下 划线、& 字符、波浪号、加号)。 5.
3. 从菜单栏中选择 Dell Storage(Dell 存储)。 NFS 数据存储和关联卷显示在表中,默认情况下选择常规选项卡。 4. 单击 Snapshot(快照)选项卡。 vSphere Web Client 插件列出 NAS 卷的所有快照,并显示快照的创建时间、过期日期、克隆数目(如果 有)和大小。 图 12: 显示所选 NAS 卷的所有快照的监测选项卡显示创建了三个快照的 NAS 卷的示例。 图 12: 显示所选 NAS 卷的所有快照的监测选项卡 后续步骤 也可从监测选项卡查看所有快照计划。请参阅从监测选项卡查看计划 从监测选项卡查看计划 请执行以下步骤,查看有关所选 NAS 卷的所有快照计划的摘要信息。 步骤 1. 选择资源清册中的 NFS 数据存储。 vSphere Web Client 插件加载所选数据存储的信息。 注: 如果不显示所选 NFS 数据存储的摘要信息,则验证您提供的 vCenter 服务器和 Enterprise Manager 配置的凭据是否正确。 2. 单击监测选项卡。 3.
图 13: 监测选项卡显示所选 NAS 卷的所有计划 后续步骤 也可从监测选项卡查看所有快照。请参阅从监测选项卡查看快照。 管理 NAS 卷快照和快照计划 本节介绍如何修改和删除快照及快照计划。 编辑 NAS 卷快照 您可以显示 NAS 卷的所有可用快照,然后选择快照进行编辑。编辑允许您修改快照名称和过期日期。 步骤 1. 选择资源清册中的 NFS 数据存储。 2. 选择 Actions(操作) → All Dell Storage Actions(所有 Dell 存储操作) → Snapshot(快照) → Edit Snapshot/Snapshot Schedule(编辑快照/快照计划) Edit Snapshot/Snapshot Schedule(编辑快照/快照计划)向导将启动。 3. 在 Edit Snapshot/Snapshot Schedule(编辑快照/快照计划)页面上,选择 Snapshot(快照)并单击 Next(下一步)。 4. 从表中的计划列表中选择快照。 5. 编辑任何当前信息: a. 在 Name(名称)字段中,选择要编辑的名称并输入修改的名称。 b.
编辑 NAS 卷快照计划 您可显示创建 NAS 卷快照的所有可用计划,然后选择快照计划进行编辑。编辑允许您修改快照计划名称、更 改创建快照的时间,或更改快照过期日期。 步骤 1. 选择资源清册中的 NFS 数据存储。 2. 选择 Actions(操作) → All Dell Storage Actions(所有 Dell 存储操作) → Snapshot(快照) → Edit Snapshot/Snapshot Schedule(编辑快照/快照计划) Edit Snapshot/Snapshot Schedule(编辑快照/快照计划)向导将启动。 3. 在 Edit Snapshot/Snapshot Schedule(编辑快照/快照计划)页面上,选择 Snapshot Schedule(快照 计划)并单击 Next(下一步)。 4. 从表中的计划列表中选择快照计划。 5. 编辑任何当前信息: a. b. c. d. 6.
删除 NAS 卷快照计划 您可以显示所有可用快照计划,然后选择并删除一个或多个计划。 步骤 1. 选择资源清册中的 NFS 数据存储。 2. 选择 Actions(操作) → All Dell Storage Actions(所有 Dell 存储操作) → Snapshot(快照) → Delete Snapshot/Snapshot Schedule(删除快照/快照计划)。 Delete Snapshot/Snapshot Schedule(删除快照/快照计划)向导将启动。 3. 在 Delete Snapshot/Snapshot Schedule(删除快照/快照计划)页面上,选择 Snapshot Schedule(快 照计划)并单击 Next(下一步)。 4. 从表中的计划列表中选择一个或多个快照计划。要选择列表中的所有快照计划,选中 Snapshot Schedule Name(快照计划名称)列标题旁边的框。 5. 单击 Next(下一步)。 摘要屏幕指定您选择要删除的计划。 6.
创建数据存储或 RDM 复制 Dell Storage vSphere Web Client 插件提供创建数据存储和 RDM 复制的功能。 复制数据存储 使用 vSphere Web Client 插件可以创建数据存储复制。 前提条件 如果使用 iSCSI 连接进行复制: • 目标 Storage Center 必须在源 Storage Center 上定义为 iSCSI 远程系统。 • 源 Storage Center 必须在目标 Storage Center 上定义为 iSCSI 远程连接。 请参阅 Enterprise Manager Administrator’s Guide(Enterprise Manager 管理员指南)以了解有关在 Storage Center 之间配置 iSCSI 连接的说明。 • 确保在复制的源 Storage Center 上至少设置了一个服务质量 (QoS) 定义。请参阅 Enterprise Manager Administrator’s Guide(Enterprise Manager 管理员指南)以了解有关创建 QoS 定义的说明。 步骤 1.
步骤 1. 选择包含要复制的 RDM 的虚拟机。 2. 选择 Actions(操作) → All Dell Storage Actions(所有 Dell 存储操作) → 复制/活动卷 → Add(添 加)。 Add Replication/Live Volume(添加复制/活动卷)向导将启动。 3. 选择要复制的 RDM。 4. 单击 Next(下一步)。 此时会打开 Storage Center 页面。 5. 选择目标 Storage Center。 6. 单击 Next(下一步)。 此时会打开 Replication Options(复制选项)页面。 7. 指定以下复制类型之一: • Replication, Asynchronous(复制,异步) • Replication, Synchronous — High Availability(复制,同步 - 高可用性) • Replication, Synchronous — High Consistency(复制,同步 - 高一致性) 8. 指定其他复制设置和目标位置。 9.
6. 根据需要修改其他复制设置。 7. 如果确认要将复制副本转换为 Live Volume,则会打开 Live Volume Options(Live Volume 选项)页 面。设置 Live Volume 的值。 8. 单击 Next(下一步)。 此时会打开 Ready to Complete(已准备好完成)页面。 9. 单击 Finish(完成)。 相关链接 复制的 Storage Center 复制选项 修改 RDM 复制 您可以修改现有数据存储复制的设置。 前提条件 必须存在 RDM 复制。 步骤 1. 选择具有被复制的 RDM 的虚拟机。 2. 选择 Actions(操作) → Dell Storage Actions(Dell 存储操作) → 复制/活动卷 → Edit Settings/ Convert(编辑设置/转换)。 Modify Replication/Live Volume(修改复制/活动卷)向导将启动。 3. 选择要修改的复制。 4. 单击 Next(下一步)。 此时会打开 Replication Options(复制选项)页面。 5.
步骤 1. 选择要移除其复制的数据存储。 2. 选择 Actions(操作) → All Dell Storage Actions(所有 Dell 存储操作) → 复制/活动卷 → Remove (移除)。 Remove Replication/Live Volume(移除复制/活动卷)向导将启动。 3. 选择要移除的复制。 4. 单击 Next(下一步)。 此时会打开 Remove Options(移除选项)页面。 5. 指定复制的移除选项。 6. 单击 Next(下一步)。 此时会打开 Ready to Complete(已准备好完成)页面。 7. 单击 Finish(完成)。 相关链接 复制删除选项 移除 RDM 复制 移除不再需要的 RDM 复制。 前提条件 必须存在 RDM 复制。 步骤 1. 选择要移除其复制的 RDM 所在的虚拟机。 2.
• 配置 Live Volume 自动故障转移和还原 向数据存储或 RDM 添加 Live Volume Dell Storage vSphere Web Client 插件提供向数据存储和 RDM 添加 Live Volume 的功能。 向数据存储添加 Live Volume 1. 选择要复制的数据存储。 2. 选择 Actions(操作) → Dell Storage Actions(Dell 存储操作) → 复制/活动卷 → Add(添加)。 Add Replication/Live Volume(添加复制/活动卷)向导将启动。 3. 选择目标 Storage Center。 4. 单击 Next(下一步)。 此时会打开 Replication Options(复制选项)页面。 5.
Add Replications/Live Volume(添加复制/活动卷)向导将启动。 3. 选择要复制的 RDM。 4. 单击 Next(下一步)。 此时会打开 Storage Center 页面。 5. 选择目标 Storage Center。 6. 单击 Next(下一步)。 此时会打开 Replication Options(复制选项)页面。 7. 指定以下复制类型之一: • Live Volume, Asynchronous(Live Volume,异步) • Live Volume, Synchronous — High Availability(Live Volume,同步 - 高可用性) • Live Volume, Synchronous — High Consistency(Live Volume,同步 - 高一致性) 8. 指定复制设置和目标位置。 9. 单击 Next(下一步)。 此时会打开 Live Volume Settings(Live Volume 设置)页面。 10.
步骤 1. 选择被复制的数据存储。 2. 选择 Actions(操作) → Dell Storage Actions(Dell 存储操作) → 复制/活动卷 → Edit Settings/ Convert(编辑设置/转换)。 Modify Replications/Live Volume(修改复制/活动卷)向导将启动。 3. 从复制列表中选择一个要修改的复制。 4. 单击 Next(下一步)。 此时会打开 Replication Options(复制选项)页面。 5. 要更改复制类型,请从下拉菜单中选择类型。 注: 如果选择将复制类型从 Live Volume 更改为复制副本,则会显示一个警告对话框。您必须选中 复选框以确认要进行转换,然后单击 OK(确定)。 6. 根据需要修改其他复制设置。 7. 如果未选择从 Live Volume 转换为复制副本,则会显示 Live Volumes Settings(Live Volume 设置)页 面。 8. 单击 Next(下一步)。 此时会打开 Live Volumes Options(Live Volume 选项)页面。 9.
步骤 1. 选择具有被复制的 RDM 的虚拟机。 2. 选择 Actions(操作) → Dell Storage Actions(Dell 存储操作) → 复制/活动卷 → Edit Settings/ Convert(编辑设置/转换)。 Modify Replication/Live Volume(修改复制/活动卷)向导将启动。 3. 选择要修改的 Live Volume。 4. 单击 Next(下一步)。 此时会打开 Replication Options(复制选项)页面。 5. 要更改复制类型,请从下拉菜单中选择一种类型。 注: 如果选择将复制类型从复制更改为 Live Volume,则会显示一个警告对话框。您必须选中该复选 框以确认要进行转换,然后单击 OK(确定)。 6. 根据需要修改其他复制设置。 7. 单击 Next(下一步)。如果未选择从 Live Volume 转换为复制,则会显示 Live Volumes Settings(Live Volume 设置)页面。设置 Live Volume 的值。 8.
5. 指定复制的移除选项。 6. 单击 Next(下一步)。 此时会打开 Ready to Complete(已准备好完成)页面。 7. 单击 Finish(完成)。 相关链接 复制删除选项 移除 Live Volume RDM 复制 移除不再需要的 Live Volume RDM 复制。 前提条件 必须存在 RDM 复制。 步骤 1. 选择要移除其复制的 RDM 所在的虚拟机。 2. 选择 Actions(操作) → All Dell Storage Actions(所有 Dell 存储操作) → 复制/活动卷 → Remove (移除)。 Remove Replication/Live Volume(移除复制/活动卷)向导将启动。 3. 选择要移除的复制。 4. 单击 Next(下一步)。 此时会打开 Remove Options(移除选项)页面。 5. 指定复制的移除选项。 6. 单击 Next(下一步)。 此时会打开 Ready to Complete(已准备好完成)页面。 7.
• VMware 服务器操作系统 • 为入站流量启用的端口 3033 步骤 1. 在您已为其配置具有高可用性的 Live Volume 同步复制的资源清册中选择一个数据存储或 RDM。 vSphere Web Client 插件向导加载所选数据存储的信息。 2. 单击监测选项卡。 3. 从菜单栏中选择 Dell Storage(Dell 存储)。 4. 单击复制/活动卷 选项卡。 数据存储和关联的卷显示在表中。将显示最近为此数据存储选择的选项卡,否则默认选择常规选项卡。 vSphere Web Client 插件显示已配置复制的详细信息。在 Details(详细信息)下,Failover Automatically(自动故障转移)字段指示 No(否)。 5. 选择 Actions(操作) → All Dell Storage Actions(所有 Dell 存储操作) → 复制/活动卷 → Edit Settings/Convert(编辑设置/转换)。 Modify Replication/Live Volume(修改复制/活动卷)向导将启动。 6.
图 14: 已启用自动故障转移的 Live Volume 52 使用 Dell 存储
3 操作虚拟机 Dell Storage vSphere Web Client 插件提供了配置虚拟机以及从 Replay 恢复虚拟机数据的功能。 可以使用以下选项配置虚拟机: • 创建虚拟机 • 通过创建虚拟机的精简副本来克隆虚拟机 创建虚拟机 vSphere Web Client 插件允许使用 Dell 存储来配置(创建)虚拟机。 注: 如果从虚拟机模板启动 Provision Virtual Machine(配置虚拟机)向导并且该模板受 VMFS 数据存储 支持,则 Clone VM(克隆虚拟机)选项被禁用,只有 Create VM(创建虚拟机)选项保持启用。只有 虚拟机或基于 NFS 数据存储的模板支持克隆功能。 将虚拟机部署到现有 VMFS 或 NFS 数据存储 使用 Provision Virtual Machines(配置虚拟机)向导在现有 VMFS 或 NFS 数据存储上创建一个或多个虚拟 机。 前提条件 此选项假定您已创建了一个虚拟机模板,并通过该模板部署新虚拟机。有关创建或更新虚拟机模板的信息,请 参阅有关虚拟机模板的 vSphere 帮助主题。 步骤 1.
7. 如果需要,指定从中运行虚拟机的资源池,然后单击 Next(下一步)。 8. 选择 Lookup for Existing Datastore(查找现有数据存储),然后单击 Next(下一步)。 此时会打开 Datastore Lookup(数据存储查找)页面。 9. 选择用于存储虚拟机文件的数据存储,然后单击 Next(下一步)。 10. 自定义每个虚拟机的设置,单击 Update(更新),然后单击 Next(下一步)。 此时会打开 Ready to Complete(已准备好完成)页面。 11.
此时会打开 Storage Center 页面。 a. 选择用于创建卷的 Storage Center,然后单击 Next(下一步)。 此时会打开 Create Storage Volume(创建存储卷)页面。 b. 输入新卷的名称和大小,再选择卷文件夹,然后单击 Next(下一步)。 注: 以下步骤可能随 Enterprise Manager 中的 Storage Center 用户首选项设置而发生变化。 c. d. e. f. g. 如果需要,选择用于创建卷的页面池。 如果需要,为卷选择存储配置文件,然后单击 Next(下一步)。 如果需要,为卷选择 Replay 配置文件,然后单击 Next(下一步)。 指定用于映射卷的 LUN,然后单击 Next(下一步)。 如果需要,选择文件系统版本,然后单击 Next(下一步)。 如果文件系统版本是 VMFS-3,则为文件系统选择最大文件大小和块大小。 h. 单击 Next(下一步)。 i.
步骤 1. 选择可以作为虚拟机父级的对象: 2. • 数据中心 • 主机 • 群集 选择 Actions(操作) → All Dell Storage Actions(所有 Dell 存储操作) → Provision Virtual Machines(配置虚拟机)。 Provision Virtual Machines(配置虚拟机)向导将启动。 3. 选择 Create Virtual Machine(创建虚拟机)。 如果在步骤 1 中选择了一个数据中心,则会打开 Host/Cluster(主机/群集)页面。如果在步骤 1 中选择 了一个主机或群集,则会打开 Template Selection(模板选择)页面。 4. 如果打开 Host/Cluster(主机/群集)页面,则选择要在其上运行虚拟机的主机或群集,然后单击 Next (下一步)。 此时会打开 Template Selection(模板选择)页面。 5. 从列表中选择一个虚拟机模板,然后单击 Next(下一步)。 此时会打开 Name and Location(名称和位置)页面。 6.
通过创建新 NFS 导出创建虚拟机 使用 Provision Virtual Machines(配置虚拟机)向导将一个或多个虚拟机部署到 NFS 数据存储。 前提条件 此选项假定您已创建了一个虚拟机模板,并通过该模板部署新虚拟机。有关创建或更新虚拟机模板的信息,请 参阅有关虚拟机模板的 vSphere 帮助主题。 注: 部署虚拟机时显示的选项会根据 Enterprise Manager 用户在 vSphere Web Client 插件中定义的卷首 选项而有所不同。 步骤 1. 选择可以作为虚拟机父级的对象: 2. • 数据中心 • 主机 • 群集 选择 Actions(操作) → All Dell Storage Actions(所有 Dell 存储操作) → Provision Virtual Machines(配置虚拟机)。 Provision Virtual Machines(配置虚拟机)向导将启动。 3.
相关链接 使用现有 NFS 导出添加 NFS 数据存储 自定义 数据存储选项 数据存储属性 名称和位置 NFS 导出 模板选择 卷 克隆虚拟机 使用 Provision Virtual Machine(配置虚拟机)向导可以克隆虚拟机,以创建现有虚拟机的精简副本。 前提条件 注: 此选项仅适用于 NFS 数据存储上的虚拟机或虚拟机模板。 只有虚拟机模板或处于关机状态的虚拟机支持克隆虚拟机操作。 步骤 1. 2. 选择可以作为虚拟机父级的对象: • 数据中心 • 主机 • 群集 选择 Actions(操作) → All Dell Storage Actions(所有 Dell 存储操作) → Provision Virtual Machines(配置虚拟机)。 Provision Virtual Machines(配置虚拟机)向导将启动。 3.
注: 使用 vSphere 中的 Customization Specification Manager 创建和管理自定义规格。 10. 选择要在其上部署虚拟机克隆的目标主机或群集,然后单击 Next(下一步)。 此时会打开 Datastore(数据存储)页面。 11. 选择用于存储虚拟机文件的数据存储,然后单击 Next(下一步)。 此时会打开 Ready to Complete(已准备好完成)页面。 12. 单击 Finish(完成)。 相关链接 主机/群集 名称和位置 为克隆虚拟机选择数据存储 模板选择 - 克隆虚拟机 克隆虚拟机自定义 从 Replay 恢复虚拟机 使用 vSphere Web Client 插件可以从 VMFS 数据存储的 Replay 恢复虚拟机数据。 从 Replay 恢复虚拟机数据 使用 Storage Center Replay Recovery(Storage Center Replay 恢复)向导从 VMFS 数据存储的 Replay 恢复 虚拟机数据。 前提条件 此选项假定该虚拟机至少存在一个 Replay。 步骤 1. 选择虚拟机。 2.
查看 Dell 存储信息 4 使用 Dell Storage vSphere Web Client 插件可以显示关于 Dell 存储的信息,包括 HBA 与 Storage Center 的 连接、数据存储信息以及性能图表。 查看主机的 Dell 设置 使用 Dell Settings(“Dell 设置”)选项卡显示关于 ESXi 主机与 Storage Center 之间的 Fibre Channel(光纤 信道)和 iSCSI 连接的信息。可通过 ESXi 主机的 Manage(管理)选项卡访问 Dell Storage Settings(Dell 存储设置)页面。 图 15: Dell 主机的存储设置 左侧窗格显示 ESXi 主机上的 Fibre Channel(光纤信道)和 iSCSI 主机总线适配器 (HBA) 以及 Storage Center 连接。Storage Center 图标指示该 Storage Center 处于已连接、部分连接、未连接或准备好配置状 态。 60 查看 Dell 存储信息
连接图例 图标 标签 说明 Connected FC(已连接的 FC) HBA 和 Storage Center 之间存在 Fibre Channel 连接。 Disconnected FC(断开连 接的 FC) HBA 和 Storage Center 之间不存在 Fibre Channel 连接。 Connected iSCSI(已连接 的 iSCSI) HBA 和 Storage Center 之间存在 iSCSI 连接。 Disconnected iSCSI(断开 连接的 iSCSI) HBA 和 Storage Center 之间不存在 iSCSI 连接。 Connected Storage Center (已连接的 Storage Center) 该 Storage Center 已连接至 ESXi 主机。 Partially Connected Storage Center(部分连接 的 Storage Center) 该 Storage Center 部分连接至 ESXi 主机。 Not Connected Storage Center(未连接的 Storage
• 设置 ESXi 主机防火墙规则以启用 iSCSI 连接 • 用 Storage Center IP (IQN) 目标配置 iSCSI 软件启动器(这些目标被添加到 ESXi 主机上的 iSCSI 静态 目标列表中) • 在 Storage Center 上创建服务器定义(如果不存在),并创建与此服务器关联的相应 HBA 定义 注: 如果该主机所在的群集不存在于 Storage Center 上,则在该 Storage Center 上创建群集定 义。 适配器详细信息 标签 说明 Model(型号) 适配器的型号名称 WWN Fibre Channel 的全球通用名称 (WWN) 和 iSCSI 的 iSCSI 限定名称 (IQN) Device(设备) 适配器的名称 Type(类型) 存储适配器类型(FC 或 iSCSI) Node Name(节点名称) Fibre Channel 节点名称 Alias(别名) iSCSI 别名 Status(状态) 适配器的状态 存储详细信息 标签 说明 Storage Center Storage Center 的名称
图 16: Storage Center 的常规选项卡信息 表. 1: 常规选项卡中的信息 介绍了常规选项卡中的信息。 表.
标签 说明 Write Cache Enabled(写入高 指示是否为卷启用了写入高速缓存 速缓存已启用) Read Cache Enabled(读取高 速缓存已启用) 指示是否为卷启用了读取高速缓存 Read Cache(读取高速缓存) 表示是否启用读取高速缓存(Yes [是] 或 No [否]) Date Created(创建日期) 创建卷的日期和时间 Created By(创建者) 创建卷的用户 Date Updated(更新日期) 上次更新卷的日期 Updated By(更新者) 上次更新卷的用户 Notes(注释) 卷的描述性注释 FluidFS 常规选项卡信息 图 17: FluidFS 群集的常规选项卡中的信息显示了 FluidFS 群集的常规选项卡上的信息示例。 图 17: FluidFS 群集的常规选项卡中的信息 表.
表. 2: FluidFS 群集的常规选项卡中的信息 标签 说明 FluidFS Cluster Name(FluidFS 群集名 称) 群集的名称 FluidFS Cluters IP Address(FluidFS 群集 IP 地址) 群集的 IP 地址 Storage Center Servers(Storage Center 关于所有已连接 Storage Center 的信息 服务器) 使用情况统计信息选项卡 使用情况统计信息选项卡显示关于所选 Dell 卷的使用情况信息。 Storage Center 统计信息 图 18: Storage Center 统计信息显示了 Storage Center 的使用情况统计信息示例。 图 18: Storage Center 统计信息 表.
表. 3: Storage Center 的使用情况统计信息 标签 说明 Total volume space consumed(消耗的总卷空 间) 卷上已使用的总空间量 Savings vs.
表.
图 20: Storage Center 的连接信息 表. 5: 连接信息选项卡中的信息说明了 Connectivity(连接)选项卡中的信息。 表.
图 21: FluidFS 群集的连接信息 表. 6: FluidFS 群集的连接信息说明了 FluidFS 群集的连接信息。 表.
图 22: 卷 Replay 选项卡 表. 7: 卷 Replay 选项卡中的信息介绍了 卷 Replay 选项卡中的信息。 表.
图 23: 复制/活动卷 选项卡 表. 8: 复制/活动卷 选项卡中的信息介绍了复制/活动卷 选项卡中的信息。 表.
标签 说明 Source volume(源卷) 源 Storage Center 上的卷的名称。 Destination volume(目标 卷) 目标 Storage Center 上的卷的名称 Source Volume Size(源卷大 小) 源 Storage Center 上的卷的容量 Destination Volume Size(目 标卷大小) 目标 Storage Center 上的卷的容量 Replicate Active Replay(复制 指示 Replicate Active Replay(复制活动 Replay)选项是否启用 活动重播) Deduplicate(重复数据消除) 指示 Deduplication(重复数据消除)选项是否启用 Replicate to Lowest Tier(复 制到最低层) 复制到最低层的首选项(Yes [是] 或 No [否]) QoS Definition(QoS 定义) 复制的 QoS 定义的名称 查看 Dell 图表 使用 Dell 图表显示 ESXi 主机的 Storage Center 性能信息。通过主机、群集、数
图 24: Storage Center 的 KB/sec 图表和 IO/sec 图表的示例 图 25: Storage Center 的延迟图表示例 显示了 Storage Center 的延迟图表示例。 查看 Dell 存储信息 73
图 25: Storage Center 的延迟图表示例 对于连接到 ESXi 主机的每个 Storage Center,标题都包含表. 9: Storage Center 的标题信息中所述的信息。 表. 9: Storage Center 的标题信息 标签 说明 Parent(父级) Storage Center 的名称 Name(名称) VMware 对象的名称 Type(类型) 对象的类型 图表 表. 10: 图表显示了 Storage Center 性能信息介绍了图表中显示的 Storage Center 性能数据的类型。 表.
标签 说明 IO Size Chart(IO 大小图表) Average IO Size(平均 IO 大小):以千字节表示的平均 I/O 操作大小 Latency (ms) Chart(延迟 [毫 秒] 图表) Read Latency(读取延迟)- 以毫秒表示的读取操作延迟 Write Latency(写入延迟)- 以毫秒表示的写入操作延迟 Transfer Latency(传输延迟)- 以毫秒表示的数据传输操作延迟 查看 Dell 存储信息 75
5 向导页面参考 以下各节介绍 Dell Storage vSphere Web Client 插件的向导页面。 添加存储 (Storage Center) 使用 Add Storage(添加存储)页面选择添加存储的方式。 • Create New Dell Volume(创建新 Dell 卷)- 选择此选项以创建新 Dell 卷进行映射。 • Map Existing Dell Volume(映射现有 Dell 卷)- 选择此选项以选择现有 Dell 卷进行映射。 76 向导页面参考
添加存储 (NFS) 使用 Add Storage(添加存储)页面选择为 NFS 数据存储添加存储的方式。 • • Create New NFS Datastore(创建新 NFS 数据存储)- 选择此选项以创建新 NFS 数据存储进行映射。 Map an Existing NFS Export(映射现有 NFS 导出)- 选择此选项以选择现有 NFS 数据存储进行映射。 兼容模式 使用 Compatibility Mode(兼容模式)页面选择虚拟磁盘的访问模式。 • Physical(物理)- 选择此选项以允许来宾操作系统直接访问硬件。虚拟机的 VMware 快照将不包括此磁 盘。 向导页面参考 77
注: vSphere 5 支持 64 TB pRDM,并且单个文件的大小可达 64 TB。 • Virtual(虚拟)- 选择此选项为来宾操作系统提供对磁盘的虚拟访问,因此可以使用 VMware 快照及其他 高级 VMware 功能。但是请注意,仅提供虚拟访问可能导致与某些 Dell 应用程序不兼容。 创建多个数据存储 使用 Create Multiple Datastores(创建多个数据存储)页面指定要创建的数据存储的数目和名称。 • Number of Datastores(数据存储的数目)- 输入要创建的数据存储的数目。 • Start numbering at(起始编号)- 输入对卷名称和数据存储名称进行编号的起始数字。 • Edit(编辑)- 选择一个数据存储,然后单击 Edit(编辑)以显示 Datastore Properties(数据存储属 性)对话框,在此可以更改卷名称、数据存储名称和数据存储大小。 78 向导页面参考
自定义 使用 Customization(自定义)页面自定义虚拟机的设置。 • Customize virtual machine settings(自定义虚拟机设置)- 输入要指定其自定义设置的虚拟机。 • Name(名称)- 输入虚拟机的名称。 • CPU - 选择虚拟机的 CPU 数目。 • Memory(内存)- 选择虚拟机的内存容量。 • Network(网络)- 选择此虚拟机连接到的虚拟网络。 克隆虚拟机自定义 使用 Customization(自定义)页面自定义克隆虚拟机的设置。 向导页面参考 79
• Use Customization Spec(使用自定义规格)- 选中此复选框以从预定义的自定义规格中进行选择。 数据存储查找 使用 Datastore Lookup(数据存储查找)页面选择用于存储虚拟机文件的数据存储。 数据存储名称 使用 Datastore Name(数据存储名称)页面指定被恢复的数据存储的名称和位置。 • Datastore Name(数据存储名称)- 输入所恢复数据存储的名称。 • Use original datastore name(使用原始数据存储名称)- 选中此复选框以使用原始数据存储名称和 Replay 时间作为所恢复数据存储的名称。 80 向导页面参考
• Location(位置)- 选择所恢复数据存储的位置。 数据存储选项 配置虚拟机时,使用 Datastore Options(数据存储选项)页面选择用于承载虚拟机的数据存储。 • • • Lookup for Existing Datastore(查找现有数据存储)- 选择此选项以使用现有数据存储承载虚拟机。 Create VMFS Datastore(创建 VMFS 数据存储)- 选择此选项以创建新数据存储来承载虚拟机。创建新 数据存储包括创建新 Dell 卷和配置新数据存储。 Create NFS Datastore(创建 NFS 数据存储)- 选择此选项以创建新 NFS 数据存储来承载虚拟机。 数据存储属性 使用 Datastore Properties(数据存储属性)页面指定数据存储的属性。 向导页面参考 81
• Datastore name(数据存储名称)- 输入数据存储的名称。 • Maximum file size(最大文件大小)- 如果文件系统版本是 VMFS-3,则选择数据存储的文件系统块大小 选项。块大小影响新数据存储可以支持的最大文件大小。 注: VMFS-5 使用统一的 1 MB 文件块大小。因此,如果文件系统版本是 VMFS-5,则不会显示 Maximum file size(最大文件大小)选项。 • Inventory Location(资源清册位置)- 选择数据存储的位置。 为克隆虚拟机选择数据存储 克隆虚拟机时,使用 Datastores(数据存储)页面选择用于存储虚拟机文件的数据存储。 82 向导页面参考
设备配置 使用 Device Configuration(设备配置)页面选择添加原始设备的选项。 • Add New Raw Device Mapping to Virtual Machine(为虚拟机添加新原始设备映射)- 选择此选项以创 建新卷,并作为 RDM 映射至虚拟机。 • Virtual Device Node(虚拟设备节点)- 如果选择了 Add New Raw Device Mapping to Virtual Machine (为虚拟机添加新原始设备映射)选项,则为原始设备映射选择节点。 • Map Existing Raw Device Mapping to Hosts and Clusters(将现有原始设备映射映射至主机和群集)选择此选项以将此虚拟机上的现有原始设备映射,映射至其他主机和/或群集。 向导页面参考 83
扩展 RDM 大小 使用 Expansion Size(扩展大小)页面可以为现有卷的 RDM 指定新的扩展大小。 • Original Size(原始大小)- 显示卷的当前大小。 • Extend to(扩展至)- 为卷输入调整大小后的新值。 • Storage Size Type(存储大小类型)- 选择度量单位(GB 或 TB)。 文件系统版本 使用 File System Version(文件系统版本)页面指定数据存储的 VMFS 版本。 84 向导页面参考
• VMFS-5 - 选择此选项以启用额外功能,例如支持大于 2 TB 的数据存储。 • VMFS-3 - 如果由传统(低于 5.
主机和群集 使用 Hosts and Clusters(主机和群集)页面选择要向其添加数据存储的一个或多个主机或群集。 为 Replay 恢复选择主机 使用 Host Selection(主机选择)页面选择在其上公开恢复的数据的主机或群集。 86 向导页面参考
活动卷 使用 Live Volumes(活动卷) 页面指定 Live Volume 复制的值。 • Secondary QoS Definition(次要 QoS 定义)- 选择 Live Volume 的次要服务质量 (QoS) 定义。有关创 建或修改 QoS 定义的信息,请参阅 Enterprise Manager Administrator’s Guide(Enterprise Manager 管 理员指南)。 • Automatically Swap Primary Storage Center(自动交换主要 Storage Center)- 选中此复选框以设置 自动交换的值,然后单击 Advanced(高级)。 • Min. Data Written to Secondary before Swap(交换之前写入次要的最小数据量)- 指定可以交换角色之 前必须写入次要卷的最小数据量。 • Min. % of I/O on Secondary before Swap(交换之前次要上的最小 I/O 百分比)- 指定可以交换角色之 前必须发生的最小 I/O 百分比。 • Min.
映射 LUN 使用 Mapping LUN(映射 LUN)页面选择要将 Dell 卷映射到的 LUN。创建多个数据存储时,从指定的 LUN 开始分配 LUN,并使用可用 LUN 递增。 名称和位置 使用 Name and Location(名称和位置)页面指定虚拟机的名称和位置。 • Base Name(基本名称)- 输入要创建的虚拟机的基本名称。 • Number of VMs to Create(要创建的虚拟机数目)- 指定要创建的虚拟机数目。 88 向导页面参考
• Inventory Location(资源清册位置)- 选择虚拟机的资源清册位置。 NFS 导出 使用 NFS Export(NFS 导出)页面指定 NAS 数据存储的属性。 • Create a New Volume(创建新卷)- 选择此选项以创建新 NAS 卷。 • Use Existing Volume(使用现有卷)- 选择此选项时,将显示现有 NAS 卷。从列表中选择一个卷。 • Name(名称)– 在数据存储配置向导的上一步中输入的 NAS 数据存储名称。 • Size(大小)- 键入数字并从下拉菜单中选择度量单位。 • Create New NAS Volume Folder(创建新 NAS 卷文件夹)- 键入新卷文件夹的名称。默认情况下,此字 段填入在上一步中输入的数据存储名称。 • Use Existing NAS Volume Folder(使用现有 NAS 卷文件夹)- 选择此选项时,将显示现有 NAS 卷文件 夹。从列表中选择一个文件夹。 • NFS Folder Path(NFS 文件夹路径)- 根据 NFS 数据存储名称预先选择了默认文件夹路径。您
协议选择 使用 Protocol Selection(协议选择)页面选择 Dell 卷的连接协议。 • • • Fibre Channel(光纤信道)- 选择此选项以限制仅映射至 Fibre Channel(光纤信道)路径。 iSCSI - 选择此选项以限制仅映射至 iSCSI 路径。 Any available(任意可用)- 选择此选项以使用主机与存储之间的任意可用路径。 Replay 配置文件 使用 Replay Profile(Replay 配置文件)页面选择要应用至 Dell 卷的一个或多个 Replay 配置文件。有关 Replay 配置文件的信息,请参阅 Dell 存储简介。 90 向导页面参考
• Select Replay Profiles(选择 Replay 配置文件)- 选择要与该卷关联的一个或多个 Replay 配置文件。 注: 要取消选择某个 Replay 配置文件,请按住 Ctrl 键并单击所选 Replay 配置文件。 • Schedule(计划)- 显示所选 Replay 配置文件的 Replay 计划。 Replay 属性 使用 Replay Properties(Replay 属性)页面指定 Replay 的属性。 • Expiration(过期)- 指定您希望 Replay 过期的时间。 • Never Expire(永不过期)- 选中此复选框以禁止 Replay 自动过期。必须手动使 Replay 过期。 • Description(说明)– 输入 Replay 的说明。 向导页面参考 91
Replay 选择 使用 Select Replays(选择 Replay)页面选择从其恢复数据的 Replays 或选择要删除的 Replays。 • 选择用于恢复数据的一个或多个 Replay。要恢复数据,请为要恢复的每个卷选择一个 Replay。如果有多 个 RDM 映射到虚拟机,则必须为要恢复的每个卷选择一个 Replay。 • 选择要删除(过期)的一个或多个 Replays。 复制删除选项 使用 Delete Options(删除选项)页面选择移除复制目标卷和还原点的选项。 92 向导页面参考
• Recycle Destination Volume(回收目标卷)- 如果要将目标卷移到目标 Storage Center 上的回收站中, 则选中此复选框。 • Delete Destination Volume(删除目标卷)- 如果不想保留回收站中的已删除目标卷,则选中此复选框 (不推荐)。 小心: 如果删除目标卷,则无法在目标 Storage Center 上恢复该卷。该卷将被永久删除。 • Delete Restore Point(删除还原点)- 如果要删除复制的还原点,则选中此复选框。 复制修改选项 使用 Modification Options(修改选项)页面选择复制数据存储的选项。 • Replicate Active Replay(复制活动 Replay)- 选中此复选框以复制来自卷的活动 Replay 区域的所有写 入。请注意,复制活动 Replay 可能需要大量带宽。 • Deduplication(重复数据消除)- 选中此复选框以仅复制源卷上 Replay 历史记录的更改部分,而不是每 个 Replay 中捕获的所有数据。 • QoS Definition(Qo
复制选项 使用 Replication Options(复制选项)页面选择复制数据存储的选项。 • Replication Type(复制类型)- 选择以下类型之一: – Replication, Asynchronous(复制,异步) – Replication, Synchronous — High Availability(复制,同步 - 高可用性) – Replication, Synchronous — High Consistency(复制,同步 - 高一致性) – Live Volume, Asynchronous(Live Volume,异步) – Live Volume, Synchronous — High Availability(Live Volume,同步 - 高可用性) – Live Volume, Synchronous — High Consistency(Live Volume,同步 - 高一致性) 有关这些复制类型的信息,请参阅 Enterprise Manager Administrator’s Guide(Enterprise Manager
调整数据存储的存储大小 使用 Resize Datastore Storage(调整数据存储的存储大小)页面可以为现有卷指定新的扩展大小。 • Original Size(原始大小)- 显示卷的当前大小。 • Resize to(大小调整为)- 为卷输入调整大小后的新值。 • Storage Size Type(存储大小类型)- 选择度量单位(GB 或 TB)。 向导页面参考 95
资源池 使用 Resource Pool(资源池)页面选择从中运行虚拟机的资源池。 选择原始设备 使用 Select Raw Device(选择原始设备)页面选择要复制或移除的原始设备。 96 向导页面参考
选择 RDM 使用 Select RDM(选择 RDM)页面选择要扩展的 RDM。 选择复制 使用 Select Replications(选择复制)页面来选择要修改或移除的一个或多个复制。 向导页面参考 97
选择卷 使用 Select Volume(选择卷)页面可以搜索并选择要映射为存储的现有 Dell 卷。所选卷必须已格式化为 VMFS 数据存储。 快照选项 使用 Snapshot Options(快照选项)页面摄取临时 VMware 快照并指定快照选项。 • Create Temporary VMware Snapshot(创建临时 VMware 快照)- 选中此复选框以在创建 Replay 之前 创建临时 VMware 快照。 • Include memory(包括内存)- 选中此复选框以在快照中捕获虚拟机内存。 98 向导页面参考
• Quiesce file system (if available)(静止文件系统 [如果可用])- 选中此复选框以在创建快照之前暂停来宾 操作系统中正在运行的进程。暂停进程可确保在创建快照时文件系统处于已知、一致的状态。(请注意, 此选项要求安装 VMware 工具。)请参阅 VMware 帮助以了解有关 VMware 快照选项的信息。 Storage Center 使用 Storage Center 页面选择在其上添加存储的 Storage Center。 • Select Storage Center(选择 Storage Center)- 选择在其上添加存储的 Storage Center。 • Select Active Controller(选择活动控制器)- 选中 Auto-Select(自动选择)复选框以允许 Storage Center 通过自动选择在其上添加存储的控制器来实现系统负载平衡。清除 Auto-Select(自动选择)复选 框以选择特定控制器来访问存储。 注: 如果 Enterprise Manager 中的 Storage Center 用户仅拥有卷管理员权限,
复制的 Storage Center 使用 Storage Center 页面选择复制的目标 Storage Center。 存储配置文件 使用 Storage Profile(存储配置文件)页面为 Dell 卷选择存储配置文件。有关存储配置文件的信息,请参阅 Dell 存储简介。 注: 只有在 Enterprise Manager 中为 Storage Center 用户设置了 Allow Storage Profile Selection(允 许存储配置文件选择)用户首选项设置时,才会打开 Storage Profile(存储配置文件)页面。 100 向导页面参考
• Recommended (All Tiers)(推荐 [所有层])- 为大多数卷选择此选项。推荐的配置文件允许系统根据数据 类型和使用情况,在所有存储层之间自动分级管理数据。 • High Priority (Tier 1)(高优先级 [第 1 层])- 选择此选项以强制卷数据保留在第 1 层存储中。 • Medium Priority (Tier 2)(中优先级 [第 2 层])- 选择此选项以强制卷数据保留在第 2 层存储中。 • Low Priority (Tier 3)(低优先级 [第 3 层])- 选择此选项以强制卷数据保留在第 3 层存储中。 • Custom(自定义)- 如果可用,选择适合卷数据的自定义存储配置文件。 模板选择 使用 Template Selection(模板选择)页面选择用于创建新虚拟机的虚拟机模板。 • Select Virtual Machine template(选择虚拟机模板)- 从可用模板下拉列表中选择虚拟机模板。 • Details(详细信息)- 显示当前所选虚拟机模板的详细信息。 向导页面参考 101
为克隆虚拟机选择模板 使用 Template Selection(模板选择)页面选择用于克隆虚拟机的虚拟机模板。 • Select Virtual Machine template(选择虚拟机模板)- 从可用模板下拉列表中选择虚拟机模板。 • Select Virtual Machine(选择虚拟机)- 从可用虚拟机下拉列表中选择虚拟机。 • Details(详细信息)- 显示当前所选虚拟机模板的详细信息。 卷 使用 Volume(卷)页面指定新 Dell 卷的属性。 102 向导页面参考
• Volume Name(卷名称)- 输入卷的名称。 • Size(大小)- 指定卷大小。 • Volume Folder(卷文件夹)- 选择卷的文件夹位置。 卷保留 使用 Volume Retention(卷保留)页面指定移除卷或原始设备的保留选项。 • Unmap volume(取消映射卷)- 选择此选项以从主机取消卷的映射。取消映射的卷保留在 Storage Center 上。 • Place in Recycle Bin(放入回收站)- 选择此选项以从主机取消卷的映射,并将卷移至回收站。如果需 要,以后可以从回收站恢复该卷(除非回收站被清空)。要从回收站恢复卷,请使用 Storage Center System Manager 或 Enterprise Manager。 • Permanently delete(永久删除)- 选择此选项以取消映射卷并永久删除该卷。永久删除的卷将无法恢 复。 向导页面参考 103
虚拟机选择 如果某个 RDM 卷与虚拟机关联,则使用 Recovery VM Selection(恢复虚拟机选择)页面选择要用于访问已 恢复的数据的虚拟机。 104 向导页面参考