Disaster Recovery with Dell PS Series SANs and VMware vSphere Site Recovery Manager VMware vSphere SRM version 6.
Revisions Date Description September 2011 Initial release June 2017 Updated to reflect industry changes Acknowledgements This paper was produced by David Glynn on the Dell EMC Storage Engineering team: The information in this publication is provided “as is.” Dell Inc. makes no representations or warranties of any kind with respect to the information in this publication, and specifically disclaims implied warranties of merchantability or fitness for a particular purpose.
Table of contents Revisions.............................................................................................................................................................................2 Acknowledgements .............................................................................................................................................................2 Executive summary.....................................................................................................................
Executive summary The virtual datacenter introduces new challenges and techniques for disaster recovery. This paper details the installation and configuration of Dell™ PS Series storage with VMware® vCenter Site Recovery Manager to help make disaster recovery an automated and manageable part of your virtual environment. Data Protection and Disaster Recovery (DP/DR) is foremost in the minds of datacenter administrators.
1 Introduction Historically, disaster recovery (DR) solutions have been difficult and costly to implement. DR has been a pain point for many IT administrators, having to maintain consistency across duplicate hardware in various locations, documenting and maintaining detailed run books, reacting to changes in the environment, and scheduling testing that is classically disruptive to the production environment.
2 VMware SRM terminology VMware SRM has unique terms when discussing DR planning and configuration. Because both SRM and the PS Series storage support bi-directional replication and configuration, it is not sufficient to use the terms production site and DR site. For example, consider a company with a virtual environment in New York running Virtual Machines (VMs) in production that is replicating to Chicago as a DR site.
3 Overview and prerequisites Site Recovery Manager requires VMware vCenter server to be installed at both the protected site and the recovery site. Each site will have its own VMware vSphere environment and datacenters. The SRM configuration is mirrored to the recovery site SRM server so that if the primary site goes down, everything that the recovery site needs to resume operations at the primary site is local. VMware SRM does not automate or configure SAN storage replication between sites.
4 Configuring array based replication VMware Site Recovery Manager is deployed with two separate PS Series groups that have asynchronous replication enabled so that the Virtual Machines that reside on the datastores at the protected site are replicated to the recovery site.
4. On the next screen there are two password fields. The first field is the inbound password. This is the password that the protected group will give to the recovery group when establishing a connection for replication. The second field is the outbound obtained. This is the password that the recovery group expects to receive from the partner. These passwords do not need to be the same, and are set by individual group administrators. Enter in both passwords and click Next. 5.
This creates the partnership between the protected site and the recovery site. 7. Follow the same steps to configure the partnership between the recovery site and the protected site. Note: When configuring the dedicated reserve space for replication, take into account the number of volumes being replicated and the total available space. For example, four 200GB volumes with data on them being replicated with 200% reserve space plus a little bigger will mean 1TB of delegated space on the recovery site.
replica volume but should be configured based on the expected amount of change and the number of replicas you wish to keep. The third section will set aside a percentage of this volume in the local replica reserve to keep track of changes made during the replica process. This is also where Fast Failback Snapshots are stored in the event you are failing back from a replica set. This can either come from local replica reserve or free space by selecting Allow temporary use of free pool space.
6. View the summary and click Finish to complete the replication configuration. Upon completion, you can start the volume replica process immediately. This will begin replicating the base volume and creating a replica set on the partner array. It can either be performed at this stage or by the volume replication schedule that is configured in the next step. Optionally, you can utilize the Manual Transfer Utility (MTU) to perform the initial replica.
4. Configure the replication schedule that meets the bandwidth and recovery needs for the VMs on that Datastore volume and click Next. For more information on Replication considerations, see the PS Series Administration Guide and Dell EqualLogic Auto-Replication: Best Practices and Sizing Guide. 5. Verify the summary of the schedule and click Finish. Follow the same procedure on all the Datastore volumes that host VMs that are to be protected in SRM.
5 Installation and configuration of VMware SRM Before VMware vCenter Site Recovery Manager can be installed, both the protected site and recovery site must have their own instance of VMware vCenter Server installed and configured. The server where SRM is installed must be able to communicate with the remote SRM server as well as have connectivity to the local SAN. For more information consult the VMware vSphere System Administrator Documentation.
4. Review and agree to the terms of the license agreements. Click Next. 5. The Dell SRA can optionally coordinate with the Dell Virtual Storage Manager (VSM) to create VM Image Consistency replicas. Note that this feature requires manual steps when preforming SRM reprotect operations. Review the VSM documentation for more information on this feature.
6. Verify the target installation directory and click Install. 7. When the install is complete, select Finish. The storage adapter needs to be installed on both servers running SRM.
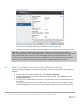
5.2 Step 2: Configure SRM connection Just as the PS Series SAN needs to have a partnership established for replication, vCenter SRM needs to have a partnership established between the protected site and the recovery site. 1. To get to the SRM configuration screen, select Home. Then under Inventories click Site Recovery. 2. From the Sites section click Pair Site. Enter the hostname or IP address of the Platform Services Controller at the recovery site.
5.3 Step 3: Configure array managers Once the SRM partnership between the two sites is established and the Array Manager needs to be configured. 1. From the SRM section of the vSphere client, select one of the sites. Click on the Monitor tab and then select SRAs. 2. The previously installed SRA will be displayed here. It may be necessary to do a manual rescan on first use. Click Rescan SRAs to discover the SRA.
6. Select the Dell EqualLogic PS Series SRA type and click Next. 7. On the Configure array manager page enter a Display Name that is descriptive and makes the array easy to identify, for example the PS Series group name can be used. 8. Under Managed Group, fill in the Group IP Address or Hostname of the local PS array and the Group Manager credentials. Under Partner Group, in the Partner Name field, enter in the Group name of the replication partner (case sensitive), as well as the credentials. Click Next.
9. On the Configure paired array manager page, repeat the previous two steps for the PS Series array at the DR site. Click Next. 10. On the Enable array pairs page, select the array pair and click Next. 11. On the Ready to complete page, review the setting and click Finish This will establish the protection site array manager. To view the status of the relationship between the array pairs, and the status of datastore replication perform the following: 1.
5.5 Step 5: Configure placeholder datastore 1. Once the inventory mappings are created, click Placeholder Datastores. 2. Click Configure Placeholder Datastore and choose a location to store the recovery placeholder VM configuration files. This is a datastore on the recovery site. There does not need to be much space allocated because it is a temporary space to hold the small .vmx and other configuration files for each of the protected VMs.
6 SRM protection groups A protection group is a datastore volume or group of datastore volumes with virtual machines that need to be protected or it can be based on a storage policy. A protection group can be configured from either site through the VMware vSphere Web Client. More detailed information can be found in the SRM Administration Guide. The steps are an example of creating a datastore protection group.
Note: A datastore can only reside in one protection group, but a protection group can be a part of one or more recovery plans. This enables the creation of recovery plans that recover only a single datastore of VMs, multiple datastores of VMs, or the entire site. 5. Verify the setting on the final screen and click Finish. 6. Follow this same procedure for all of the protection groups that need to be configured. In order to be protected with SRM, each replicated datastore must belong to a protection group.
6.1 Datastore cluster considerations in protection groups vSphere includes a functionality for datastores called a datastore cluster. A datastore cluster is a grouping of datastores that allows for ease of VM placement as well as load balancing and capacity balancing across datastores in the cluster. It leverages storage DRS to move VMs to the appropriate datastore either manually or automatically.
7 Recovery plans A recovery plan is a run book plan that facilitates and automates the process of testing and failing over virtual machines. The recovery plan can encompass any or all of the protection groups created on the protected site. This allows administrators to configure and run various test scenarios. It also allows for more comprehensive full site failover situations to be run.
6. Verify the information is correct and click Finish. After configuring a recovery plan, you can adjust individual VM recovery options by selecting the recovery plan and then clicking Virtual Machines on the Related Objects tab. There are many options including recovery priority, VM dependencies, IP customization, pre- and post-power on scripts.
Another option is to suspend the non-critical VMs at the recovery site. This allows administrators to use the DR location to host VMs that are not necessary in the event of a failover from the protected site. To do this: 1. Open the Monitor tab in the recovery plan. 2. To suspend virtual machines on the recovery site, right click Suspend Non-critical VMs at recovery site and select Add Non-Critical VM. 3. Select the virtual machines to be suspended when this recovery plan is run.
8 Testing One of the greatest attributes of SRM is the ability to non-disruptively test the recovery plan before there is a failure. This allows administrators the ability to tune their recovery process and ensure a plan will perform as intended in the event of an actual failover. It also allows for comprehensive auditing of the recovery plans without affecting production virtual machines. A test failover scenario is designed to completely eliminate any impact on the production VMs and datastore volumes.
2. Click Test at the top of the recovery plan to begin. 3. During a test you have the option of replicating recent changes to the recovery site. This is independent of any replication schedules you may have, and could take several minutes depending data that has changed since the last replication. Select your option and click Next. 4. Review the recovery plan steps and click Finish. 5. The progress of the test will fill up the Recovery Steps screen.
RDP sessions, mapped drives or connections to iSCSI volumes. These are all processes to be tested and documented in the case of a true failover. If there was an error, troubleshoot the issue, correct the error and re-run the test. A log of the test can be exported for auditing purposes. 7. Once you have verified the test failover of the individual virtual machines, click Cleanup to finish the test and clean up the environment.
9 Recovery In case of a full site failure, a site migration or simply wanting to fail over individual protection groups, running the recovery plan follows a slightly different process. First, SRM tries to communicate with the protected site vCenter Server. If it can, SRM shuts down any VMs on the protected site to make sure they are not online with both sites. It also takes the original protected datastores offline.
3. There will be one last screen to review before the recovery process begins. Verify the settings and click Finish. 4. From the recovery site PS Series Group Manager GUI all of the promoted replicas are displayed as recovery volumes. 5. During the recovery process, you can follow the steps by clicking Recovery Steps. 6. When the recovery process is complete, SRM shows that the recovery is complete in the monitor tab. If there are any errors during the recovery they are displayed as well.
10 Failback Failback is the process that brings the recovered VMs at the DR site back to the original protected site after a full recovery plan has been run. There can be multiple reasons for enacting the full recovery plan and moving production VMs from the protected site to the recovery site; anything from power outage, equipment outage, planned migration, to a true disaster.
2. Make the recovery site B volume promotion permanent. 3. Reverse the replication setup and configure replication from site B to site A for the re-protected volumes. 4. Reverses protection groups and recovery plans so they can be run going from site B to site A. Once the reprotect is finished, the protection groups and recovery plans will have been switched. This makes site B the protected site and site A the recovery site for these particular groups and plans.
10.2.1 Make promotions permanent During full recovery the replicas on the recovery site B were promoted with the ability to fail back. Since there is nothing to fail back to, these volumes need to be promoted permanently to reverse the replication process. 1. From the Group Manager GUI on site B, select each volume that was promoted during the recovery process. In the Activities tab click Make Promote Permanent. 2. Enter a new name for the volume, select the storage pool assignment and click Next.
3. Verify the settings are correct and click Finish to make the promotion permanent. Once this is done the volume cannot utilize the fast failback option and any failback must include the reconfiguration of replication to the other partner group. 4. Do this step for all volumes that were promoted during the SRM failover.
requirements and downtime requirements. Because this is a controlled failback you will have to be able to dictate when machines return to the original protected site A as well as guarantee their consistency. Verify the recovery plans by utilizing the test feature of SRM. Make sure everything is configured correctly before beginning the controlled failback. 10.2.
11 Considerations for guest iSCSI connected volumes There are many benefits to utilizing the native iSCSI initiator from inside the VM to connect to the storage array. These can include, but are not limited to, data isolation, VSS integration, physical to virtual clustering and snapshots. One of the difficulties of combining this with SRM is that during a test the VMs that are brought up on the DR site are isolated in a test network bubble. This is for the safety of the production VM and production data.
12 Summary With today’s business environment dependency on the applications, data and communications, disaster recovery is not an option but a requirement. Dell PS Series auto replication feature provides a cost effective disaster recovery solution using manual processes and lengthy detailed run books.
A Technical support and resources Dell.com/support is focused on meeting customer needs with proven services and support. Dell TechCenter is an online technical community where IT professionals have access to numerous resources for Dell EMC software, hardware and services. Storage Solutions Technical Documents on Dell TechCenter provide expertise that helps to ensure customer success on Dell EMC Storage platforms. A.