
Users Guide
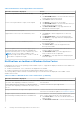
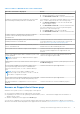
Table Of Contents
- SupportAssist for Home PCs Version 3.9 User’s Guide
- Contents
- Introduction
- Getting started with SupportAssist for Home PCs
- Minimum PC requirements
- Install SupportAssist for Home PCs
- SupportAssist user interface
- Change language setting
- Create SupportAssist profile
- Update contact and shipping information
- Use different SupportAssist profile
- Configure Internet settings
- Schedule automatic scans and optimizations
- Manually upgrade SupportAssist
- Notifications
- Uninstall SupportAssist
- System reset and repair overview
- Dell Migrate overview
- Drivers and downloads overview
- Scanning PC hardware
- Optimizing your PC
- Virtual assistant overview
- Creating support request
- Troubleshooting overview
- History overview
- Getting support
- Frequently asked questions
- SupportAssist for Home PCs resources
- Contacting Dell

Install SupportAssist for Home PCs
By default, SupportAssist is installed on all PCs shipped from the Dell factory. If SupportAssist is not installed on your PC, you
can manually download and install SupportAssist.
Prerequisites
● The PC must meet the minimum PC requirements for installing and using SupportAssist. See Minimum PC requirements.
● You must be logged in as an administrator.
Steps
1. Go to www.dell.com/supportassistforpcs.
2. Click Download Now.
The SupportAssistInstaller.exe file is downloaded.
3. Double-click the SupportAssistInstaller.exe file.
● The installation progress is displayed in the SupportAssist Installer window and a shortcut is created on the desktop
after installation. On PCs with operating system build number 16299 or later, the shortcut is not created.
● The Dell SupportAssist OS Recovery Plugin for Dell Update is also installed.
NOTE: The plug-in is used by SupportAssist to check and install the latest version of SupportAssist OS Recovery
applicable for your PC.
4. Click Launch.
SupportAssist for Home PCs user interface is displayed.
SupportAssist user interface
The SupportAssist user interface contains the following pages:
● Home
● Troubleshooting
● History
● Get Support
When you open SupportAssist for the first time or have not performed any scan or optimization, the default view of the Home
page is displayed. Click Start now to initiate all the scans and optimizations.
If you have run scans or optimizations earlier, the following details are displayed on the Home page and the History page:
● Amount of hard drive space reclaimed
● Number of driver updates installed
● Number of files optimized
● Number of viruses or malware removed
To perform a scan or optimization, click . Depending on the PC service plan, the following tiles are displayed. For information
about the SupportAssist capabilities for different service plans, see SupportAssist capabilities and Dell service plans.
● Get drivers & downloads
● Scan hardware
● Clean files
● Tune performance
● Optimize network
● Remove viruses & malware
NOTE:
If a critical hardware issue is detected on your PC, all the PC optimization tiles are disabled until you create a
support request.
NOTE: If you do not have administrator rights on the PC, only the Scan Hardware tile is enabled.
If there are any additional Dell service offers applicable for your PC, the link to review, purchase, or use them are displayed on
the bottom pane. For information about Dell service offers, see Other service offers.
When you hover over the Service Tag, the model number and the following details are displayed:
Getting started with SupportAssist for Home PCs
11