Devon IT Echo Management Console Dell Edition Administrationshandbuch
Hinweise, Vorsichtshinweise und Warnungen HINWEIS: Ein HINWEIS macht auf wichtige Informationen für die bessere Nutzung Ihres Computers aufmerksam. VORSICHT: EIN VORSICHTSHINWEIS warnt vor möglichen Beschädigungen der Hardware oder vor Datenverlust, die eintreten können, wenn die Anweisungen nicht befolgt werden. WARNUNG: Eine WARNUNG weist auf die Möglichkeit von Sachschaden, Verletzungen oder Tod von Personen hin.
Inhaltsverzeichnis Installation und Einrichtung virtueller Appliances .....................5 vSphere, VMware, Server oder Player herunterladen und installieren ................5 Echo Software herunterladen ........................................................................5 Virtual Machine Setup mit dem vSphere Client installieren ..............................6 Installation der Virtual Machine auf VMware .............................................
Echo-Administrationsbildschirm ..............................................................24 Suchvorgänge ........................................................................................28 Terminalverwaltung .....................................................................29 Aktualisierungen des Echo-Agenten .......................................................29 Benutzerdefinierte Symbole ....................................................................
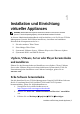
1 Installation und Einrichtung virtueller Appliances HINWEIS: Benutzerdefinierte Symbole funktionieren derzeit nur mit DeTOS-Terminals (Devon IT Terminal Operating System), nicht mit Windows-basierten Terminals. In diesem Administrationshandbuch wird beschrieben, wie Sie Devon IT Echo Management Console Dell Edition installieren, einrichten und ausführen. Erforderliche Komponenten sind u.a.
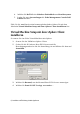
4. Wählen Sie DeTOS oder Windows Embedded unter Betriebssystem. 5. Laden Sie unter Anwendungen die Echo Management Console Dell Edition herunter. Falls Sie die .ova-Dateiversion heruntergeladen haben, fahren Sie mit dem Abschnitt Virtual Machine Setup mit dem vSphere Client installieren fort. Virtual Machine Setup mit dem vSphere Client installieren So starten Sie eine Echo Virtual Machine mit vSphere: 1 Starten Sie den VMWare vSphere Client.
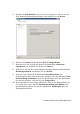
5 Wählen Sie Durchsuchen, um zu OVA zu navigieren, das Sie von der Dell-Website heruntergeladen haben, und klicken Sie auf Weiter. 6 Wählen Sie Weiter am Bildschirm OVF-Vorlagendetails. 7 Benennen Sie die Vorlage bei Bedarf am Bildschirm Name und Speicherort um. Klicken Sie danach auf Weiter. 8 Wählen Sie das für Ihre Anwendung bevorzugte Format am Bildschirm Datenträgerformat und klicken Sie auf Weiter.
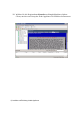
11 Wählen Sie die Registerkarte Konsole am Hauptbildschirm vSphere Client, um das erste Setup der Echo Appliance Dell Edition fortzusetzen.
Installation der Virtual Machine auf VMware Um Ihre Virtual Machine auf einer dieser Versionen des VMware Servers einzurichten, müssen Sie zunächst die Datei *.ova in eine Datei im Format *.vmx umwandeln, damit der VMware Server die Datei erkennen kann. Einen VMware-Dateikonverter finden Sie unter http://www.vmware.com/products/converter. Nachdem Sie Ihre Datei *.ova in das Format *.vmx umgewandelt haben, können Sie mit den entsprechenden VMware Server-Anweisungen fortfahren. VMware Server 2.
3 Je nach Version von VMware Server müssen Sie möglicherweise eine der Optionen Zugeordneten Speicher anpassen oder Einstellungen der Virtual Machine bearbeiten wählen, um den Speicher für Ihre Virtual Appliance anzupassen. 4 Nachdem Sie Ihre Echo-Einstellungen ausgewählt haben, klicken Sie neben dem grünen Dreieck auf Einschalten. VMware Player So starten Sie eine Echo Virtual Machine auf VMware Player: 1 Starten Sie VMware Player in Ihrem System und klicken Sie auf Virtual Machine öffnen.
Konfigurationen von Passwort und Zeitzone in Echo 1 Schalten Sie die Virtual Machine ein. 2 Nach dem Anlauf wird das Fenster Passwort festlegen angezeigt. 3 Geben Sie ein neues Passwort für das Konto bwadmin ein. Dieses Passwort ist für die Anmeldung bei Echo erforderlich. HINWEIS: Für die Eingabe eines neuen Passworts gibt es keine Mindestzeichenzahl, zwischen Groß- und Kleinschreibung wird unterschieden.
6 Im Menü Zeitzone wird eine Liste von Städten angezeigt. Wählen Sie eine Stadt in Ihrer Zeitzone aus und drücken Sie die .
Echo-Netzwerkkonfiguration DHCP-Konfiguration (Standard) Im nächsten Bildschirm wird das Konfigurationsmenü Netzwerk angezeigt. Standardmäßig versucht Echo, vom Dynamic Host Configuration Protocol (DHCP) in Ihrem Netzwerk automatisch eine IP-Adresse zu erhalten. Das bedeutet, dass bei jedem Anlauf des Rechners und bei jedem Neustart Ihrer Echo Virtual Application automatisch eine IP-Adresse zugewiesen wird.
3 Geben Sie die IP-Adresse ein, die als statische IP-Adresse von Echo verwendet werden soll, und wählen Sie OK. 4 Geben Sie die Subnetzmaske ein und klicken Sie auf OK. 5 Geben Sie die Gateway-IP-Adresse ein und klicken Sie auf OK. 6 Bestätigen Sie die neuen statischen Einstellungen. Wählen Sie Ja, um die neuen Einstellungen zu übernehmen. Wählen Sie Nein, um die Änderungen zu verwerfen. 7 Wenn Sie Ja auswählen, wird die Netzwerkschnittstelle neu gestartet und das Hauptmenü von Echo angezeigt.
4 Fügen Sie nach Bedarf für jeden weiteren DNS-Server, den Sie aufnehmen möchten, eine weitere Zeile nameserver ein. 5 Drücken Sie +, dann Y, um die Änderungen zu speichern, und drücken Sie dann dieEingabetaste, um die Datei zu speichern. 6 Wählen Sie Keine Änderungen, um zum Hauptmenü zurückzukehren. Hauptmenü Nachdem Sie den ersten Setup-Vorgang abgeschlossen haben, wird das Fenster Hauptmenü angezeigt. Dies ist Ihr Ausgangspunkt für alle künftigen Änderungen in Echo.
Optionen im Hauptmenü: Referenztabelle Tabelle 1-1. Referenztabelle für das Echo-Hauptmenü Elemente im Hauptmenü Beschreibung bwadmin-Passwort festlegen Wählen Sie diese Option, um ein neues Passwort für das Konto bwadmin einzugeben. Active Directory konfigurieren Ermöglicht es Benutzern, sich über eine LDAP-Query mit den Benutzerdaten des Active Directory am Web-Frontend anzumelden. Zeitzone ändern Wählen Sie diese Option, um die aktuelle Zeitzone des Servers zu ändern.
Echo neu starten Rechner stoppen Serverstatus anzeigen Wählen Sie diese Option, um den EchoServer neu zu starten. Wählen Sie diese Option, um die gesamte Echo Virtual Machine herunterzufahren. Diese Option zeigt den aktuellen Status von Server und Webschnittstelle an. Abschließende Konfigurationsschritte DNS-Konfiguration Erstellen Sie auf Ihrem DNS-Server einen Eintrag für ws-broker.., der auf die IP-Adresse der Echo Virtual Machine zeigt.
3 Geben Sie statt des Domainnamens ws-broker die IP-Adresse ein und klicken Sie auf OK.
Firewall-Ports Tabelle 1-2. Ports, die für die Echo-Funktionalität offen sein müssen Port Protokoll Komponenten Zweck 80 TCP Echo-Server HTTP – Standard-Webport für die Echo-Webschnittstelle 443 TCP Echo-Server HTTPS – Sichere Kommunikation (SSL) über das HTTP-Protokoll 50000 TCP Echo-Server, Hosts und Terminals Wird von SOAP verwendet. Dieser Port muss an ALLEN Geräten in der Echo-Umgebung offen sein.
Zusätzliche Installationsschritte für erweiterte Konfigurationen HINWEIS: Bitte lesen Sie die nächsten beiden Abschnitte nur, wenn Sie mehrere Echo Thin Manage Virtual Appliances in einer Umgebung einsetzen. Trifft dies auf Ihre Umgebung nicht zu, lesen Sie weiter in Kapitel 2, "Grundlagen von Echo".
9 Wenn Wie möchten Sie die Lizenz erhalten? angezeigt wird, wählen Sie die Option [1]. 10 Wählen Sie im nächsten Menü [0] Beenden. 11 Drücken Sie bei allen weiteren Eingabeaufforderungen die , um die Standardeinstellungen zu übernehmen. 12 Wenn Sie zum Menü MSSQL/ODBC-Konfiguration zurückkehren, konfigurieren Sie Datenbankname, IP-Adresse, Port und Benutzername für Ihre MSSQL-Datenbank.
Fehlerbehebung bei einer schlechten Verbindung Stellen Sie sicher, dass Ihre Echo Appliance mit dem Netzwerk verbunden ist und dass die Datenpakete von und zur Appliance fließen können. Sie können zu einem anderen virtuellen Terminal umschalten oder versuchen, in der Applicance selbst die Taste und die rechte Pfeiltaste zu drücken. An der Terminal-Eingabeaufforderung sehen Sie die Anmeldung für ws-broker: _.
2 Grundlagen von Echo Terminologie Mit der folgenden Liste von Begriffen sollten Sie sich vertraut machen, weil diese Begriffe wiederholt in diesem Dokument verwendet werden. Terminal – Dies ist das Gerät, an das Bildschirm, Tastatur und Maus angeschlossen sind. Sitzung – Dies ist eine Netzwerkverbindung zwischen einem Thin Client und einem Host mit angeschlossenem Display und angeschlossenen USBKomponenten.
Zugriff auf die webbasierte Echo-Schnittstelle 1 Geben Sie in einem Webbrowser in die Adresszeile die folgende URL ein: http://. Drücken Sie dann die . HINWEIS: Beim Herstellen der Verbindung zum Server kann eine Warnung bezüglich des Sicherheitszertifikats angezeigt werden. Klicken Sie auf Ja, um fortzufahren. 2 Geben Sie den Benutzernamen bwadmin und dann das Echo-Passwort, das während der Installation eingerichtet wurde, ein.
Verbindungstabelle Terminals können über verschiedene Arten von Protokollen Verbindungen zu dezentralen Servern herstellen. In der Verbindungstabelle können Sie RDP-, ICA-, VDI- und andere verfügbare Verbindungen erstellen, verwalten und bearbeiten. Profiltabelle Eine wesentliche Funktion der Echo-Software ist die Erstellung und Anwendung von Profilen für die effektive Verwaltung der Einstellungen, die dezentral für einzelne Terminals übernommen werden.
Terminaleinstellungstabelle Bei den Terminaleinstellungen handelt es sich um die Konfiguration von Anzeige, Ton, Tastatur, Maus und Passwort für ein bestimmtes Terminal. Administratoren können diese Einstellungen eines Terminals in Echo klonen, die Klone in der Echo Thin Client-Einstellungsdatenbank speichern und sie dann für andere Terminals übernehmen. HINWEIS: Weitere Informationen zur Konfiguration von Anzeige, Ton, Tastatur, Maus und Passwort finden Sie in den Handbüchern zu eTOS, WES 2009 oder WES7.
HINWEIS: Sie können in den verschiedenen Tabellen mehrere Objekte auswählen. Drücken Sie die -Taste und klicken Sie mit der linken Maustaste auf Elemente in der Tabelle, um einzelne Terminals in die Auswahl aufzunehmen. Halten Sie die gedrückt und klicken Sie mit der linken Maustaste auf zwei Elemente in der Tabelle, um alle Terminals zwischen den zwei ausgewählten Elementen in die Auswahl einzuschließen.
Suchvorgänge Die Suchleiste befindet sich in jeder Bestandstabelle oben rechts und ermöglicht Ihnen die Suche nach spezifischen Informationen in der jeweiligen Tabelle. Bei einer Suche werden alle möglichen Felder jeder Bestandstabelle durchsucht. Deshalb ist es möglich, die sichtbaren Elemente anhand der angegebenen Kriterien einzugrenzen.
3 Terminalverwaltung Aktualisierungen des Echo-Agenten Der Echo-Agent ist ein Dienst, der auf Terminalgeräten läuft und mit dem EchoServer kommuniziert. Dell bringt regelmäßig neue Setup-Programme für den Agenten mit zusätzlichen Funktionen heraus. In diesem Abschnitt wird beschrieben, wie Sie für Ihr Terminal im Bestand einen neuen Agenten über die Echo-Software aktualisieren. Herunterladen des neuesten Echo-Agenten Unter support.dell.
4 Klicken Sie auf Absenden, um Ihre Änderungen einzugeben. Daraufhin wird die Meldung Echo-Agent-Anforderung gesendet angezeigt. Der neue Agent beginnt, sich selbst auf dem Gerät zu installieren. Dies kann 30 bis 60 Sekunden in Anspruch nehmen. Nach Abschluss der Installation beginnt der neue Agent damit, Heartbeats an den Echo-Server zu senden, und in der Spalte mit der Agentenversion des entsprechenden Terminals wird die neue Versionsnummer angezeigt.
Bild hochladen 1 Wählen Sie im Register Wartung die Option Symbole. 2 Wählen Sie oberhalb der Bestandstabelle der Symbole die Option Symbol hinzufügen. 3 Geben Sie im Bereich Name und Details im Feld Name einen Namen ein. Dies ist der Aliasname, den Echo dem Bild, das Sie hochladen, zuweist. Der Name kann später an verschiedene Verbindungen angehängt werden. 4 Mit der Schaltfläche Datei auswählen rufen Sie ein Fenster auf, in dem Sie auf Ihrem lokalen Rechner ein Bild zum Hochladen auswählen können.
1 Wählen Sie in der Tabelle des Verbindungsbestands die gewünschte Verbindung aus. 2 Im Bereich Name und Details gibt es das Dropdown-Menü Symbol. Klicken darauf, um die Liste der verfügbaren Optionen anzuzeigen. 3 Wählen Sie in diesem Dropdown-Menü das gewünschte Symbol aus. Es hat den Aliasnamen, der dem Bild beim Hochladen vom Administrator zugewiesen wurde. 4 Nach Auswahl des benutzerdefinierten Bilds klicken Sie über dem Bereich auf Aktualisieren, um Ihre Änderungen zu speichern.
Übersicht über das Klonen in Echo Die folgenden Arten von Klone können in Echo erstellt werden: Verbindungen – Terminals können über verschiedene Arten von Protokollen Verbindungen zu dezentralen Servern herstellen. Das RDPProtokoll dient für die Verbindung mit Microsoft Windows TerminalServern. Das ICA-Protokoll dient zur Herstellung von Verbindungen mit Citrix-Servern.
Klonen von Verbindungen In Echo können Administratoren einzelne Verbindungen von einem Thin Client klonen und sie in der Echo-Datenbank speichern. Administratoren können mühelos eine Verbindung wie VMware View oder Citrix auf einem Terminal erstellen und diese dann über ein Profil an alle anderen Terminals weitergeben. Alle Verbindungen können geklont werden. Die häufigsten werden im Folgenden aufgeführt: RDP – Eine oder mehrere Konfigurationsdateien vom Typ *.
3 Im Detailbereich auf der rechten Seite werden die verfügbaren Verbindungen angezeigt, die Sie von diesem Terminal klonen können. 4 Wählen Sie unter Verbindungen eine der aufgeführten Verbindungen aus. Um mehrere Verbindungen auszuwählen, wählen Sie eine weitere Verbindung im Dropdown-Menü aus, die dann der Liste hinzugefügt wird. 5 Klicken Sie auf Absenden. Nach Abschluss des Klonvorgangs wird Ihnen eine Erfolgsmeldung angezeigt.
4 Klicken Sie auf Absenden. Wenn die Verbindung übernommen wurde, wird Ihnen eine Erfolgsmeldung angezeigt. Wenn Sie Verbindungen für Terminals übernehmen, werden die eigentlichen ICA- und RDP-Dateien jeweils unter C:\Devon IT\Citrix und C:\Devon IT\rDesktop gespeichert. Auf den Desktops von Benutzer und Administrator werden automatisch Verknüpfungen zu diesen Dateien erstellt. Der Endbenutzer kann einfach auf eine solche Verknüpfung doppelklicken, um die Verbindung zu initiieren.
HINWEIS: Es gibt einige wenige Unterschiede in der Art und Weise, wie VMWare ViewClientverbindungen im Vergleich zu RDP- und ICA-Verbindungen von Windows gehandhabt werden. Es darf lediglich eine VMWare View-Clientverbindung pro Benutzer vorhanden sein. Die Konfigurationseinstellungen für eine VMWare ViewClientverbindung werden in der Registry-Hive des Benutzerkontos gespeichert und nicht in Flat Files wie bei RDP und ICA.
Terminaleinstellungen klonen 1 Klicken Sie in der Bestandstabelle der Terminals mit der linken Maustaste, um das gewünschte Terminal auszuwählen, und dann mit der rechten Maustaste, um das Kontextmenü aufzurufen. Wählen Sie den Befehl Terminaleinstellungen Vom Terminal klonen. 2 Im Detailbereich auf der rechten Seite wird ein Formular mit zwei Bereichen angezeigt: Name und Details und Zu klonende Module auswählen. Name – Geben Sie einen Namen für diesen Klon ein.
3 Klicken Sie auf Absenden. Nach einigen Sekunden wird eine Erfolgsmeldung angezeigt. 4 Öffnen Sie auf der linken Seite das Register Terminaleinstellungen. Die Einstellungen, die Sie gerade geklont haben, werden nun in der Bestandstabelle aufgeführt. Einstellungen für ein Terminal übernehmen 1 Klicken Sie in der Bestandstabelle der Terminals mit der linken Maustaste, um das gewünschte Terminal auszuwählen, und dann mit der rechten Maustaste, um das Kontextmenü aufzurufen.
5 Klicken Sie auf Absenden, um diese Einstellungen für Ihr Terminal zu übernehmen. Nach Abschluss der Übernahme wird Ihnen eine Erfolgsmeldung angezeigt. Profile Mit der Profilfunktion von Echo können Sie Terminalverbindungen und einstellungen mit einem oder mehreren Terminals zuweisen. Profile sind für Administratoren nützlich, die Aktualisierungen auf vielen Terminals gleichzeitig durchführen möchten. So ist es z. B.
Profil erstellen 1 Öffnen Sie das Register Profile, um die Bestandstabelle der Profile anzuzeigen. 2 Klicken Sie mit der linken Maustaste über der Bestandstabelle auf Profil hinzufügen. Auf der rechten Seite werden fünf Detailbereiche angezeigt. Name – Geben Sie einen Namen für dieses Profil ein. Beschreibung – Geben Sie eine Beschreibung für das Profil ein.
Festplatten-Image: Wenn der Echo-Administrator im Dropdown-Menü dem Profil ein Image hinzufügt, übernimmt Echo bei jedem Anlauf das Image erneut für das Terminal, wenn das spezifische Image hier noch nicht aufgeführt wird. 3 Klicken Sie auf Absenden, um dieses Profil zu erstellen. Abschließend wird Ihnen eine Erfolgsmeldung angezeigt. 4 Ihr neuer Profileintrag wird nun in der Bestandstabelle der Profile angezeigt.
Profil übernehmen Nachdem Sie wie im Abschnitt oben beschrieben ein Profil erstellt haben, werden die zugewiesenen Verbindungen und Einstellungen beim nächsten Neustart der Terminals, die im Modus eingeschlossen sind, automatisch übernommen. Wenn Sie jedoch möchten, dass die Änderungen sofort wirksam werden, können Sie das Profil manuell übernehmen. Gehen Sie dazu wie im Folgenden beschrieben vor.
Klonen von Festplatten-Images In Echo können Sie über FTP-, CIFS- oder NFS-Protokolle vollständige Festplatten-Images Ihrer Terminals klonen. HINWEIS: Um das Festplatten-Image eines WES 2009- oder WES7Terminals zu klonen, muss FBWF deaktiviert sein. Ausführliche Anweisungen hierzu finden Sie im WES 2009 oder WES7 Administrationshandbuch.
können jede beliebige Erweiterung oder auch gar keine Erweiterung vergeben. Achten Sie auch darauf, dass Sie das Protokollpräfix in die URL des Speicherorts einschließen (ftp:// oder nfs:/). 3 Image prüfen – Aktivieren Sie dieses Kontrollkästchen, wenn bei Abschluss des Klonvorgangs eine md5-Prüfsumme berechnet werden soll. Beachten Sie, dass der Klonvorgang wesentlich mehr Zeit in Anspruch nimmt, wenn dieses Kontrollkästchen aktiviert ist.
4 Nach Abschluss des Vorgangs wird das neu geklonte Festplatten-Image im Register Festplatten-Images in der Bestandstabelle angezeigt. Festplatten-Image für ein Terminal übernehmen HINWEIS:Wenn Sie Festplatten-Images für Ihre Terminals übernehmen, müssen Sie darauf achten, dass Sie das richtige Image für das jeweilige Modell verwenden, da sich das Terminal ansonsten nicht mehr hochfahren lässt.
3 Klicken Sie auf Absenden, um die Übernahme des Images zu starten. Das Terminal wird neu gestartet und übernimmt das ausgewählte Image für seine FlashMedien. Dieser Vorgang kann 20 bis 40 Minuten in Anspruch nehmen, je nach Größe des Images und des Netzwerkverkehrs. Während dieses Zeitraums sendet kein Agent Heartbeat-Meldungen an den Echo-Server, deshalb ändert sich der Zeitstempel im Feld Letzter Kontakt nicht.
Bereitstellung von Festplatten-Images Neue OS-Images können zu Ihrem Bestand von Devon IT Echo Management Console Dell Edition hinzugefügt werden. Unter support.dell.com können Sie das aktuelle Image des DeTOSBetriebssystems herunterladen, um es für Ihre OptiPlex FX130 und FX170 Thin Clients zu übernehmen. HINWEIS: Nur beim OptiPlex FX170 ist es möglich, das Windows Embedded Standard (WES) Betriebssystem-Image herunterzuladen und zu übernehmen. Dieses Image finden Sie ebenfalls unter support.dell.com.
NFS: Wählen Sie diese Option, wenn Sie eine verfügbare NFS-Freigabe auf einem Linux/Unix-Server haben. Image-Speicherort – Geben Sie den Speicherort Ihres FestplattenImages ein. HINWEIS: Sie können einen Hostnamen oder eine IP-Adresse verwenden. Beispiele: ftp://meinServerName/Pfad/zu/meinem/Image/ und nfs://192.168.1.123/Pfad/zu/meinem/Image/.
4 Wartung Sicherungskopie Ihres Servers erstellen Über das Hauptregister Wartung können Sie eine Sicherungskopie Ihres Servers erstellen. Dieses Verfahren wird auch "Hotcopy" genannt, weil die Sicherungskopie bei laufendem System erstellt wird. Der Echo-Server muss für die Sicherung nicht angehalten oder unterbrochen werden. Um eine Hotcopy durchzuführen, gehen Sie wie folgt vor: 1 Öffnen Sie im Register Wartung den Abschnitt Serverkonfiguration speichern/wiederherstellen.
4 Das Ergebnis des Hotcopy-Vorgangs ist eine binäre Sicherungsdatei (*.BIN), die auf Ihren lokalen Rechner heruntergeladen wird. Klicken Sie auf Datei speichern und notieren Sie sich den Speicherort der Datei, weil Sie diese Datei für eine Wiederherstellung benötigen könnten.
5 Nun kann der Administrator, der die Konfigurationsdatei wiederherstellt, auswählen, welche Einstellungen (nach Kategorie) wiederhergestellt und welche Einstellungen ignoriert werden sollen. Alle Einstellungen, die nicht für die Wiederherstellung ausgewählt werden, bleiben im gegenwärtigen System-Setup unverändert. 6 Nach Eingabe des Pfads der Sicherungsdatei klicken Sie auf Wiederherstellen, um die Wiederherstellung zu starten.
Appliance-Upgrades Um Ihre Echo-Appliance auf eine neuere Version aufzurüsten, wird die folgende Vorgehensweise empfohlen. 1 Sicherungskopie erstellen – Erstellen Sie eine Sicherungskopie der aktuellen Konfiguration und der Daten Ihres Servers, bevor Sie mit Hilfe des Hotcopy-Verfahrens ein Upgrade durchführen. Weitere Einzelheiten zu diesem Schritt finden Sie unter "Sicherungskopie Ihres Servers erstellen". 2 Upgrade 3 a.
5 Hilfe anfordern Dell kontaktieren Kunden in den Vereinigten Staaten rufen bitte die Telefonnummer 800-WWWDELL (800-999-3355) an. Dell bietet verschiedene Support- und Service-Möglichkeiten im Internet und per Telefon. Die Verfügbarkeit richtet sich je nach Land und Produkten, einige Services sind möglichlicherweise in Ihrer Region nicht verfügbar. Weitere Informationen zur Kontaktaufnahme mit Dell hinsichtlich Vertrieb, technischem Support oder Kundendienst finden Sie unter: 1 support.dell.com.