Dellt オンライン式ラック型UPS 5600W ユーザーガイド Dell 5600R OL HV-US, Dell 5600R OL HV K812N www.dell.com | support.dell.
注記および警告 注記: 「注記」はソフトウェアを有効に利用するための重要な情報を示しています。 注意: 「注意」は回避しないと軽傷、または中程度の傷害を招く恐れがある潜在的に危険な状況を示 しています。 警告: 「警告」は回避しないと死亡、または重傷を招く潜在的に危険な状況を示しています。 危険: 「危険」は回避しないとほぼ確実に死亡、または人身事故を招く危険な状況を示しています。 危険: 回避しないと、ほぼ確実に死亡、または重傷を招く危険な状況を防ぐため、以下の説明をよく お読みください: S このUPSの中には 「致死的な電圧」が掛かっています。すべての修理や点検は、 「公認のサービススタッフのみ」が行わなければいけません。UPS内には 「ユーザーが修理可能な部品はありません。」 当資料の情報は予告なく変更されることがあります。 E 2009–2013 Dell Inc. 無断複写・転載を禁じます。 Dell Inc.の書面による許可のない複写はいかなる形態においても厳重に禁じられています。 当テキストに使用されている登録商標: Dell および DELL のロゴは、Dell Inc.
目次 1 はじめに 情報検索 . . . . . . . . . . . . . . . . . . . . . . . . . . . . . . . . . . . . . . . . . . . . . . . . . . . . . 8 2 安全性に関する警告 3 設置 製品の検査 . . . . . . . . . . . . . . . . . . . . . . . . . . . . . . . . . . . . . . . . . . . . . . . . . . . 11 キャビネットの開梱 . . . . . . . . . . . . . . . . . . . . . . . . . . . . . . . . . . . . . . . . . . . 12 UPSの後方パネル . . . . . . . . . . . . . . . . . . . . . . . . . . . . . . . . . . . . . . . . . . . . . . 14 UPSの前方パネル . . . . . . . . . . . . . . . . . . . .
画面のロック . . . . . . . . . . . . . . . . . . . . . . . . . . . . . . . . . . . . . . . . . . . . . . . 35 UPSステータス . . . . . . . . . . . . . . . . . . . . . . . . . . . . . . . . . . . . . . . . . . . . . . 35 イベントログ . . . . . . . . . . . . . . . . . . . . . . . . . . . . . . . . . . . . . . . . . . . . . . . 38 測定結果 . . . . . . . . . . . . . . . . . . . . . . . . . . . . . . . . . . . . . . . . . . . . . . . . . . 39 コントロール画面 . . . . . . . . . . . . . . . . . . . . . . . . . . . . . . . . . . . . . .
UPSおよび電池の保管方法 . . . . . . . . . . . . . . . . . . . . . . . . . . . . . . . . . . . . . . 59 バッテリーの交換時期 . . . . . . . . . . . . . . . . . . . . . . . . . . . . . . . . . . . . . . . . . 59 バッテリーのテスト . . . . . . . . . . . . . . . . . . . . . . . . . . . . . . . . . . . . . . . . . . . 60 UPSファームウェアの更新 . . . . . . . . . . . . . . . . . . . . . . . . . . . . . . . . . . . . . . 60 7 仕様 8 トラブルシューティング 警告の表示方法および状態 . . . . . . . . . . . . . . . . . . . . . . . . . . . . . . . . . . . . . UPSステータスメニュー . .
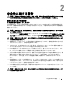
はじめに 1 Dellt オンライン式ラック型無停電電源装置(UPS)は、停電や電力低下、電力サージ、電圧 低下、回線ノイズなどの電力の基本的な問題からお使いのデリケートな電子機器を守ります。 思いもよらない時に停電が起こる場合もあり、電力の質が不安定になる場合があります。こう いった電力問題には、重要データを破損させ、保存されていない作業セッションを破壊し、 ハードウェアに損傷をもたらす可能性があり、生産性の多大な損失や高額な修理代がかかり ます。 Dell オンライン式ラック型UPSでは、電力障害の影響を安全に抑え、機器の完全性を保護する ことができます。UPSには一連のネットワーク機器を扱うことができる柔軟性があるため、 お客さまのLANやサーバー、ワークステーション、その他の電子機器を保護する最適な選択 です。 図 1は、Dell オンライン式ラック型UPSを示しています。 図 1.
UPSは優れた性能および信頼性を提供し、以下のような独自の利点があります。 S 正弦波出力のあるオンラインUPS設計。 S 高出力密度や商用周波数依存性、発電器の互換性を持つオンライン二重変換技術。 S 電圧変動を修正することで、負荷へ安定した電圧を保証する「昇降圧」電圧調節。 S UPSは入力される交流電力をフィルター処理、調節し、バッテリーを消耗せずに機器へ安定 した電力を供給します。 S 選択可能な作動の高性能モード。 S 48 cm (19インチ)標準ラックにぴったりの4U サイズ。 S 外部電力がないときでもUPSの電力を入れることができる始動電池の能力。 S UPSの電源を切らずにバッテリーを安全に交換することができるため、メンテナンスが簡単 です。 S オプションの 拡張バッテリーモジュール (EBM)付き拡張実行時間。 S リモートエマージェンシーパワーオフ(REPO)ポートを通じた緊急シャットダウン制 御。 S 標準通信ポート2個(USBおよびRS-232シリアルポート) S オプションとして、電力の保護や制御の拡張ができる高度通信機能付きDell ネットワークマネージメントカード。
情報検索 注意: 安全、環境、規制に関する情報資料には、安全および規定に関する重要情報が含まれてい ます。 どんな情報をお探しですか? S UPSユーザーガイド こちらでご覧いただけます Dell UPS ディスク S Dell ネットワークマネージメントカード用のユ ーザーガイド S Dell UPS制御ソフトウェア 注記: 説明書およびソフトウェアの更新情報は support.dell.comでご確認いただけます。 S 仕様 Dell UPS ユーザーガイド S UPSの設定方法 ユーザーガイドはDell UPS ディスクおよび support.dell.comで入手することができます。 S トラブルシューティングの方法および問題の解 決方法 S REPO制御のインストール方法 S 安全に関する説明書 安全、環境、規制に関する情報 S 規則に関する情報 S リサイクルに関する情報 S 保証情報 Dell 保証およびサポート情報 S 使用上の条件(アメリカのみ) S エンドユーザー使用許諾契約 S サポート情報 Dell サポートウェブサイト—support.dell.
2 安全性に関する警告 注意: 当資料の手順を実施する前に、安全、環境、規制に関する情報資料に記載されている安全 に関する説明書および重要な規制情報をご覧いただき、これらの情報に従ってください。 重要な安全に関する説明書 この説明書を保管してください この説明書には、UPSおよび電池の取り付けおよびメンテナンスの際に従うべき重要な説明が含 まれます。機器の操作の前にすべての指示をお読みいただき、今後の参考のためにこの説明書を 保管してください。 危険: 回避しないと、ほぼ確実に死亡、または重傷を招く危険な状況を防ぐため、以下の説明を よくお読みください: S このUPSの中には致死的な電圧が掛かっています。すべての修理や点検は公認のサービススタ ッフのみが行わなければいけません。UPS内にはユーザーが修理可能な部品はありません。 警告: 回避しなければ、死亡、または重傷をもたらす可能性のある危険な状態を防ぐため、以下 の指示をご確認ください: S 有資格のサービススタッフ(公認の電気主任技術者など)のみが、電気器具の取り付けを行 うようにしてください。 感電の危険があります。 S このUPSには、
S バッテリーの取り扱いは、バッテリーおよび必要とされる安全上の注意に関して知識のある S S S S S S S S S S S S S スタッフが行うか、監視する必要があります。承認を受けていないスタッフをバッテリーに 近寄らせないようにしてください。 バッテリーには、高圧な短絡電流による感電および火傷の危険があります。以下の予防措置 に従ってください:1) 腕時計や指輪、その他金属製の物を外してください;2) 絶縁ハンド ルがついている工具を使用してください;3) ゴム製の手袋及びブーツを着用してください; 4) バッテリーの上に工具や金属部品を放置しないでください;5) バッテリー端子の取り 付け、または取り外しの前に、充電源を切ってください。 バッテリーが不適切に接地されていない事をご確認ください。不適切に接地されている場 合、その地盤から商用源を離してください。接地されたバッテリーに接触すると、感電する 可能性があります。取り付けおよびメンテナンス中に地盤を取り外すと、感電の可能性を減 らすことができます(接地供給回路がない機器やリモートバッテリー電源に適用)。 感電注意 。電池の配線や
3 設置 この章では以下を説明します: S 製品の検査 S キャビネットの開梱 S UPSの後方パネル S UPSの組み立てと設置 拡張バッテリーモジュール(EBM)を含む S リモートエマージェンシーパワーオフ(REPO)のインストール S 初期起動 製品の検査 発送中に製品が損傷した場合には、輸送業者あるいは購入場所が分かるように梱包用段ボールお よび梱包材を処分せず保存し、発送中の損傷の支払い請求を行ってください。受領後に損傷が分 かった場合は、コンシールドダメージの支払い請求を行ってください。 輸送中の損傷、あるいはコンシールドダメージの支払い請求は、以下に従って行ってください: 1) 装置の受領後15日間以内に輸送業者へ損害請求を申請してください;2)15日以内に、損害賠償 書類のコピーを顧客サービス担当者までご送付ください。 注記: 発送用段ボールのラベルに記載された電池の再充電日をご確認ください。日付が経過し、電 池を再充電していない場合は、UPSのご使用はお控えください。顧客サービス担当者へお問い合わせ ください。 設置 | 11
キャビネットの開梱 注意: 低温環境でキャビネットを開梱すると、キャビネット内またはキャビネット上に結露が生 じる可能性があります。キャビネットは、内部および外部が完全に乾燥するまで、取り付けない ようにしてください(感電の危険性があります)。 注意: キャビネットにはかなりの重量があります( 61ページを参照)。注意して開梱し、キャ ビネットを移動します。 箱の移動や開梱の際は、注意を払ってください。設置の準備が完了するまで、部品は梱包から取 り出さずにそのままにしておきます。 システムの開梱方法: 1 段ボール箱を開き、キャビネットと同梱の付属品を取り外します。(図 2を参照)。 図 2.
注意: キャビネットにはかなりの重量があります( 61ページを参照)。キャビネットをラックに 移動するには最低2名必要です。 2 片側を一人ずつで持ち、段ボールのハンドル部分を使って、段ボール箱からキャビネット を注意して持ち上げ、平らで安定した表面上に置きます。(図 3を参照)。 湿度や可燃性ガスがなく、腐食のおそれもない、風通しのよい保護された場所にキャビネ ットを置きます。 図 3.
UPSの後方パネル このセクションは、Dell オンライン式ラック型型の後方パネルを示しています。 NEMA L6-30R レセプタクル2個 (負荷セグメント2) 出力サーキットブレーカ EBMコネクタ RS-232 UPS 通信ベイ REPO ポート ポート 出力サーキット・ブレーカー2個 入力端子ブロック 接地ネジ USBポート IEC 320-C19 レセプタクル4個 (負荷セグメント1) 図 4. 5600W、208V 後方パネル IEC 320-C19 レセプタクル4個 (負荷セグメント1) REPO ポート 出力サーキット・ブレーカー2個 EBMコネクタ 出力サーキッ トブレーカ 図 5.
UPSの前方パネル このセクションは、Dell オンライン式ラック型UPSの前方パネルを示しています。 オン/オフボタン LCDパネル スクロールボタン(上方向、また スクロールボタン(下方向、または前方) は後方) 選択ボタン 図 6.
ラックマウント式設置方法 注意: キャビネットにはかなりの重量があります( 61ページを参照): 1) Dellでは、持ち上げ る前に、UPSからバッテリートレイを取り外すことを推奨します。2) キャビネットをラックに移 動するには、最低2名必要です。 注意: バッテリーの取り外しは、バッテリーおよび必要な安全上の注意に詳しいスタッフが行 うか、詳しいスタッフが監視する必要があります。承認を受けていないスタッフをバッテリーに 近寄らせないようにしてください。 注意: オプションのEBMを取り付ける場合は、UPSの直接下にEBMを取り付けます。 注記: 取り付けレールは、各キャビネットに必要となります。 UPSおよびオプションのEBMをラックに取り付ける方法: 1 UPSから内蔵バッテリートレイを取り外します: バッテリー固定ブラケットにある蝶ネジを緩め、ブラケットを取り外します(図 7を参照)。 図 7.
プラスチックのつまみを使ってバッテリートレイを引き抜き、バッテリートレイを取り外 します(図 8を参照)。 図 8.
5 レールをラックに取り付ける方法: 垂直のラックフランジに完全に収まり、フックラッチが所定位置に固定するまでレールの 後端部をはめ込みます(図 9を参照)。 ラックの前方を越えるようレールを引っ張ります。 垂直のラックフランジに完全に収まり、フックラッチが所定位置に固定するまで、レール の前端部をはめ込みます。 図 9.
6 キャビネットをラックにスライドして取り付けます(図 10を参照)。キャビネットが複数 ある場合は、ステップ 3から5まで繰り返し行います。 図 10. キャビネットの設置方法 7 マウンティングブラケットにある4つの蝶ネジを使って、キャビネットの前方をラックに固 定します(図 11を参照)。手で強く締めてください。電動工具は使用しないでください。 その他のキャビネットも同じ方法で固定します。 図 11.
8 UPSバッテリトレイを取り付けます(図 12を参照)。 図 12.
9 バッテリー固定ブラケットを取り外します図 13。 10 蝶ネジを強く締めます。 注記: バッテリーを接続する際、少量のアーク放電が起こることがあります。これは正常であり、 装置に損傷を与えたり、安全にかかわる心配はありません。 11 内部バッテリーコネクタを接続し、2個の止め金具の間のバッテリー保持ブラケットに取り 付けます 図 13.
12 UPSフロントパネルカバーをはめ込みます(図 14を参照)。 図 14.
取り付け方法 EBM 注記: EBMをUPSに接続する際、少量のアーク放電が起こることがあります。これは正常であり、人に損 傷 を与えることはありません。迅速にしっかりと、EBMケーブルをUPSバッテリーコネクタへ挿入します。 オプションのEBMの取り付け方法: 1 EBMケーブルをUPSバッテリーコネクタへ差し込みます(図 15を参照)。 図 15EBM 5600W OL UPS (208V)での取り付け方法 UPSの取り付け方法 UPSの取り付け方法: 1 Dell UPS制御ソフトウェアを使用する場合は、同梱のケーブルを使って、コンピューターを USBポートへ接続してください。通信オプションに関する詳細は、53ページをご参照ください。 2 お使いのラックに、接地用、あるいは非接地金属部品の接合用の導体が含まれる場合は、 接地ケーブル(同梱されていません)を接地接合ネジに接続します。各型のグラウンドボ ンディングネジの場所については、14ページの「UPS後方パネル」をご参照ください。 3 エマージェンシーパワーオフ(切断)スイッチが局所コードにより必要となる場合は、次 のセクションの「リ
5 必要に応じて、コードを引いたり張力の緩和を行ってください。 注記: 過負荷アラームを防ぐため、装置の定格の合計がUPSの容量を超えていないか確認してく ださい。 リモートエマージェンシーパワーオフの設置方法 REPOを使用して、遠隔地からUPSをシャットダウンすることができます。例えば、室内温度が上 がり過ぎると、熱動継電器が負荷やUPSをシャットダウンする目的のために使われます。REPOが 作動していると、UPSは出力やすべての電力変換装置を直ちにシャットダウンします。UPSのロジ ック電力は、警告を送るために電源が入ったままになります。 REPO機能は、保護している機器を直ちにシャットダウンし、パワーマネージメントソフトウェア が指示する規則的なシャットダウン手順には従いません。パッテリー電力で作動する機器も同様 に、すぐにシャットダウンされます。 REPOのスイッチがリセットされると、UPSが手動で再起動されるまで、機器は商用電力やバッテ リー電力に戻りません。 REPOの端子は、通常、露出された状態です。 警告: REPOの回路は、IEC 60950安全特別低電圧(SELV)回路です。この回路
ジャンパーは、インスト ールされている場合には 取り外します 図 16.
この手順を各UPSに繰り返します。連結した最後のUPSにおいて、REPOコネクタ(ジャンパ ーなし)を「OUT」と表示されたREPOポートへ接続します。 7 外部に接続されたREPOスイッチがオフとなり、UPS出力レセプタクルへ電力を供給していな いことをご確認ください。 8 配線接続型の場合は、次のセクションの「UPS入力配線」に進んでください。それ以外の場 合は、30ページの「UPS初期起動」へ進んでください。 UPS入力配線 警告: 有資格のサービススタッフ(公認の電気主任技術者など)のみが、電気器具の取り付け を行うようにしてください。 感電の危険があります。 Dell オンライン式ラック型配線接続型は、以下の条件を満たす専用分岐回路が必要です: S 保護装置には、UPS入力と電源の間に2極の断路器が必要です (図 17を参照)。 S ブレーカーは、壁掛け式であり、操作員が容易にアクセスできる場所に設置されなければな りません S 欧州では、ブレーカーは、IEC/EN 60934 基準に適合し、最低3mmの接続空隙がなければなり ません S 200–240 Vac S 単相 - 56
壁 2極ブレーカ ライン AC主電源 UPS 中性/L2 図 17. サーキットブレーカのダイアグラム UPS入力の配線方法: 1 UPSが接続される供給地点のユーティリティ電源をオフにします。電力が完全に供給されて いないことを確認します。 2 端子ブロックカバー(4本のネジ) を取り外して保持します。 図 18. 端子台カバーの取り外し方法 3 Greenlee® パンチ、または類似装置を使用して入力導管用に端子ブロックカバーに穴を 開けます。 穴には 3/4”、または 1” IMC 導管が入ります。 4 電線管から入力用電線を引き出し、約2 ft (0.
5 配線アクセス入り口を通して導管を挿入し、導管接続金具をパネルに取り付けます。各ワ イヤーの末端から0.5” (1.5 cm) の絶縁をはぎ取ります。 注意: UPSに電流負帰還に対する自動保護装置がない場合、外付けの絶縁装置を取り付けるよう Dell では推奨いたします(図 19を参照)。装置を取り付けた後、以下の注意事項が記載された警 告ラベル等を、外付けのACコンタクタに貼り付けなければいけません:電圧 負帰還の危険性この 回路で操作する前に、UPSを絶縁し、すべての端子間における危険な電圧を確認してください。 外付け供給パネル Q UPS T L/L1 L/L1 N/L2 N/L2 B 凡例 B Q T N/L2 L/L1 コイルリモートスイッチ 磁気熱入力メインスイッチ ACコンタクタ(表 1を参照) 中性/L2 L1ライン入力 図 19. 一般的な外付け絶縁装置の取り付け 以下の表は、負帰還保護装置として使用することができるACコンタクタを一覧表示しています。 表 1.
6 図 20および表 2に従い、入力線およびアース線を端子台に取り付けてください。 端子位置 1 2 3 図 20. UPS入力端子台 表 2. UPS配線仕様 ワイヤーの機能 入力 端子位置 UPSワイヤーの機能 1 入力接地 2 L2/中性点入力 3 L1入力 端子ワイヤーサイズ 定格* 締め付けトルク 5.26–16 mm2 (10–6 AWG) 2.
UPSの初期起動 UPSの起動方法: 1 内蔵バッテリーが接続されていることをご確認ください。 2 オプションのEBMがインストールされている場合、EBMがUPSに接続されていることをご確認く ださい。 3 すべての負荷セグメントサーキットブレーカがオン位置にあることを検証します。 4 メインの電力ブレーカーのスイッチを入れます。 UPSの前方パネルのディスプレイが明るくなります。Dell の起動画面がUPSステータス要約画面に変 わります。UPSの前方パネルのディスプレーは、点滅のスタンバイアイコンを示しています。 5 UPSの前方パネルにある ボタンを押します。 起動が完了後、ステータスアイコンがUPSの動作モードに基づき、適切なアイコンに変わり ます(表 4( 36ページ)を参照)。 6 UPSステータスコントロールパネルにある ボタンを押し、作動中の警告や通知をご確認く ださい。 続ける前に、作動中の警告を解決してください。65ページの「トラブルシューテ ィング」をご参照ください。 作動中の警告がない場合は、「作動中の警告なし」と表示されたメッセージが表示されます。 7 UP
4 操作 この章には、以下のUPSの使用方法に関する情報が含まれています: S UPSの起動およびシャットダウン S コントロールパネルおよび表示機能 S イベントログの読み込み S UPSのモード間の移行 S 過負荷時の動作 S 負荷セグメント、バッテリー設定、および自動再起動の設定 UPSの起動およびシャットダウン UPSの起動およびシャットダウンを行うには、以下をご参照ください: S 31ページの「UPSの起動方法」 S 32ページの「バッテリーモードによるUPSの起動」 S 32ページの「UPSのシャットダウン」 UPSの起動方法 以下の方法でUPSを起動します: 1 UPSが外部電源に接続されているかご確認ください。 2 UPSが接続されている外部電源のスイッチを入れます。 UPSの前方パネルのディスプレイが明るくなります。Dell 起動画面( 図 21(33ページ)を参 照)が、UPSステータス要約画面に変わります。UPSの前方パネルのディスプレイが「スタ ンドバイ」モードアイコンを表示します。 3 UPSの前方パネルにある ボタンを押します。 起動が完了後、ステ
4 コントロールパネルにある ボタンを押し、作動中の警告や通知をご確認ください。続ける前に、 作動中の警告を解決してください。65ページの「トラブルシューティング」をご参照ください。 作動中の警告がない場合は、「作動中の警告なし」と表示されたメッセージが表示されます。 5 UPSが正常に作動し、負荷電力があることを示す「正常」アイコン 約画面に表示されていることをお確かめください。 がUPSのステータス要 バッテリーモードでのUPSの起動 注記: この機能を使用する前に、UPSを外部電力によって作動させて、最低一度は出力を有効にし ておいてください。 注記: 起動の際は、外部電力は存在しません。 UPSをバッテリーモードで起動する方法: 1 UPSがブザー音を鳴らすまで、UPSの前方パネルにある ボタンを押します。 UPSの前方パネルのディスプレイが明るくなり、UPSが起動を開始します。 UPSは、スタンバイモードからバッテリーモードへ、周期的にモードの移行を繰り返します。 バッテリーモードアイコン がUPSステータス要約画面に表示されます。UPSが、お使いの 機器に電力を供給します。 注記
コントロールパネルの機能 UPSには、ボタンを3つ備えた液晶ディスプレイがあり、2色のバックライトを発します。標準の バックライトは、青の背景に白のテキストで、ディスプレイを明るくするのに使われます。UPS に重要な警告がある場合、バックライトのテキストは濃い琥珀色に変わり、背景は琥珀色に変わ ります。図 21をご参照ください。 図 21. Dell オンライン式ラック型UPSコントロールパネル コントロールパネルには3つのボタンがあります: S S S 上方または後方へスクロール 選択 下方または前方へスクロール 表 3は、LCDコントロールボタンの機能を示しています。 表 3.
オプションの選択方法: 1 設定をスクロールする際、現在の設定が各選択で表示されます。 2 オプションを選択するには、 ボタンを押してから開放します。 オプションの現在の設定は、選択された際に点滅します。 3 使用可能なオプションに切り替えるには、 または ボタンを使います。 4 新しいオプションを設定するには、 ボタンを1秒間以上再度押します。 オプションが点滅を停止します。 言語の変更 言語選択は、ユーザー設定で選択することができます。利用可能な言語情報に関しましては、 表 7( 41ページ)をご参照ください。 ディスプレイ機能 UPSは、前面パネルディスプレーによって、UPSそれ自体、負荷ステータス、イベント、測定結 果、識別表示、設定などの便利な情報を提供します。 起動画面 起動中に、Dell ロゴ起動画面が5秒間表示され、UPSステータス要約画面に変わります。 15分間ボタンが押されず、ユーザーがその他の画面をロックしていないければ、ディスプレイは自 動的にUPSステータス要約画面に戻ります。ステータス要約画面に戻ったら、 ボタンを1秒間以上 押し、メニュー選択へ戻ります。
画面のロック 画面をロックするには、 ボタンを押します。現在の表示がロックされ、中断時間後でも自動的 に初期画面に戻りません。画面がロックされている間、UPSステータス要約画面のステータスア イコンの左側にキーの記号が表示されます。 図 22をご参照ください。 いずれかのボタンを押すことで、通常のボタン機能に戻り、画面のロックを解除し、ロックの記 号が消えます。 図 22.
表 4. ステータス要約画面 ステータス要約画面 解説 UPSの致命的な障害 UPSが障害モードです。ステータスアイコンおよびアイコンの背景が点滅し ます。 バッテリーモード ステータスアイコンおよびアイコンの背景が点滅します。 警告音(0.5秒間オン/4.
表 4.
表 5.
測定結果 測定結果画面により、以下の項目について便利な測定結果情報が提供されます。 S 出力ワットVA、電流、力率、電圧、周波数 S 入力電圧および周波数 S バッテリー電圧および充電比率 S 残存する瞬時ヘッドルームワット数 S 最大ヘッドルームワット数(ピーク需要の際、負荷をサポートするのに利用可能な残存ワッ ト数、ピーク需要の日付およびタイムスタンプを含む) S 最大消費ワット数(UPSで必要な最大電力量、ピーク需要の日付およびタイムスタンプを含 む) S 現在のキロワット時消費量(過去の時間で平均化されたUPSのキロワット時需要量) S 累積キロワット時消費量(最後のリセット以降の総キロワット時使用量、日付およびタイム スタンプを含む) 操作 | 39
コントロール画面 表 6は、使用可能なコントロール画面を示しています。 表 6.
識別表示 識別表示画面は、以下のUPS情報を表示します。 S 機種および型名 S 品番 S シリアル番号 S UPSファームウェア S 通信ファームウェア S ネットワークマネージメントカードファームウェア 注記: ネットワークマネージメントカードがインストールされている場合のみ、NMCファームウ ェア画面が表示されます。 Dell ネットワークマネージメントカード( 55ページ)をご参照ください。 設定 使用することができるオプションのみが表示されます。 ユーザー設定は、初期設定では保護されていません。ユーザーパスワード設定を通じて、パスワ ードを有効にすることができます。 表 7はユーザーが変更できるオプションを表示しています。 表 7.
表 7. 設定 (続く) 解説 使用できる設定 日付/時間設定 月、日、年、時間、分、および秒を設定します 初期設定 日付:月月/日日/年年年年 01/01/2009 時間:時時:分分:秒秒 12:00:00 注記:日付の形式は、言語選択によって異なります。 注記:時間は24時間方式です。 シリアルポートによる制御 コマンド [有効] [無効] 有効 有効の場合、制御コマンドは、シリアルポート、 USBポート、またはオプションカードを通じたコ マンドです。 無効の場合、設定および負荷制御コマンドがLCDのみに 制限されます。 出力電圧 [自動検出] 自動検出 [200V] [208V] [220V] [230V] [240V] 出力周波数 [50Hz] [60Hz] [自動検出] 自動検出 過負荷警告レベル [10%] [20%] [30%]...
表 7. 設定 (続く) 解説 使用できる設定 初期設定 バッテリー節約モード [無効] [10%] [20%] [30%]...[100%] 無効 UPSがバッテリーモードで作動し、出力電力が選択した レベル以下の場合は、UPSの出力は5分以内にオフにな ります。 バッテリー運転通知遅延時 間 [0秒] [1秒] [2秒]...[99秒] 入力配線不具合警告 [有効] [無効] 208Vでは無効、そ の他では有効 バイパス電圧下限値 公称の[-6%] [-7%]...[-20%] 公称の-15% 0秒 UPSがバッテリーの放電を開始した後、特定の秒数内 で、「UPSバッテリーモード」通知を出します。 測定されたバイパス電圧レベルが、公称出力圧力 (-15%)以下の場合、バイパス操作は、無効になります。 注記:バイパス制限設定は、バイバス電圧下限値設定 を無効にします。 バイパス電圧上限値 公称の[+6%] [+7%]...
表 7. 設定 (続く) 解説 使用できる設定 初期設定 同期化ウィンドウ [同期無効] [±0.5 Hz] [±1.0 Hz] [±1.5 Hz] [±2.0 Hz] [±2.5 Hz] [±3.0 Hz] ±3.0 Hz ±3.
表 7.
UPSのモード間の移行 型間の移行は次の通りです: S 正常モードからバイパスモードへの移行 S バイパスモードから正常モードへの移行 正常モードからバイパスモードへの移行 正常モードからバイパスモードへの移行方法: 1 2 3 を1秒間以上押し、メインメニュー選択を表示し、 ボタンを使ってコントロールメニュ ーへスクロールダウンします。 ボタンを押し、コントロールメニューを表示します。 「バイパスモードへ移行」を選択します。 画面上のテキストが、「手動バイパスコマンド送信済み」に変わります。バイパスモード アイコン が点滅し、バイパスモードであることを示します。 バイパスモードから正常モードへの移行 バイパスモードから正常モードへの移行方法: 1 2 3 を1秒間以上押し、メインメニュー選択を表示し、 ボタンを使ってコントロールメニュ ーへスクロールダウンします。 ボタンを押し、コントロールメニューを表示します。 「正常モードへ移行」を選択します。 画面上のテキストが、「正常コマンド送信済み」に変わります。正常モードアイコン 点滅し、正常モードであることを示します。 が イベントログの読み込み
過負荷時の動作 UPSがどのように過負荷状態に対処しているかに関する説明につきましては、表 8をご参照くださ い。 表 8.
負荷セグメントの設定 負荷セグメントは、Dell UPS制御ソフトウェアや、Dell ネットワークマネージメントカード、ある いはLCDディスプレーによって制御することができる一連のレセプタクルであり、お使いの機器 を順序正しくシャットダウンや起動を行います。例えば、停電の際、その他の機器の電源を切っ ている間、機器の主な要素を作動することができます。この機能によって、バッテリー電力を保 存することができます。 各Dell オンライン式ラック型型には、設定可能な負荷セグメントが2つあります。負荷セグメント の場所については、14ページの「UPS後方パネル」をご参照ください。 パワーマネージメントソフトウェアで負荷セグメントを管理する場合は、パワーマネージメント ソフトウェア取扱説明書で詳細をご確認ください(最新情報は、ソフトウェアCD、または www.dell.
自動開始遅延時間の設定 シャットダウンした場合、外部電力が復旧後、以下の方法で、負荷セグメントが自動的にオンに なるよう設定することができます: S ボタン S 自動再起動オプションのある外部コマンド S バッテリー不足電圧状態 S 自動バッテリー運転シャットダウンコマンド 各負荷セグメントに対する再起動遅延時間を指定することができます:即時再起動の場合は、ゼ ロ秒を選択(0sは初期設定値)、特定の時間差の後に起動する場合は、1~32767秒を選択、あるい はオフを選択。 各負荷セグメントに対する再起動遅延時間の設定方法: 1 ボタンを1秒間以上押し、メインメニュー選択へ進み、 ボタンを使って、設定メニュー へスクロールダウンします。 2 ボタンを押し、設定メニューを表示します。 3 ボタンを使って、自動開始遅延時間へスクロールし、 ボタンを押します。 オプションの現在の設定は、選択された際に点滅します。 4 5 6 7 ボタンおよび ボタンを使って、一つの負荷セグメントに対する再起動遅延時間を設定し ます。 ボタンを押し、確定します。 該当する場合、その他の負荷セグメントに対する再起動
自動バッテリー運転シャットダウン設定 オフ(初期設定)に設定されている場合、 ボタン、外部コマンド、あるいはディスプレイ (コントロール>負荷セグメント)が手動でコマンドを出す場合のみ、負荷セグメントはオフに なります。 ゼロ秒(0s)に設定されている場合は、UPSバッテリーモードが有効の場合、負荷セグメントは 自動的にオフになります。 値を選択し、UPSがバッテリーモードで作動中の場合、選択した遅延時間後、負荷セグメントは 自動的にオフになりますが、遅延時間に達する前に外部電力が復旧すると、シャットダウンはキ ャンセルされます。 各負荷セグメントに対するシャットダウン時間の設定方法: 1 2 3 ボタンを1秒間以上押し、メインメニュー選択へ進み、 ボタンを使って、設定メニュー へスクロールダウンします。 ボタンを押し、設定メニューを表示します。 ボタンを使って、自動バッテリー運転シャットダウンオプションへスクロールし、 ンを押します。 ボタ オプションが表示され、選択すると、現在の設定が点滅します。 4 5 6 7 50 ボタン、または ボタンを使って、一つの負荷セグメントに対するシャットダウン遅
バッテリー設定 自動バッテリーテストや自動再起動設定を実行するかどうかなど、取り付けたEBM用のUPS設定を 行います。 UPSの設定 EBM UPSがEBMに設定されていない場合、UPSは、UPSの前方パネル上やリモートソフトウェアへ、バッ テリー残存時間を報告します。早めのタイミングで、シャットダウン警告を受ける場合もありま す。パワーマネージメントソフトウェアを使って最大バッテリーランタイムを確かめるには、 EBMのUPS設定を行います: 1 2 3 ボタンを1秒間以上押し、メインメニュー選択へ進み、 ボタンを使って、設定メニュー へスクロールダウンします。 ボタンを押し、設定メニューを表示します。 ボタンを使って、拡張バッテリーモジュールオプションへスクロールし、 ます。 ボタンを押し バッテリー数値が点滅し始めます。 4 ボタン、および ボタンを使って、バッテリー数値を設定します。 設定 設定 UPSのみ(内蔵バッテリー) 0(初期設定) UPS + 1 EBM 1 注記:ランタイムは、存在する負荷レベルやEBMが設定されているかに基づいて、自動的に調整す ることができます。
自動バッテリーテストの実行 初期設定で有効である自動放電テストは、浮動モードから静止モードへの移行中に実行されます。 テストが完了したら、充電サイクルが再起動し、バッテリーを完全に充電し、その後正常に静止モ ードへと進みます。自動テストは約3か月に1回実行され、浮動モードから静止モードへの移行が3 回以上あるまでは再度実行されません。手動バッテリーテストが要求されたら、自動バッテリーテ ストタイマーがリセットされるため、次の3ヶ月間は実行されません。 自動バッテリーテストの実行方法: S 自動バッテリーテスト設定で、実行する自動バッテリーテストを有効にしなければいけませ ん。 (次のセクション「自動バッテリーテストの設定」をご参照ください。) S バッテリーを十分に充電しなければいけません。 S UPSは、作動中の警告がなく、「正常」モードでなければいけません。 S 負荷は10%以上でなければいけません。 自動バッテリーテストの設定 自動バッテリーテストの設定方法: 1 ボタンを1秒間以上押し、メインメニュー選択へ進み、 ボタンを使って、設定メニュー へスクロールダウンします。 2 ボタンを押し、
5 UPSの追加機能 この章では、以下の事項について説明します: S 通信ポート(RS-232およびUSB) S Dell ネットワークマネージメントカード S Dell UPS制御ソフトウェア RS-232およびUSB通信ポート UPSとコンピューター間に通信を確立するには、適切な通信ケーブル(RS-232ケーブルは同梱され ていません)を使用して、UPSの通信ポートの一つへコンピューターを接続します。通信ポート の箇所については、14ページの「UPS後方パネル」をご参照ください。 通信ケーブルを接続すると、パワーマネージメントソフトウェアは、UPSを使ってデータを交換 します。電力環境のステータスにおける詳細を記録するため、ソフトウェアがUPSをポーリング します。電力供給に異常が起こった場合は、ソフトウェアはすべてのデータを保存し、機器の電 源を順序正しくシャットダウンするよう伝えます。 RS-232通信ポートのケーブルピンは、図 23に特定されており、ピンの機能は、表 9で説明されて います。 5 4 9 3 8 2 7 1 6 図 23.
表 9.
Dell ネットワークマネージメントカード (オプション) Dell オンライン式ラック型UPSには、通信ベイが一つあり、オプションのDell ネットワークマネージメントカードに対応しています。通信ベイの場所については、 図 24をご参照ください。 通信カードを設置する前に、UPSをシャットダウンする必要はありません。 1 2つのネジで固定されたスロットカバーを取り外します。ネジを固定します。 2 通信カードをスロットへ挿入します。 3 固定ネジで通信カードを固定します。 図 24.
Dell UPS制御ソフトウェア 各Dell オンライン式ラック型UPSには、Dell UPS制御ソフトウェアが同梱されています。 Dell UPS制御ソフトウェアは、UPS電力およびシステムデータや電力経路の最新画像を表示し ます。また、重要な停電などのイベントを完全に記録し、重要なUPS情報や電力供給情報につい て通知します。停電時にDell オンライン式ラック型UPSバッテリーの電力が低下した場合、UPS がシャットダウンされる前に、ソフトウェアが自動的にコンピュータシステムをシャットダウン し、コンピューターのデータを守ります。 ソフトウェアによる制御コマンドの無効方法の詳細に関しましては、42ページの「シリアルポー ト設定による制御コマンドのユーザー設定」をご参照ください。 56 | UPSの追加機能
6 UPSのメンテナンス この章では以下の実行方法を説明しています: S UPSおよびバッテリーの手入れ S UPSの移動 S UPSおよびバッテリーの保管方法 S バッテリーのテスト方法 S UPSファームウェアの更新 UPSおよびバッテリーの手入れ 最適な予防整備には、UPS周辺をきれいにし、ほこりのない状態にしておいてください。周辺が ほこりが多い場合は、システムの外側を掃除機で清掃してください。バッテリー寿命を保つた め、室温が25°C (77°F)の状態でUPSを保管してください。 注記: UPS内のバッテリーの耐用年数は、3〜5年とされています。使用頻度や室温によって、 耐用年数は異なります。予想されている耐用年数以上使用した電池は、ランタイムが極端に減少 することがあります。 最低5 年おきに電池を交換し、最大効率で装置を操作してください。 UPSの移動 注記: 移動する前に、UPSの内蔵バッテリーの電源を切断してください。 注意: 以下の事項は、バッテリーや必要とされる安全上の注意に関して知識のあるスタッフが 行うか、知識のあるスタッフが監視する必要があります。承認を受けていないスタ
3 UPSのフロントカバーを取り外します(図 25を参照)。 図 25. UPSのフロントカバーの取り外し方法 4 内蔵バッテリーのコネクタを外します(図 26を参照)。 図 26.
5 UPSのフロントカバーを取り外します(図 27を参照)。 図 27.
バッテリーのテスト バッテリーテストの実行方法: S バッテリーを十分に充電しなければいけません。 S UPSは、作動中の警告がなく、「正常」モードでなければいけません。 S 負荷は10%以上でなければいけません。 バッテリーテストの実行方法: 1 バッテリーの充電を行うには、最低48時間UPSを外部電源に接続してください。 2 ボタンを1秒間押し、メインメニュー選択へ進み、 ボタンを使って、コントロールメニ ューへスクロールダウンします。 3 ボタンを押し、コントロールメニューを表示します。 4 ボタンを押し、「バッテリーテスト」オプションへスクロールします。 5 ボタンを押し、バッテリーテストを開始します。 バッテリーテスト中は、UPSはバッテリーモードに変わり、当初予想のランタイムの25%のバ ッテリーを放電します。ステータス画面は、「バッテリーテスト実行」およびテストが完了 した%を表示します。テストが完了すると、UPSステータス画面に結果が表示されます。 UPSファームウェアの更新 最新版のUPSファームウェアに更新する場合は 、www.dell.
7 仕様 この章では、以下の仕様について説明しています: S 型番表 S 寸法および重量 S 入力および出力電圧 S 環境保護および安全性 S バッテリー S UPSブロック図 表 10. UPS型番表 UPS 型番 208V型 230V型 Dell 5600R OL HV-US, 5600W Dell 5600R OL HV, 5600W 拡張バッテリーモジュ ール (EBM) 5600R EBMK812N、216 Vdc/30A 表 11. 寸法および重量 UPS寸法(幅×高さ ×奥行) ラックユニットサイズ 重量 UPS 型番 EBM型 438.0×171.5×801.4 mm (17.2”×6.8”×31.5”) 438.0×127.0×735.0 mm (17.2”×5.0”×29.0”) 4U 3U 72.0 kg (158.7 lb) 59.0 kg (130.1 lb) 208V型 230V型 200–208V 220–240V 200–208V 自動検出 160–286V 自動検出 表 12.
表 13.
表 14. 環境保護および安全性 208V型 操作温度 230V型 1,500メートル以下: 0°C から 40°C (32°F から 104°F); UL 試験済み 25°C (77°F) 1,500メートル以上: 0°C から35°C (32°F から95°F) 輸送/保管温度 -15°C から 60°C (5°F から 140°F) 相対湿度 0–95% 結露なし 操作高度 最高海抜3,048メートル (0–10,000 ft)以下 可聴ノイズ オンラインモード/バイパスモード(負荷75%以下)で55 dBA 以下、室内温度 ファン速度 低速度:負荷が<80%以上の場合 負荷が>80%、またはUPSがバッテリーモードの場合に高速 サージ抑制 安全適合 安全マーク EMC (クラスA) ANSI/IEEE C62.41; 1991 カテゴリーB3 UL 1778 第4版; CSA C22.2, No. 107.3 UL 1778 4th Edition; CSA C22.2, No. 107.
表 15. バッテリー 設定 5600W: (18) 216V, 7.2 Ah 内部バッテリ; EBM バッテリーの種類 CSB GP1272 7.2 Ah, YUASA NP7-12 7Ah, YUASA NPW 45-12 9.0 Ah 電圧 (18) 216V, 9.0 Ah 5600W: 216 Vdc 内部、216 Vdc/30A EBM ヒューズ UPS:(2) 30A ヒューズ EBM: (2) 30A ヒューズ 種類 密閉型、メンテナンス不要、制御弁式、鉛蓄電池 充電 公称ラインで、90%の使用可能容量まで約4時間。追加の電力供給負荷なし モニタリング 初期の不具合検知および警告の高度なモニタリング バッテリーランタイム* 5600W内臓バッテリー: 5.
8 トラブルシューティング Dell オンライン式ラック型UPSは、耐久性の高い自動操作を実行するよう設計されており、作動 に影響する可能性のある問題が生じた場合に、いつでも警告を出します。コントロールパネルが 表示する警告は通常、出力電力が影響を受けていることを意味しません。ユーザーに警告するた めの予防アラームです。 警告ブザーとともに、警告および通知が作動します。 警告の表示方法および状態 コントロールパネルは、以下の2つのメインメニューからトラブルシューティング情報を表示します: S UPSステータスメニュー: 作動中の警告のすべてを表示 S イベントログメニュー: 作動中および解決済みの警告を含む、50件の最新イベントを表示 UPSステータスメニュー UPSステータスメニューから、以下のトラブルシューティング情報の画面を表示することができます: S ステータス要約画面: ステータス要約画面は、モードおよび負荷に関する情報を表示します。 重大な警告がある場合、ステータス要約画面は、正常状態である青の背景に白のテキストの 画面から、琥珀色の背景に濃い琥珀色のテキストの画面に変わります。 S
イベントログメニュー イベントログメニューから、イベントや通知、警告など、新しいイベントから古いイベントの順 で表示された最新の50件のイベントを表示することができます。イベント、通知、警告が発生し た際、またこれらが以下の通りクリアされた際、イベントログにログインされます。 S イベントは、「時間設定完了」などステータス情報としてイベントログに記録された静止状 態です。 イベントは対処する必要がありません。 S アクティブ通知などの通知は、イベントログに記録されます。「バイパスAC過電圧」など のアクティブ警告は、一般的に、断続的なビープ音によって通告されます。通知は通常、対 処する必要はありません。 S アクティブ警告などの警告は、イベントログに記録されます。アクティブ警告は、一般的 に、断続的なビープ音、または連続的な警報音によって通行されます。「ファン故障」や 「ヒートシンク温度過昇」が一般的な例です。 作動中の警告を解決する必要があります。 UPSステータスメニューが初期設定によって表示されます。イベントログメニューによるトラブ ルシューティング情報の表示方法: 1 ボタンを1秒間押し、メイ
表 16.
表 16.
表 16.
表 16.
表 16.