
Users Guide
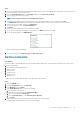


Configure ESXi settings—using DCUI
About this task
The Direct Console User Interface (DCUI) is a menu-based interface that is accessed from the host console and used to configure ESXi
running on vSphere hosts.
Steps
1. After the server reboots and fully loads ESXi, press F2 to log in to the DCUI.
2. Enter the credentials that were created during the ESXi installation, and then press Enter.
3. From the System Customization menu, select Configure Management Network.
4. From the VLAN (Optional) menu, press Enter.
NOTE: Step 4 is mandatory although the name of the menu item includes the word optional.
5. Enter the required management VLAN ID, and then press Enter.
6. Select IPv4 Configuration and press Enter.
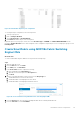
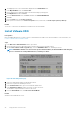
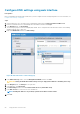
7. Select Set static IPv4 address and press the spacebar.
Figure 29. IPv4 configuration page
8. Enter the IPv4 Address,Subnet Mask, and the Default Gateway, and then press Enter to confirm.
9. Select DNS Configuration, and then press Enter.
10. Enter the IP addresses of the DNS servers and FQDN of the host.
11. Press Esc to return to the main menu, and then press Y to confirm the changes and restart the management network.
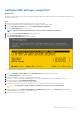
12. From the main menu, click Test Management Network.
The target IP addresses and DNS hostname are pre-populated.
13. Press Enter to perform the network test, and after the test is completed, press Enter to return to the main menu.
CAUTION: If the network test fails, troubleshoot and resolve the issues before proceeding further.
14. From the main menu, select Troubleshooting Options > Enable ESXi Shell, and then select Enable SSH (required during
validation and deployment phases) to enable the ESXi shell.
15. Press Esc to return to the main menu.
Deploy ESXi to cluster nodes
49