
Service Manual


Back to Contents Page
Before You Begin
Dell™Vostro™A100/A180ServiceManual
Technical Specifications
Recommended Tools
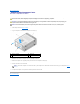
Turning Off Your Computer
Safety Instructions
This chapter provides procedures for removing and installing the components in your computer. Unless otherwise noted, each procedure assumes that the
following conditions exist:
l You have performed the steps in Turning Off Your Computer and Safety Instructions.
l You have read the safety information that shipped with your computer.
l A component can be replaced or—if purchased separately—installed by performing the removal procedure in reverse order.
Technical Specifications
For information on technical specifications of your computer, see the Setup and Quick Reference Guide that shipped with your computer or see the Dell Support
website at support.dell.com.
Recommended Tools
The procedures in this document may require the use of a small Phillips screwdriver size #2.
Turning Off Your Computer
1. Shut down the operating system.
2. Ensure that the computer and all attached devices are turned off. If your computer and attached devices did not automatically turn off when you shut
down your operating system, press and hold the power button for about 4 seconds to turn them off.
Safety Instructions
Use the following safety guidelines to help protect your computer from potential damage and to help to ensure your own personal safety.
1. Ensure that the work surface is flat and clean to prevent the computer cover from being scratched.
2. Turn off your computer (see Turning Off Your Computer).
NOTICE: To avoid losing data, save and close all open files and exit all open programs before you turn off your computer.
CAUTION: Before working inside your computer, read the safety information that shipped with your computer. For additional safety best
practices information, see the Regulatory Compliance Homepage at www.dell.com/regulatory_compliance.
CAUTION: Many repairs may only be done by a certified service technician. You should only perform troubleshooting and simple repairs as
authorized in your product documentation, or as directed by the online or telephone service and support team. Damage due to servicing that is not
authorized by Dell is not covered by your warranty. Read and follow the safety instructions that came with the product.
NOTICE: When you disconnect a cable, pull on its connector or on its pull-tab, not on the cable itself. Some cables have connectors with locking
tabs; if you are disconnecting this type of cable, press in on the locking tabs before you disconnect the cable. As you pull connectors apart, keep
them evenly aligned to avoid bending any connector pins. Also, before you connect a cable, ensure that both connectors are correctly oriented
and aligned.
NOTICE: To avoid damaging the computer, perform the following steps before you begin working inside the computer.
NOTICE: To disconnect a network cable, first unplug the cable from your computer and then unplug the cable from the network device.