
Concept Guide


349 | W-IAP Maintenance Dell Networking W-Series Instant 6.4.3.1-4.2.0.0 | User Guide
3. Select Standalone AP from the drop-down list.
4. Select the Access Point from the drop-down list.
5. Click Convert Now to complete the conversion. The a W-IAP now operates in the standalone mode.
Converting a W-IAP using CLI
To convert a W-IAP to a remote AP or campus AP, execute the following command:
(Instant AP)# convert-aos-ap <mode> <controller-IP-address>
To convert a W-IAP to a Standalone AP or to provision a W-IAP in the cluster mode, execute the following
command:
(Instant AP)# swarm-mode <mode>
Resetting a Remote AP or Campus AP to a W-IAP
The reset button located on the rear of a W-IAP can be used to reset the W-IAP to factory default settings.
To reset a W-IAP, perform the following steps:
1. Power off the W-IAP.
2. Press and hold the reset button using a small and narrow object such as a paperclip.
3. Power on the W-IAP without releasing the reset button. The power LED flashes within 5 seconds indicating
that the reset is completed.
4. Release the reset button. The W-IAP reboots with the factory default settings.
All APs have a reset button, except IAP-175P/175AC. Contact Dell support for resetting these W-IAPs.
Rebooting the W-IAP
If you encounter any problem with the W-IAPs, you can reboot all W-IAPs or a selected W-IAP in a network
using the Instant UI. To reboot a W-IAP:
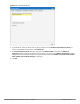
1. Click the Maintenance link. The Maintenance window is displayed.
2. Click the Reboot tab.