
Release Notes
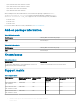


Platform name Memory conguration
(Flash/RAM)
Supported BIOS
version
Supported build version
for ThinLinux 1.0.x
(English)
Build version after installing
the add-on
Wyse 3030 LT thin client
with ThinLinux
4 GB/2 GB 1.0F 1.0.6.2 1.0.6.3
Wyse 3040 thin client
with ThinLinux
16 GB/2 GB 1.2.3 1.0.4.1/1.0.4.2 1.0.4.3/1.0.4.4
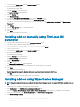
Installing add-on using Wyse Management Suite
1 Go to Dell Wyse support.
2 Expand Download Wyse Software and Driver.
3 Click Wyse Support Download.
4 From the Active drop-down list, select your thin client model, and click Search.
The Downloads page is displayed.
5 Download the respective RPM or RSP le, and copy the les to the following path:
NOTE: You can download either RPM le or RSP le based on your preference.
• RPM le—C:\WMS\LocalRepo\repository\thinClientApps.
• RSP le—C:\WMS\Local Repo\repository\rspPackages\zipped. The compress folder is extracted automatically, and the
extracted les are copied to C:\WMS\LocalRepo\repository\rspPackages\valid path.
6 Log in to Wyse Management Suite.
7 Click Portal Administration, and then click File Repository under Console Settings.
8 Select the Local Repository check box.
9 Click Sync Files.
Wait for the synchronization process to complete. The synchronization process copies the package from the repository to Apps and
Data.
10 Click Apps and Data.
The Apps and Data page is displayed.
11 Verify the copied package in the applications list.
12 To create a group in the Wyse Management Suite server, click Groups & Congs.
The Groups & Congs page is displayed.
13 Click the Plus sign (+) button, and register your client in the same group.
14 Click Apps and Data.
The Apps and Data page is displayed.
15 Click Thin Clients under App Policies.
16 Click Add Policy to add the policy to the required group.
17 Update the required elds, and then click Save.
The policy is added to the required group.
18 Click Jobs.
The Jobs page is displayed.
19 Click Schedule App Policy and update the required elds to schedule the policy.
20 Monitor the status in the Jobs page to ensure that the package installation is successful.
NOTE
: The lock screen is displayed during the package installation process on all the thin clients.
Installing add-on manually using ThinLinux
1 Copy the add-on and the directory le to the <root path>\add-ons folder.
2 Log in to the thin client.
Meltdown and Spectre side channel attacks security vulnerability
x add-on
Release Notes
3