
Administrator Guide


In any desktop case, you can select the desktop option you want (Classic Desktop or Zero Desktop) and create the connections you need
using the Visual Experience tab on the Remote Connections dialog box.
To open the Remote Connections dialog box, perform one of the following tasks:
• Classic Desktop — Click User Name , and then select System Setup > Remote Connections.
NOTE: User Name is the user who is logged-on and is located at the lower-left pane of the taskbar
• Zero Desktop — Click the System Settings icon on the Zero Toolbar, and then select Remote Connections.
Conguring Thin Client Settings and Connection
Settings
While the use of INI les is recommended to congure thin client settings and connection settings available to users , see How to Set Up
Automatic Updates and Congurations, you can use dialog boxes on a thin client to:
• Set up your thin client hardware, look and feel, and system settings, see Conguring Thin Client Settings Locally.
• Congure connection settings, see Conguring Thin Client Settings Locally.
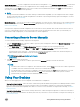
Connecting to a Printer
To connect a local printer to your thin client, be sure you obtain and use the correct adapter cables which are not included. Before use, you
may need to install the driver for the printer by following the printer driver installation instructions. For information on connecting to
printers, see Conguring the Printer Setup.
Connecting to a Monitor
Depending on your thin client model, connections to monitors can be made using either a VGA (analog) monitor port, a DVI (digital) monitor
port, or a DisplayPort (digital) and the proper Dell monitor cables/splitters/adapters. For information on conguring dual display settings,
see Conguring the Display Settings.
NOTE
:
For dual-monitor supported thin clients— when using a DVI to DVI/VGA splitter, ensure that the DVI monitor will be the primary
monitor; when using a DisplayPort, ensure that the DisplayPort monitor will be the primary monitor.
Locking the Thin Client
To help ensure that no one else can access your private information without permission, ThinOS allows you to lock your thin client so that
credentials are required to unlock and use the thin client after you do one of the following:
• Unplug a signed-on smart card — If an administrator has set SCRemovalBehavior=1for the signing parameter in the INI les and
you unplug the smart card that you used to sign on to the thin client, then the thin client will lock. To unlock the thin client for use, you
must use the same smart card and your correct PIN. Note that removing a signed-on smart card can also cause the thin client to log-
o, if an administrator has set the INI les to do so in this case you must sign-on as usual to use the thin client.
• Use Lock Terminal from the Shortcut Menu and Shutdown dialog box — On the Classic Desktop, right-click on the desktop and
select Lock Terminal, or use the Shutdown dialog box, see Classic Desktop Features. On the Zero Desktop, use the Shutdown dialog
box, see Signing O and Shutting Down. To use the thin client, you must use your correct password.
• Use the screen saver — If an administrator has set LockTerminal=2 for the ScreenSaver parameter in the INI les and you use
the screen saver, then the thin client will lock. To open the thin client for use, you must use your correct password.
Signing O and Shutting Down
Use the Shutdown dialog box to select the available option you want:
10
Getting Started: Quickly Learning the Basics