
Administrator Guide
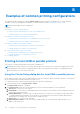

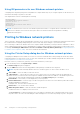
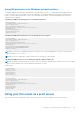
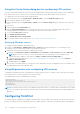


Table Of Contents
- Dell Wyse ThinOS Version 8.5 Hotfix Administrator’s Guide
- Introduction
- Getting started
- Configuring ThinOS using the First Boot Wizard
- Connecting to a remote server
- Using your desktop
- Configuring thin client settings and connection settings
- Connecting to a printer
- Connecting to a monitor
- Locking the thin client
- Signing off and shutting down
- Additional getting started details
- Classic desktop features
- Login dialog box features
- Accessing system information
- Global Connection settings
- Configuring the connectivity
- Configuring the network settings
- Configuring the remote connections
- Configuring the central configurations
- Configuring the VPN Manager
- Configuring the connection brokers
- Configuring Citrix
- Configuring the Citrix broker connection
- Citrix HDX RealTime Multimedia Engine or RealTime Optimization Pack
- Citrix Cloud services
- Citrix icon refresh
- Using multiple audio in Citrix session
- Using Citrix NetScaler with CensorNet MFA authentication
- Configuring ICA connections
- ICA Self Service Password Reset
- QUMU or ICA Multimedia URL Redirection
- HTML5 Video Redirection
- ICA SuperCodec
- Anonymous logon
- Configuring the Citrix UPD printer
- Introduction to Flash Redirection
- Configuring VMware
- Configuring Microsoft Remote Desktop
- Configuring Dell vWorkspace
- Configuring Amazon Web Services or WorkSpaces
- Configuring Citrix
- Configuring thin client settings
- TCX Suite
- Performing diagnostics
- BIOS management on ThinOS
- Security
- Automating updates and settings using central configuration
- Examples of common printing configurations
- Important notes
- Troubleshooting
- Firmware upgrade
- Frequently asked questions

3. Click OK to save the settings.
Using INI parameters for local USB or parallel printers
Configuring local printing using ThinOS INI parameters is simple and an easy way to configure a printer for all clients in your
environment assuming every printer is the same.
Your INI parameters will look something like the following:
Printer=LPT1 \
Name="HP LaserJet 4000" \
PrinterID="HP LaserJet 4000 Series PCL" \
Enabled=yes
NOTE: The PrinterID is the exact text of the Windows printer driver name, so if a printer driver is named HP LaserJet 4000
Series PCL in Windows, then it must be exactly the same in the PrinterID field in the INI parameters including capitalizations
and spaces.
Printing to non-Windows network printers
ThinOS can print to non-Windows network printers as long as the printers can accept LPR print requests. Most workgroup
printers and large network printers have this capability be sure to check with your vendor that the printer can accept Line
Printer Request print requests.
Once your thin client is configured to print to an LPR capable printer, the client will then redirect this printer through an RDP
or ICA connection to your back end infrastructure. In this way the client will connect to your back end infrastructure and this
network printer will appear as a client local printer.
Using the Printer Setup dialog box for non-Windows network
printers
To configure the Printer Setup dialog box for Non-Windows Network Printers (LPD).
1. From the desktop menu, click System Setup, and then click Printer.
The Printer Setup dialog box is displayed.
In this example we have an HP LaserJet 4200n attached to a thin client through LPR.
2. Click the LPDs tab and use the following guidelines when printing to a non-Windows network printer:
a. Select LPD — Select LPD1 or LPD2 port.
b. Printer Name — Enter name you want displayed in your list of printers.
c. Printer Identification — Enter the type or model of the printer in the exact text of the Windows printer driver name —
including capitalizations and spaces.
In this example, enter HP LaserJet 4200n PCL6.
d. LPD Hosts — The DNS or WINS name of the server for the network printer. An IP address of the printer on the network
can also be entered as we have used in our case example.
NOTE:
If the printer is attached to another thin client on your network, the entry in the LPD Hosts box is the name
or address of that thin client.
e. LPD Queue Name — An LPD host maintains a named queue for each supported printer. Enter the name of the queue
associated with the printer used. This name can be different for each vendor. This field is required and must be correct
so that the network printer accepts incoming print jobs properly. In our case example, auto can be used for HP LaserJet
4200n PCL6 as per documentation found on the HP website.
NOTE:
If the printer is attached to another thin client on your network, the LPD Queue Name must match the
content of the Printer Name box on the thin client with the printer attached.
f. Printer Class —You can leave this as default.
g. Enable the printer device — Must be selected to enable the printer enables the device so it displays on the remote
host.
Examples of common printing configurations
163