
Install Guide

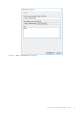
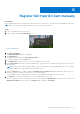
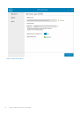
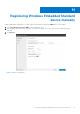
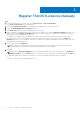
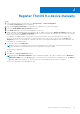
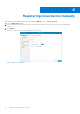

Table Of Contents
- Dell Wyse Management Suite Version 3.x Quick Start Guide
- Contents
- Introduction
- Getting started with Wyse Management Suite
- Installing Wyse Management Suite on private cloud
- Deploying applications to thin clients
- Upgrade Wyse Management Suite version 2.x to 3.x
- Upgrade Wyse Management Suite version 3.x to 3.2
- Upgrade Wyse Management Suite version 3.x to 3.3
- Uninstalling Wyse Management Suite
- Troubleshooting Wyse Management Suite
- Wyse Device Agent
- Additional resources
- Remote database
- Custom installation
- Access Wyse Management Suite file repository
- Create and configure DHCP option tags
- Create and configure DNS SRV records
- Creating and deploying standard application policy to thin clients
- Register Dell Hybrid Client manually
- Registering Windows Embedded Standard device manually
- Register ThinOS 8.x device manually
- Register ThinOS 9.x device manually
- Registering Linux device manually
- Terms and definitions

Creating and deploying standard application
policy to thin clients
About this task
To deploy a standard application policy to thin clients, do the following:
Steps
1. In the local repository, go to thinClientApps, and copy the application to the folder.
2. Ensure that the application is registered by going to the Apps & Data tab and selecting Thin Client under App Inventory.
NOTE: The App Inventory interface takes approximately two minutes to populate any recently added programs.
3. In App Policies, click Thin Client.
4. Click Add Policy.
5. To create an application policy, enter the appropriate information in the Add Standard App Policy window.
● Select Policy Name, Group, Task, Device Type, and TC Application.
● To deploy this policy to a specific operating system or a platform, select either OS Subtype Filter or Platform Filter.
Timeout displays a message on the client which gives you time to save your work before the installation begins. Specify
the number of minutes the message dialog should be displayed on the client.
● To automatically apply this policy to a device that is registered with Wyse Management Suite, select Apply the policy to
new devices from the Apply Policy Automatically drop-down list.
NOTE:
The app policy is applied, when any device is moved to the defined group or registered directly to the group. If
you select Apply the policy to devices on check in, the policy is automatically applied to the device at check-in to the
Wyse Management Suite server.
6. To allow a delay in execution of the policy, select the Allow delay of policy execution check box. If this option is selected,
the following drop-down menus are enabled:
● From the Max Hours per Delay drop-down menu, select the maximum hours (1–24 hours) you can delay execution of
the policy.
● From the Max delays drop-down menu, select the number of times (1–3) you can delay the execution of the policy.
7. To stop the installation process after a defined value, specify the number of minutes in the Application Installation
Timeout field.
8. Click Save to create a policy.
A message is displayed to allow the administrator to schedule this policy on devices based on group.
9. Select Yes to schedule a job on the same page. The app/image policy job can run:
● Immediately—Server runs the job immediately.
● On device time zone—Server creates one job for each device time zone and schedules the job to the selected date/
time of the device time zone.
● On selected time zone—Server creates one job to run at the date/time of the designated time zone.
10. To create the job, click Preview and schedules are displayed on the next page.
11. You can check the status of the job by going to the Jobs page.
F
62 Creating and deploying standard application policy to thin clients