
Administrator Guide


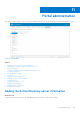
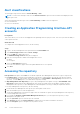
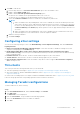
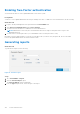
Table Of Contents
- Dell Wyse Management Suite Version 1.3.1 Administrator’s Guide
- Introduction to Wyse Management Suite
- Getting started with Wyse Management Suite
- Wyse Management Suite dashboard
- Managing groups and configurations
- Add a group
- Edit a group
- Remove a group
- Edit an unmanaged group
- Configure a global level policy
- Configure a group level policy
- Configure a device level policy
- Edit the ThinOS policy settings
- ThinOS—Wizard mode
- ThinOS—Advanced mode
- Configuring general settings
- Configuring general settings
- Configuring security settings
- Configuring keyboard settings
- Configuring display settings
- Configuring visual experience settings
- Schedule shutdown or reboot settings
- Configuring device information
- Configuring BIOS settings
- Configuring firmware upgrade
- Configuring device settings
- Configuring global INI settings
- Configuring central configuration settings
- Configuring advanced settings
- Configuring remote connections
- Configuring global session settings—ThinOS 8.5 and later versions
- Configuring USB redirection settings
- Configuring third party authentication settings
- Configuring citrix broker connection settings
- Configuring citrix HDX connection settings
- Configuring VMware broker connection settings
- Configuring VMware settings
- Configuring Microsoft broker connection settings
- Configuring Microsoft RDP connection settings
- Configuring vWorksapce broker connection settings
- Configuring AWS broker connection settings
- Configuring direct RDP connection settings
- Configuring direct ICA connection settings
- Configuring global printer settings
- Configuring printer settings
- Configuring WLAN global settings
- Configuring WLAN connections
- Configuring LAN connections
- Configure SCEP Settings
- Configure proxy Settings
- Edit the Windows Embedded Standard policy settings
- Configuring system personalization
- Configuring desktop experience
- Configuring network settings
- Configuring security and lockdown settings
- Configuring other settings
- Configuring remote connection settings—Citrix
- Configuring remote connection settings—VMware
- Configuring remote connection settings—RDP
- Configuring remote connection settings—Browser
- Configuring Latitude mobile thin client BIOS settings
- Configuring Wyse 7040 thin client BIOS settings
- Configuring device information
- Configuring Wyse Easy Setup settings
- Configuring VNC settings
- Configuring domain settings
- Configuring BIOS settings for Wyse 5070 thin client with Windows 10 IoT Enterprise
- Edit the Linux policy settings
- Configuring system personalization
- Configuring desktop experience
- Configuring login experience settings
- Configuring network settings
- Configuring security settings
- Configuring central configuration settings
- Configuring other settings
- Configuring VDI global settings
- Configuring remote connection settings—Citrix
- Configuring remote connection settings—VMware
- Configuring remote connection settings—RDP
- Configuring remote connection settings—Browser
- Configuring advanced settings
- Edit the ThinLinux policy settings
- Configuring system personalization
- Configuring desktop experience
- Configuring login experience
- Configuring network settings
- Configuring security settings
- Configuring central configuration settings
- Configuring other settings
- Configuring VDI global settings
- Configuring remote connection settings—Citrix
- Configuring remote connection settings—VMware
- Configuring remote connection settings—RDP
- Configuring remote connection settings—Browser
- Configuring advanced settings
- Configuring device information
- Configuring Wyse 3040 thin client BIOS settings
- Configuring BIOS settings for Wyse 5070 thin client with ThinLinux
- Editing Teradici policy settings
- Edit the Wyse Software Thin Client policy settings
- Configuring system personalization
- Configuring desktop experience
- Configuring network settings
- Configuring security and lockdown settings
- Configuring other settings
- Configuring remote connection settings—Citrix
- Configuring remote connection settings—VMware
- Configuring remote connection settings—RDP
- Configuring remote connection settings—Browser
- Configuring device information
- Configuring Wyse Easy Setup version settings
- Configuring VNC settings
- Configuring domain settings
- Managing devices
- Methods to register devices to Wyse Management Suite
- Registering ThinOS devices by using Wyse Device Agent
- Registering Wyse Software Thin Client to Wyse Management Suite by using Wyse Device Agent
- Registering Linux thin clients using Wyse Device Agent
- Registering Wyse Embedded Standard Thin Clients to Wyse Management Suite by using Wyse Device Agent
- Registering ThinLinux version 2.0 devices by using FTP INI method
- Registering ThinLinux version 1.0 devices by using FTP INI method
- Registering ThinOS devices by using the FTP INI method
- Registering ThinLinux thin clients by using Wyse Device Agent
- Registering devices by using DHCP option tags
- Registering devices by using DNS SRV record
- Searching a device using filters
- Saving the current filter
- Querying the device status
- Locking the devices
- Restarting the devices
- Unregistering the devices
- Resetting to factory default settings
- Changing a group assignment
- Sending messages to devices
- Activating the devices
- Viewing device details
- Managing device summary
- Viewing system information
- Viewing device events
- Viewing installed applications
- Rename the thin client
- Configuring remote shadow connection
- Tagging devices
- Device compliance status
- Pulling Windows Embedded Standard or ThinLinux image
- Requesting a log file
- Troubleshooting your device
- Methods to register devices to Wyse Management Suite
- Apps and data
- Application policy
- Configuring thin client application inventory
- Configuring Wyse Software thin client application inventory
- Creating and deploying standard application policy to thin clients
- Creating and deploying advanced application policy to thin clients
- Creating and deploying standard application policy to Wyse Software Thin Clients
- Creating and deploying advanced application policy to Wyse Software Thin Clients
- Image policy
- Managing file repository
- Application policy
- Managing rules
- Managing Jobs
- Managing Events
- Managing users
- Portal administration
- Adding the Active Directory server information
- Importing users to public cloud through active directory
- Alert classifications
- Creating an Application Programming Interface-API accounts
- Accessing file repository
- Configuring other settings
- Thin clients
- Managing Teradici configurations
- Enabling Two-Factor authentication
- Generating reports
- Enabling multi-tenant accounts
- Enabling custom branding
- Managing license subscription
- Managing system setup
- Configuring Wyse Easy Setup by using Wyse Management Suite
- Configuring Wyse Converter for PCs by using Wyse Management Suite
- Registering Wyse Software thin client to Wyse Management Suite
- Registering Wyse Software Thin Client to Wyse Management Suite by using Wyse Device Agent
- Registering devices by using DHCP option tags to Wyse Management Suite
- Registering Wyse Software thin clients by using DNS SRV record to Wyse Management Suite
- Configuring the Wyse Software thin client by using Wyse Management Suite
- Teradici device management
- Troubleshooting Wyse Management Suite
- Installing or upgrading Wyse Device Agent
- Wyse Management Suite feature matrix
- Wireless profiles password editor
- Create and configure DHCP option tags
- Create and configure DNS SRV records
- Steps to change the host name to IP address

8. Click Edit to edit the files.
a. From the drop-down list of Concurrent File Downloads option, select the number of files.
b. Enable or disable Wake on LAN option.
c. Enable or disable Fast File Upload and Download (HTTP) option.
● When HTTP is enabled, the file upload and download occurs over HTTP.
● When HTTP is not enabled, the file upload and download occurs over HTTPS.
d. Select the Certificate Validation check box to enable the CA validation for public cloud.
NOTE:
●
i. When CA Validation from Wyse Management Suite server is enabled, the certificate should be present in the
client. All the operations such as, Apps and Data, Image Pull/Push is successful. If certificate is not present in
the client, the Wyse Management Suite server provides one generic audit event message Failed to Validate
Certificate Authority under Events page. All the operations such as, Apps and Data, Image Pull/Push is not
successful.
ii. When CA Validation from Wyse Management Suite server is disabled, then the communication from server
and client happens in secure channel without Certificate Signature validation.
e. Add a note in the provided box.
f. Click Save Settings .
Configuring other settings
You can use the following settings to enforce the APNS Warnings, License Expiration Warnings, and other Self Service
Legal Agreements.
● Dismiss License Expiration Warning on Dashboard page—Select this check box to disable the warning for a license
expiration from displaying on the Dashboard page.
● Enable Advanced Dell Wyse Cloud Connect options in Android Settings policy configuration page (Note:
Professional Tier Only)—Select this option to enable Advanced Dell Wyse Cloud Connect options in the Android Settings
policy configuration page.
● Heartbeat interval—Enter the time. The device sends heartbeat signal every 60 to 360 minutes.
● Checkin interval—Enter the time. The device sends full checking signal every 8 to 24 hours.
● Not Checked In compliance alert—Enter the number of days before a device triggers a Not Checked In compliance
alert. The range is 1–99.
Thin clients
This section provides the following web links where you can download:
● Thin client operating system images—appservices.wyse.com/pages/serviceandsupport/support/downloads.asp
● Wyse Device Agent for Windows Embedded Standard thin clients—appservices.wyse.com/pages/serviceandsupport/
support/downloads.asp
● Instructions for installing Wyse Device Agent on Windows Embedded Standard thin clients— support.wyse.com/OA_HTML
It also lists the groups and their corresponding registration tokens created for thin clients.
Managing Teradici configurations
To add a Teradici server, do the following:
Steps
1. In the Portal Administration tab, under Console Settings, click Teradici.
2. Click Add Server.
The Add Server screen is displayed.
3. Enter the Server Name. The port number is automatically populated.
4. Select the CA Validation check box to enable CA validation.
5. Click Test.
Portal administration
179