
Reference Guide


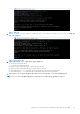
Table Of Contents
- Dell Wyse Management Suite 버전 3.x 고가용성 가이드
- 목차
- 소개
- 고가용성 아키텍처
- Windows Server 2012 R2/2016/2019의 고가용성
- Windows Server 2012 R2/2016/2019에서 고가용성 달성
- MySQL InnoDB에 대한 고가용성 달성
- MongoDB에서 고가용성 확보
- Teradici 장치에 대한 고가용성 달성
- Windows Server 2012 R2/2016/2019에 Wyse Management Suite 설치
- 설치 후 확인
- Wyse Management Suite 버전 1.3을 1.4로 업그레이드
- Wyse Management Suite 버전 1.4/1.4.1/2.x/2.1에서 Wyse Management Suite 버전 3.x(으)로 업그레이드
- 문제 해결

다음 텍스트는 샘플 HAProxy 구성 파일입니다.
global
log /dev/log local0
log /dev/log local1 notice
chroot /var/lib/haproxy
daemon
#maxconn is maximum allowed connections
maxconn 60000
defaults
log global
mode tcp
timeout connect 5000ms
timeout client 50000ms
timeout server 50000ms
errorfile 400 /etc/haproxy/errors/400.http
errorfile 403 /etc/haproxy/errors/403.http
errorfile 408 /etc/haproxy/errors/408.http
errorfile 500 /etc/haproxy/errors/500.http
errorfile 502 /etc/haproxy/errors/502.http
errorfile 503 /etc/haproxy/errors/503.http
errorfile 504 /etc/haproxy/errors/504.http
frontend fe_teradici_5172
bind :5172
mode tcp
backlog 4096
maxconn 70000
default_backend be_teradici_5172
backend be_teradici_5172
mode tcp
option log-health-checks
option tcplog
balance leastconn
server emsdk1 :5172 check server emsdk2 5172 check : timeout queue 5s timeout server
86400s
option srvtcpka
#frontend fe_teradici_5172
#replace IP with IP of your Linux proxy machine bind Eg: 10.150.105.119:5172
#default_backend servers
#backend servers
#Add your multiple back end windows machine ip with 5172 as port
# maxconn represents number of connection- replace 10 with limit #(below 20000)
# "server1" "server2" are just names and not keywords
#server server1 10.150.105.121:5172 maxconn 20000 check
#server server2 10.150.105.124:5172 maxconn 20000 check
6. 다음 명령을 실행하여 HAProxy 구성을 검증합니다.
sudo haproxy –f /etc/haproxy/haproxy.cfg –c
구성이 유효한 경우 Configuration is Valid가 표시됩니다.
7. 다음 명령을 실행하여 HAProxy 서비스를 재시작합니다.
Sudo service haproxy restart
8. 다음 명령을 실행하여 HAProxy 서비스를 중지합니다.
serviceSudo service haproxy stop
66 Teradici 장치에 대한 고가용성 달성