
Administrator Guide


• Save the filter in Devices page
• Query the device status
• Lock the devices
• Restart the devices
• Unregister the device
• Enrollment Validation
• Reset the ThinOS device to factory default settings
• Change a group assignment on the Devices page
• Send messages to a device
• Activate the device
• View the device details
• Manage the device summary
• View the system information
• View device events
• View the installed applications
• Rename the thin client
• Configure remote shadow connection
• Shutting down devices
• Tag a device
• Device compliance status
• Pulling Windows Embedded Standard or ThinLinux image
• Request a log file
• Troubleshooting your device
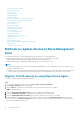
Methods to register devices to Wyse Management
Suite
You can register a thin client to the Wyse Management Suite by using any of the following methods:
• Register manually through the User Interface provided by the Wyse Device Agent (WDA) on the device.
• Register automatically by configuring the appropriate option tags on the DHCP server.
• Register automatically by configuring the appropriate DNS SRV records on the DNS server.
NOTE:
• For a public cloud, register a thin client by providing the Wyse Management Suite URL, and the group token for the group to which
you want to register the device.
• For a private cloud, register a thin client by providing the Wyse Management Suite URL, and the group token—optional for the group
to which you want to register this device. Devices are registered to the unmanaged group, if the group token is not provided.
Register ThinOS devices by using Wyse Device Agent
To register the ThinOS devices manually, do the following:
Steps
1. From the desktop menu of the thin client, go to System Setup > Central Configuration.
The Central Configuration window is displayed.
2. Click the WDA tab. The WDA service automatically runs after the client boot up process is complete.
WMS is selected by default.
3. Select the Enable Wyse Management Suite check box to enable Wyse Management Suite.
4. Enter the Group Registration Key as configured by your administrator for the wanted group.
5. Select the Enable WMS Advanced Settings option, and enter the WMS server or MQTT server details.
6. Enable or disable CA validation based on your license type. For public cloud, select the Enable CA Validation check box, and for
private cloud, select the Enable CA Validation check box if you have imported certificates from a well-known certificate authority
into your Wyse Management Suite server.
34
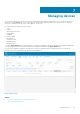
Managing devices