
Administrator Guide


3. Click Add Policy.
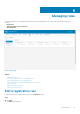
Add Standard App Policy window is displayed.
4. Enter the Policy Name.
5. From the Group drop-down list, select the group.
6. From the Task drop-down list, select the task.
7. From the OS Type drop-down list, select the operating system.
8. Select the Filter files based on extensions checkbox to filter the applications.
9. From the Application drop-down list, select the application.
If the application files are available on multiple repositories, then the number of repositories is displayed next to the file name.
10. To deploy this policy to a specific operating system or a platform, select either OS Subtype Filter or Platform Filter.
11. From the Apply Policy Automatically drop-down list, select any of the following options:
• Do not apply automatically—This option does not apply any policy automatically to the devices.
• Apply the policy to new devices—This option automatically applies the policy to a registered device which belongs to a selected
group or is moved to a selected group.
• Apply the policy to devices on check in—This option is automatically applied to the device at check-in.
NOTE: For Windows based devices, specify the silent installation parameters for .exe files to run the application in
the silent mode. For example, VMware-Horizon-Client-4.6.1-6748947.exe /silent /install /norestart.
12. To stop the installation process after a defined value, specify the number of minutes in the Application Installation Timeout field.
The default value is 60 minutes.
NOTE: The Application Installation Timeout option is applicable only for Windows Embedded Standard devices and
Wyse Software thin clients.
13. Click Save to create a policy.
A message is displayed to enable the administrator to schedule this policy on devices based on group.
14. Select Yes to schedule a job on the same page.
15. Select any of the following options:
• Immediately—Server runs the job immediately.
• On device time zone—Server creates one job for each device time zone and schedules the job to the selected date or time of
the device time zone.
• On selected time zone—Server creates one job to run at the date or time of the designated time zone.
16. To create the job, click Preview and schedules are displayed on the next page.
17. You can check the status of the job by going to the Jobs page.
Enable single sign-on for Citrix StoreFront using standard
application policy
To enable single sign-on for Citrix StoreFront, do the following:
• Scenario 1—If you want to enable single sign-on for StoreFront on the current version of Citrix Receiver, do the following:
1. Create and deploy a standard application policy to uninstall the Citrix Receiver using the parameter /silent.
2. Create and deploy a standard application policy to install the Citrix Receiver again using the parameter /silent /
includeSSON /AutoUpdateCheck = Disabled.
• Scenario 2—If you want to upgrade Citrix Receiver and enable single sign-on for StoreFront, do the following:
1. Create and deploy a standard application policy to upgrade the Citrix Receiver using the parameter /silent /includeSSON /
AutoUpdateCheck = Disabled.
• Scenario 3—If you want to downgrade Citrix Receiver and enable single sign-on for StoreFront, do the following:
1. Create and deploy a standard application policy to downgrade the Citrix Receiver using the parameter /silent /
includeSSON /AutoUpdateCheck = Disabled.
52
Apps and data