
Install Guide


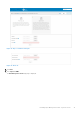


Table Of Contents
- Dell Wyse Management Suite Version 1.0 Quick Start Guide
- Introduction
- Getting started with Wyse Management Suite
- Installing Wyse Management Suite on private cloud
- Deploying applications to thin clients
- Uninstalling Wyse Management Suite
- Troubleshooting Wyse Management Suite
- Introduction to remote database
- Custom installation
- Wyse Management Suite feature matrix
- Supported thin clients on Wyse management Suite
- Creating and configuring DHCP option tags
- Creating and configuring DNS SRV records
- Creating and deploying advanced application policy to thin clients
- Registering Windows Embedded Standard device manually
- Registering Linux device manually
- Terms and definitions

Figure 16. Central Configuration
3. Select the Enable Wyse Management Suite check box to enable Wyse Management Suite.
4. Enter the Group Registration Key as configured by your administrator for the desired group.
5. Select the Enable WMS Advanced Settings option, and enter the WMS server or MQTT server details.
6. Enable or disable CA validation based on your license type—public cloud or private cloud.
● Public cloud—Select the Enable CA Validation check box if the device is registered with Wyse Management Suite in
public cloud.
● Private cloud—Select the Enable CA Validation check box if you have imported certificates from a well-known
certificate authority into your Wyse Management Suite server.
NOTE:
For the pro cloud version of Wyse Management Suite in USA, do not change the default WMS server and MQTT server
details. For the pro cloud version of Wyse Management Suite in Europe, use the following:
● CCM Server—eu1.wysemanagementsuite.com
● MQTT Server—eu1-pns.wysemanagementsuite.com:1883
7. To verify the setup, click Validate Key. The device automatically restarts after the key is validated.
NOTE:
If the key is not validated, verify the credentials which you have provided. Ensure that ports 443 and 1883 are
not blocked by the network.
8. Click OK.
The device is registered to the Wyse Management Suite console.
Next steps
For information on how to register the Windows Embedded Standard devices and the Linux devices, see Registering Windows
Embedded Device manually and Registering Linux device manually.
Registering ThinOS devices using existing INI file delivery
If you want to configure the ThinOS devices using wnos.ini, or xen.ini, then the additional information can be published in the .ini
files to inform the devices to check in to a Wyse Management Suite server.
For example,
CCMEnable=yes
CCMServer=<WMS_Server>
GroupPrefix=defa
20
Installing Wyse Management Suite on private cloud