
Administrator Guide


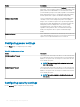
Table Of Contents
- Dell Wyse Management Suite Version 1.4 Administrator’s Guide
- Introduction to Wyse Management Suite
- Getting started with Wyse Management Suite
- Wyse Management Suite dashboard
- Managing groups and configurations
- Add a group
- Edit a group
- Remove a group
- Edit an unmanaged group
- Configure a global level policy
- Configure a group level policy
- Configure a device level policy
- Export group policies
- Import group policies
- Edit the ThinOS policy settings
- Edit the Windows Embedded Standard policy settings
- Configuring system personalization
- Configuring desktop experience
- Configuring network settings
- Configuring security and lockdown settings
- Configuring other settings
- Configuring remote connection settings—Citrix
- Configuring remote connection settings—VMware
- Configuring remote connection settings—RDP
- Configuring remote connection settings—Browser
- Configuring Latitude mobile thin client BIOS settings
- Configuring Wyse 7040 thin client BIOS settings
- Configuring device information
- Configuring Wyse Easy Setup settings
- Configuring VNC settings
- Configuring domain settings
- Configuring BIOS settings for Wyse 5070 thin client with Windows 10 IoT Enterprise
- Configuring BIOS settings for Wyse 5470 All-in-One thin client with Windows 10 IoT Enterprise
- Edit the Linux policy settings
- Configuring system personalization
- Configuring desktop experience
- Configuring login experience settings
- Configuring network settings
- Configuring security settings
- Configuring central configuration settings
- Configuring other settings
- Configuring VDI global settings
- Configuring remote connection settings—Citrix
- Configuring remote connection settings—VMware
- Configuring remote connection settings—RDP
- Configuring remote connection settings—Browser
- Configuring advanced settings
- Edit the ThinLinux policy settings
- Configuring system personalization
- Configuring desktop experience
- Configuring login experience
- Configuring network settings
- Configuring security settings
- Configuring central configuration settings
- Configuring other settings
- Configuring VDI global settings
- Configuring remote connection settings—Citrix
- Configuring remote connection settings—VMware
- Configuring remote connection settings—RDP
- Configuring remote connection settings—Browser
- Configuring advanced settings
- Configuring device information
- Configuring Wyse 3040 thin client BIOS settings
- Configuring BIOS settings for Wyse 5070 thin client with ThinLinux
- Configuring global browser settings
- Configuring proxy settings
- Editing Teradici policy settings
- Edit the Wyse Software Thin Client policy settings
- Configuring system personalization
- Configuring desktop experience
- Configuring network settings
- Configuring security and lockdown settings
- Configuring other settings
- Configuring remote connection settings—Citrix
- Configuring remote connection settings—VMware
- Configuring remote connection settings—RDP
- Configuring remote connection settings—Browser
- Configuring device information
- Configuring Wyse Easy Setup version settings
- Configuring VNC settings
- Configuring domain settings
- Managing devices
- Methods to register devices to Wyse Management Suite
- Registering ThinOS devices by using Wyse Device Agent
- Registering Wyse Software Thin Client to Wyse Management Suite by using Wyse Device Agent
- Registering Linux thin clients using Wyse Device Agent
- Registering Wyse Embedded Standard Thin Clients to Wyse Management Suite by using Wyse Device Agent
- Registering ThinLinux version 2.0 devices by using FTP INI method
- Registering ThinLinux version 1.0 devices by using FTP INI method
- Registering ThinOS devices by using the FTP INI method
- Registering ThinLinux thin clients by using Wyse Device Agent
- Registering devices by using DHCP option tags
- Registering devices by using DNS SRV record
- Searching a device using filters
- Saving the current filter
- Querying the device status
- Locking the devices
- Restarting the devices
- Unregistering the devices
- Resetting to factory default settings
- Changing a group assignment
- Sending messages to devices
- Activating the devices
- Viewing device details
- Managing device summary
- Viewing system information
- Viewing device events
- Viewing installed applications
- Rename the thin client
- Configuring remote shadow connection
- Shutting down devices
- Tagging devices
- Device compliance status
- Pulling Windows Embedded Standard or ThinLinux image
- Upgrading ThinLinux 1.x to 2.1 and later versions
- Requesting a log file
- Troubleshooting your device
- Methods to register devices to Wyse Management Suite
- Apps and data
- Application policy
- Configuring thin client application inventory
- Configuring Wyse Software thin client application inventory
- Creating and deploying standard application policy to thin clients
- Creating and deploying advanced application policy to thin clients
- Creating and deploying standard application policy to Wyse Software Thin Clients
- Creating and deploying advanced application policy to Wyse Software Thin Clients
- Enable single sign-on for Citrix StoreFront using standard application policy
- Image policy
- Managing file repository
- Application policy
- Managing rules
- Managing Jobs
- Managing Events
- Managing users
- Portal administration
- Adding the Active Directory server information
- Importing users to public cloud through active directory
- Alert classifications
- Creating an Application Programming Interface-API accounts
- Accessing file repository
- Configuring other settings
- Managing Teradici configurations
- Enabling Two-Factor authentication
- Generating reports
- Enabling multi-tenant accounts
- Enabling custom branding
- Managing license subscription
- Managing system setup
- Configuring Wyse Easy Setup by using Wyse Management Suite
- Configuring Wyse Converter for PCs by using Wyse Management Suite
- Registering Wyse Software thin client to Wyse Management Suite
- Registering Wyse Software Thin Client to Wyse Management Suite by using Wyse Device Agent
- Registering devices by using DHCP option tags to Wyse Management Suite
- Registering Wyse Software thin clients by using DNS SRV record to Wyse Management Suite
- Configuring the Wyse Software thin client by using Wyse Management Suite
- Teradici device management
- Wyse Device Agent
- Troubleshooting Wyse Management Suite
- Installing or upgrading Wyse Device Agent
- Wyse Management Suite feature matrix
- Supported thin clients on Wyse management Suite
- Wireless profiles password editor
- Create and configure DHCP option tags
- Create and configure DNS SRV records
- Steps to change the host name to IP address

Option Description
network bandwidth is constrained, select Reduced to enable higher
frame rates. Select towards Perception-Free to enable higher image
quality. When network bandwidth is not constrained, the PCoIP
system maintains perception-free quality regardless of the Minimum
Image Quality parameter. Note: The Maximum Initial Image Quality
must be greater than or equal to the Minimum Image Quality.
Maximum Image Quality Select towards Reduced to reduce the network bandwidth peaks
caused by screen content changes, but produce lower quality
images. Select towards Perception-Free to produce higher quality
images but also higher bandwidth peaks. This parameter limits the
initial quality on the rst display frame of the screen change.
Unchanged regions of the image are built to a lossless state
regardless of this parameter. Note: The Maximum Initial Image
Quality must be greater than or equal to the Minimum Image
Quality.
Enable local cursor When enabled, the Tera2PCoIP Zero Client always shows the local
cursor. When disabled, the local cursor is only shown when the host
requests it or a locally-terminated mouse is connected.
Conguring power settings
Use the Power page to congure the power settings.
Table 239.
Congure power settings
Option Description
OSD Screen Saver Timeout This is the period of inactivity in the device. You can enter the time
in seconds. After the time is entered, the device sets the attached
displays to low power mode. The range is 10–9999. Enter the time
as 0 to disable this option.
NOTE: This feature is applicable only when the device is
not in the session.
Display Suspend Timeout This is the period of inactivity in the device. You can enter the time
in seconds. After the time is entered, the device sets the attached
displays to low power mode. The range is 10–14400. Enter the time
as 0 to disable this option.
NOTE: This feature applicable only when the device is in
the session.
Conguring security settings
Use the Security page to congure the security settings.
128
Managing groups and congurations