
Deployment Guide

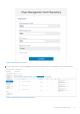


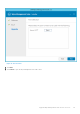
Table Of Contents

Upgrade Wyse Management Suite version 3.x
to 3.2
Prerequisites
● Ensure that there is enough space on the drive where Wyse Management Suite is installed and the local repository is
configured.
● If you have installed or configured an antivirus or other monitoring tools on the Wyse Management Suite setup, Dell
Technologies recommends that you disable the tools temporarily until the upgrade is complete. You can also add an
appropriate exclusion to the Wyse Management Suite install directory, temporary directory, and local repository directory.
Steps
1. Double-click the Wyse Management Suite 3.2 installer package.
2. On the Welcome screen, click Next.
The EULA details are displayed.
NOTE: This screen is displayed when you upgrade from Wyse Management Suite 3.0 to 3.x.
3. Read the License Agreement.
4. Select the I accept the terms in the license agreement and click Next.
5. On the Upgrade page, configure the shared folder and access rights for the CIFS user. The available options are:
● Use an Existing user—Select this option to validate credentials for the existing user.
● Create a New user—Select this option and enter the credentials to create a user.
NOTE:
If EM SDK is installed on the server during the previous Wyse Management Suite installation, the Teradici EM
SDK components are updated automatically. If EM SDK is not installed on the device during the previous installation,
select the Teradici EM SDK checkbox to install and configure the Teradici EM SDK components.
NOTE: You can also install and update Teradici EM SDK using the Wyse Management Suite installer.
6. Select the Bind Memcached to 127.0.0.1 check box to bind the memcache to local server—127.0.0.1. If this check box is
not selected, the memcache is binded to FQDN.
7. Select a port for secure MQTT communication. The default port is 8443.
NOTE: The port number for secure MQTT communication should not be 0.
7
22 Upgrade Wyse Management Suite version 3.x to 3.2