Ja a môj Dell Pre počítače Inspiron, rad G, XPS a Alienware May 2020 Rev.
Poznámky, upozornenia a výstrahy POZNÁMKA: POZNÁMKA uvádza dôležité informácie, ktoré vám umožnia využívať váš produkt lepšie. VAROVANIE: UPOZORNENIE naznačuje, že existuje riziko poškodenia hardvéru alebo straty údajov a ponúka vám spôsob, ako sa tomuto problému vyhnúť. VÝSTRAHA: VÝSTRAHA označuje potenciálne riziko vecných škôd, zranení osôb alebo smrti. © 2011-2020 Dell Inc. alebo jej dcérske spoločnosti. Všetky práva vyhradené. Dell, EMC, ako aj ďalšie ochranné známky sú ochranné známky firmy Dell Inc.
Obsah Kapitola 1: Inštalácia počítača...........................................................................................................7 Pripojenie k internetu.............................................................................................................................................................7 Pripojenie k internetu pomocou LAN.............................................................................................................................
Pamäťový modul..................................................................................................................................................................20 Systémová doska................................................................................................................................................................ 20 Čipová sada...............................................................................................................................................
Grafický adaptér (VGA)......................................................................................................................................................38 Digitálne vizuálne rozhranie (DVI)..................................................................................................................................... 38 DisplayPort...........................................................................................................................................................
Konfigurácia správania tlačidla napájania....................................................................................................................58 Dell Power Manager......................................................................................................................................................58 Zlepšenie životnosti batérie...............................................................................................................................................
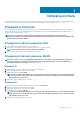
1 Inštalácia počítača Postup inštalácie sa líši v závislosti od vášho počítača. Inštalačné pokyny pre váš počítač alebo tablet nájdete v Stručnej úvodnej príručke, ktorú ste dostali k počítaču, alebo si pozrite časť Nastavenie a technické údaje na webovej stránke www.dell.com/support. Pripojenie k internetu Váš počítač môžete pripojiť k internetu pomocou kábla, DSL, telefonického pripojenia alebo pripojenia WWAN.
Windows 7 1. Kliknite alebo ťuknite na ikonu bezdrôtovej komunikácie v ponuke oznámení. 2. Kliknite na sieť, ku ktorej sa chcete pripojiť. 3. Kliknite na tlačidlo Pripojiť. POZNÁMKA: V prípade výzvy zadajte heslo pre prístup do siete. Kľúč pre prístup do siete ste pravdepodobne zadali pri nastavovaní smerovača, prípadne smerovač môže mať predvolený kľúč pre prístup do siete. Podrobné informácie vám poskytne výrobca smerovača. 4. Zapnite alebo vypnite zdieľanie súborov (voliteľné).
POZNÁMKA: Na počítačoch s diskrétnou zvukovou kartou pripojte reproduktory ku konektorom na karte. Konfigurácia zvuku 5.1 a 7.1 Konfigurujte počítač tak, aby poskytoval viackanálový zvukový výstup. Windows 10 a 8.1 1. Do vyhľadávacieho poľa zadajte výraz Zvuk. POZNÁMKA: V systéme Windows 10 kliknutím alebo ťuknutím na ikonu vyhľadávania otvorte vyhľadávacie políčko. V systéme Windows 8.1 otvorte otvorením kľúčového tlačidla vyhľadávacie pole. 2.
7. Zadný zvukový konektor na reproduktore Pripojenie reproduktorov typu 7.1 Obrázok 2. Pripojenie reproduktorov typu 7.1 1. 3. 5. 7. 9. Zadný konektor zvuku na počítači Bočný konektor zvuku na počítači Kábel 7.1-kanálového zvuku Predný zvukový konektor na reproduktore Bočný zvukový konektor na reproduktore 2. 4. 6. 8.
POZNÁMKA: Ak je tlačiareň nainštalovaná, mala by sa zobrazovať v zozname na pravej strane. Ak tlačiareň nie je v zozname, kliknite alebo ťuknite na položku Pridať zariadenie v hornej časti zoznamu zariadení. Pre inštaláciu vyberte svoju tlačiareň v zozname. Viac informácií o nastavení tlačiarne nájdete v dokumentácii dodanej s tlačiarňou. Windows 7 1. Kliknite na položky Štart > Zariadenia a tlačiarne. 2. Kliknite na položku Pridať tlačiareň. Zobrazí sa okno Pridať tlačiareň. 3.
• • • • Iba obrazovka počítača – použiť iba displej 1 a na displeji 2 nezobrazovať nič. Pri tomto nastavení sa bude používať iba primárny monitor, sekundárny bude systém ignorovať. Duplikovať (označuje sa aj ako Režim klonovania) – zobrazovať celú pracovnú plochu na oboch displejoch. Sekundárny alebo ďalší monitor zrkadlí primárny. Rozšíriť – roztiahnuť pracovnú plochu na dva displeje.
2 Informácie o počítači V tejto časti nájdete viac informácií o komponentoch vášho počítača. Napájací adaptér Napájacie adaptéry na používajú na napájanie prenosných počítačov, tabletov a niektorých stolových počítačov. Súpravu napájacieho adaptéra Dell tvorí napájací adaptér a napájací kábel. Menovitý výkon napájacieho adaptéra (90 W, 65 W a podobne) závisí od zariadenia, pre ktoré je určený, a napájací kábel sa mení podľa krajiny, kde sa napájací adaptér dodáva.
Gombíková batéria Gombíková batéria napája čip CMOS (Complementary Metal Oxide Semiconductor) aj keď je počítač vypnutý. Čip CMOS obsahuje čas, dátum a iné konfiguračné údaje vášho počítača. V normálnych podmienkach používania môže gombíková batéria vydržať niekoľko rokov. Životnosť gombíkovej batérie ovplyvňujú faktory, ako napríklad typ systémovej dosky, teplota, ale tiež, ako dlho je počítač vypnutý atď. Dotyková plocha Dotykovým panelom je vybavená väčšina notebookov a toto zariadenie slúži ako myš.
POZNÁMKA: Bezdrôtová obrazovka nemusí byť k dispozícii v každom počítači. Viac informácií nájdete na webovej lokalite www.intel.com. Kamera Webová kamera Webová kamera umožňuje videokonverzácie, fotografovanie a nahrávanie videí. 3D Kamera 3D kamera vám umožňuje zachytávať a vysielať trojrozmerné obrázky. To umožňuje vnímať vzdialenosť, veľkosť a rozmery predmetov prostredníctvom integrovaných snímačov. Táto funkcia zvyšuje interaktivitu počas videokonferencií, online hier a podobných aktivít.
Podsvietenie klávesnice Posvietenie, ktorým sú vybavené niektoré klávesnice, osvetľuje symboly na klávesách, aby ste mohli klávesnicu používať aj pri nedostatku svetla. Podsvietenie môžete zapnúť manuálne alebo môžete nakonfigurovať podsvietenie tak, aby sa zaplo, keď sa počítač nachádza v tmavom prostredí. Podsvietené klávesnice na notebookoch Dell majú rôzne režimy osvetlenia. Stláčaním tlačidla Fn a šípky doprava môžete prepínať medzi týmito režimami osvetlenia.
Typy pripojenia klávesnice Klávesnice sa dajú pripojiť k počítačom pomocou kábla (káblové pripojenie) alebo pomocou bezdrôtových signálov (bezdrôtové pripojenie). Káblové pripojenie Káblové klávesnice sa pripájajú k počítaču pomocou kábla (zvyčajne s konektorom USB) a nepotrebujú ďalší napájací zdroj, napríklad batérie.
Interné ukladacie zariadenia Interné ukladacie zariadenia sú nainštalované v počítači a vo všeobecnosti sa nedajú vybrať, kým je počítač zapnutý. Najčastejšie používané ukladacie zariadenia sú pevné disky (HDD) a disky SSD (Solid-State Drive). Disky HDD a SSD používajú na prenos informácií rozhranie SATA. Disky SSD sú aj fyzicky podobné pevným diskom, vďaka čomu sú kompatibilné s existujúcimi počítačmi. Pevné disky využívajú magnetické platne.
Tabuľka1.
Tabuľka1. Príklady bežne používaných typov pamäťových kariet (pokračovanie) Pamäť Memory Stick (MS) / Pamäť Memory Stick Pro (MS Pro) Smart Media / Smart Media XD Pamäťový modul Pamäťový modul uchováva dočasné dáta, ktoré počítač potrebuje na vykonávanie úloh. Každý súbor alebo aplikácia sa načíta do pamäťového modulu predtým, než ho otvoríte alebo použijete. Pamäťové moduly sa triedia podľa ich kapacity (v GB) a rýchlosti (v MHz). Rýchlejšie a väčšie pamäte zvyčajne poskytujú lepšiu výkonnosť.
Procesory sa rozlišujú najmä na základe nasledovných parametrov: • • • Počet jadier na spracovanie Rýchlosť alebo frekvencia meraná v gigahertzoch (GHz) alebo megahertzoch (MHz) Pamäť na doske, tiež nazývaná rýchla vyrovnávacia pamäť Tieto parametre určujú aj výkonnosť procesora. Vyššie hodnoty vo všeobecnosti znamenajú vyšší výkon. Niektoré procesory môžu byť integrované na systémovej doske. Procesory vyrábajú napr. spoločnosti Intel, AMD, Qualcomm atď.
• • Integrovaná – často býva označovaná ako grafická karta na doske a je integrovaná v systémovej doske. V niektorých počítačoch je grafická karta integrovaná v procesore. Integrované grafické karty zvyčajne zdieľajú systémovú pamäť (RAM) a na spracovanie videa môžu tiež využívať procesor. Zrýchlená spracovacia jednotka (APU) je integrovaná na rovnakej matrici ako procesor a poskytuje vyššie rýchlosti prenosu dát pri nižšej spotrebe.
POZNÁMKA: Na vytvorenie 5.1/7.1-kanálového zvuku musí vaša zvuková karta a reproduktory podporovať 5.1/7.1 kanálov. Zvuk 2.1 2.1 označuje systém s dvomi reproduktormi (ľavý a pravý kanál) a jedným superbasovým reproduktorom. Zvuk 5.1 5.1 sa vzťahuje na počet zvukových kanálov vo väčšine konfigurácii zvuku surround. Zvukový systém 5.1 používa päť hlavných zvukových kanálov (ľavý predný, pravý predný, stredný, ľavý surround a pravý surround) a jeden nízkofrekvenčný zvukový kanál. Zvuk 7.1 7.
Bezdrôtová lokálna počítačová sieť (WLAN) Zariadenia sú pripojené bezdrôtovo a pokrývajú relatívne malú plochu, v rámci domu alebo budovy. Vo všeobecnosti sa pre bezdrôtové pripojenie WLAN používa Wi-Fi (802.11x, kde x označuje rôzne protokoly 802.11). Bezdrôtová rozľahlá počítačová sieť (WWAN) Známa tiež pod názvom „širokopásmové mobilné pripojenie“, túto službu väčšinou poskytujú poskytovatelia telefónnych služieb pre používanie v mobilných zariadeniach.
Bluetooth Technológia Bluetooth umožňuje pripojiť iné zariadenia s podporou technológie Bluetooth k vášmu počítaču alebo tabletu na krátku vzdialenosť. Bluetooth používajú zariadenia, ako napr. telefón, slúchadlá, klávesnica, myš, tlačiareň, atď. Ovládače Bluetooth môžu byť interné (ako rozširujúce karty alebo sú integrované do systémovej dosky) alebo externé.
3 Používanie počítača Nabíjanie batérie Ak chcete nabiť batériu, pripojte napájací adaptér k počítaču alebo tabletu. Batéria sa nabíja, keď sa počítač alebo tablet používa alebo je vypnutý. Vnútorné obvody v batérii bránia jej nadmernému nabitiu. POZNÁMKA: Ak sa batéria v teplom prostredí príliš zohreje, nemusí sa nabiť, keď pripojíte napájací adaptér. Pred pokračovaním nabíjania nechajte batériu vychladnúť. POZNÁMKA: Možnosti, ako zvýšiť životnosť batérie, nájdete v časti Predĺženie životnosti batérie.
Tabuľka2. Tabuľka 21. Zoznam klávesových skratiek (pokračovanie) Ctrl a c Kopírovanie vybranej položky. Ctrl a x Vystrihnutie vybranej položky. Ctrl a v Vloženie vybranej položky. Ctrl a z Vrátenie činnosti späť. Ctrl a a Výber všetkých položiek v dokumente alebo okne. Ctrl a F4 Zatvorenie aktívneho okna (v programoch, ktoré umožňujú súčasné otvorenie viacerých dokumentov). Ctrl, Alt a Tab Pomocou klávesov so šípkami môžete prepínať medzi otvorenými položkami.
Tabuľka3. Tabuľka 21. Zoznam klávesových skratiek (pokračovanie) Ctrl a - Oddialenie od veľkého množstva položiek na obrazovke, napríklad od aplikácií pripnutých na domovskej obrazovke. Klávesy Windows a c Otvorenie bočného panela kľúčových tlačidiel. Klávesy Windows a f Otvorenie kľúčového tlačidla Vyhľadávanie na vyhľadávanie súborov vo vašom počítači. Klávesy Windows a h Otvorenie kľúčového tlačidla Vyhľadávanie. Klávesy Windows a i Otvorte kľúčové tlačidlo Nastavenia.
2. 3. 4. 5. POZNÁMKA: V systéme Windows 10 kliknutím alebo ťuknutím na ikonu vyhľadávania otvorte vyhľadávacie políčko. V systéme Windows 8.1 otvorením kľúčového tlačidla Vyhľadávanie otvorte vyhľadávacie políčko. Kliknite na položku Ovládací panel. Ak je Ovládací panel zobrazený podľa Kategórie, kliknite alebo ťuknite na rozbaľovací zoznam Zobraziť podľa: a zvoľte možnosť Malé ikony alebo Veľké ikony. Kliknite alebo ťuknite na položku Klávesnica.
Gestá na dotykovom paneli POZNÁMKA: Váš počítač nemusí podporovať všetky gestá na dotykovom paneli. POZNÁMKA: Nastavenia gest na dotykovom paneli môžete zmeniť – stačí kliknúť dvakrát na ikonu dotykového panela v oblasti oznámení. Váš počítač môže, no nemusí, podporovať tieto gestá: posúvanie, priblíženie, otočenie, rýchly pohyb a rýchle spustenie. Tabuľka4. Zoznam gest na dotykovom paneli Posúvanie Posun – presunutie zamerania na zvolený objekt, keď nie je vidno celý objekt.
Tabuľka4. Zoznam gest na dotykovom paneli (pokračovanie) Otočenie Otáčanie – umožňuje otáčať aktívny obsah pomocou dvoch prstov vždy o 90 stupňov. Palec držte na jednom mieste a ukazovákom sa posúvajte oblúkovým smerom doprava alebo doľava, aby ste zvolenú položku otočili o 90 stupňov v smere alebo proti smeru hodinových ručičiek. Rýchly pohyb Preklápajte obsah dopredu alebo dozadu. Ak chcete preklopiť obsah dozadu alebo dopredu, posuňte tri prsty rýchlo doľava alebo doprava.
Tabuľka5. Zoznam gest dotykovej obrazovky (pokračovanie) Pre oddialenie položte dva prsty na dotykovú obrazovku a priblížte ich jeden k druhému. Zotrvať Pre otvorenie kontextovej ponuky sa dotknite položky na obrazovke a podržte ju. Rýchly pohyb Posuňte prst rýchlo do želaného smeru, aby ste rýchlym pohybom prešli cez obsah v aktívnom okne ako na stranách v knihe. Listovanie funguje aj vo zvislom smere, napríklad pri listovaní zoznamu obrázkov alebo skladieb.
Tabuľka5. Zoznam gest dotykovej obrazovky (pokračovanie) Vertikálne posúvanie – umožňuje posúvanie nahor alebo nadol v aktívnom okne. Posuňte prst nahor alebo nadol, aby ste aktivovali vertikálne posúvanie. Horizontálne posúvanie – umožňuje posúvanie doprava alebo doľava v aktívnom okne. Posuňte prst doprava alebo doľava, aby ste aktivovali horizontálne posúvanie. Používanie funkcie Bluetooth Môžete vytvárať spojenie (párovať) zariadenia Bluetooth, napríklad myši, klávesnicu, slúchadlá, telefóny, TV atď.
POZNÁMKA: Na počítači alebo tablete a zariadení, ktoré chcete spárovať, sa môže zobraziť prístupový kód. Po dokončení spárovania sa zobrazí správa potvrdzujúca spárovanie zariadenia. Windows 8.1 1. Zapnite Bluetooth na vašom počítači alebo tablete a na zariadení, ktoré chcete spárovať. Na laptope Dell zapnite bezdrôtové pripojenie, aby ste aktivovali Bluetooth. POZNÁMKA: Informácie o aktivácii Bluetooth na vašom zariadení nájdete v dodanej dokumentácii. 2.
Výber kamery a mikrofónu Ak váš počítač obsahuje viacero webkamier alebo mikrofónov (integrovaných alebo externých), môžete zvoliť požadovanú webkameru alebo mikrofón, ktoré chcete použiť s programom Dell Webcam Central. 1. 2. 3. 4. 5. 6. Otvorte program Dell Webcam Central. Kliknite alebo ťuknite na rozbaľovaciu šípku vedľa ikony kamery v ľavom dolnom rohu okna. Kliknite alebo ťuknite na kameru, ktorú chcete použiť. Kliknite alebo ťuknite na kartu Record Videos (Nahrávanie videí).
4 Porty a konektory Audio Zvukové konektory umožňujú pripojiť reproduktory, slúchadlá, mikrofóny, zvukové systémy, zosilňovače alebo zvukový výstup televízora. POZNÁMKA: Váš počítač nemusí podporovať všetky zvukové porty. Viac informácií o portoch, ktoré sú dostupné na vašom počítači alebo tablete, nájdete v Stručnej úvodnej príručke, ktorú ste dostali k počítaču, alebo si pozrite časť Nastavenie a technické údaje na webovej stránke www.dell.com/support. Typy zvukových portov Tabuľka6.
Tabuľka6. Typy zvukových portov (pokračovanie) Bočný port priestorového zvuku – slúži na pripojenie ľavého/ pravého reproduktora. Port RCA S/PDIF – prenáša digitálny zvuk bez potreby analógovej konverzie zvuku. Optický port S/PDIF – prenáša digitálny zvuk pomocou optických signálov bez potreby analógovej konverzie zvuku. USB Port USB (Universal Serial Bus, teda univerzálna sériová zbernica) umožňuje pripojiť k počítaču alebo tabletu periférne zariadenia.
Tabuľka8. Štandardy USB (pokračovanie) USB 2.0 Označuje sa ako Hi-Speed USB. Poskytuje dodatočné prenosové pásmo pre multimédiá a úložné aplikácie. USB 2.0 podporuje rýchlosť prenosu dát do 480 Mb/s. USB 1.x Starší štandard USB, ktorý podporuje rýchlosť prenosu údajov do 11 Mb/s. USB PowerShare Funkcia USB PowerShare umožňuje nabíjať zariadenia USB, keď je počítač zapnutý/vypnutý alebo je signalizuje, že port USB podporuje funkciu PowerShare. v režime spánku.
Mini DisplayPort Mini DisplayPort je zmenšenou verziou rozhrania DisplayPort. POZNÁMKA: DisplayPort a Mini DisplayPort sú navzájom kompatibilné, ale rozmery portov a konektorov sú rozdielne. Ak sú rozmery portov rozdielne, použite konvertor.
5 Softvér a aplikácie Absolute Nástroj Absolute poskytuje riešenia pre trvalé zabezpečenie koncového bodu a správu rizika údajov pre počítače, tablety a smartfóny. Technológia Persistence umožňuje nepretržité posudzovanie rizík, zabezpečenie jednotlivých zariadení počas ich životného cyklu a včasné reagovanie na bezpečnostné problémy. POZNÁMKA: Technológia Persistence nemusí byť podporovaná na všetkých počítačoch.
Nástroj SupportAssist je vopred nainštalovaný vo všetkých počítačoch a tabletoch Dell. Ak chcete preinštalovať nástroj SupportAssist, prevezmite aplikáciu a spustite inštalačný program. Prístup k nástroju SupportAssist • • • Windows 10 – kliknite alebo ťuknite na ikonu nástroja Dell Help & Support na obrazovke Štart. Windows 8.1 – kliknite alebo ťuknite na ikonu nástroja My Dell na obrazovke Štart. Windows 7 – kliknite na položky Štart > Všetky programy > Dell > My Dell > My Dell.
Tabuľka9.
Tabuľka10. Klávesové skratky pre 3D hry Klávesy Popis Funkcia Zobrazenie/skrytie stereoskopických 3D efektov Zapnutie alebo vypnutie 3DTV Play. POZNÁMKA: Výkon hier sa v režime HD 3D môže znížiť aj pri vypnutej funkcii 3DTV Play. Výkon môžete maximalizovať voľbou režimu HD alebo SD pri vypnutej funkcii 3DTV Play. Zväčšuje 3D hĺbku Zväčšuje 3D hĺbku v aktuálnej hre. Zmenšuje 3D hĺbku Zmenšuje 3D hĺbku v aktuálnej hre.
6 Obnovenie operačného systému Možnosti obnovenia systému VAROVANIE: Použitím programu Dell Factory Image Restore alebo disku s operačným systémom natrvalo vymažete z počítača všetky súbory. Ak je to možné, pred použitím týchto nástrojov na obnovu systému si najprv zálohujte svoje údaje. Operačný systém vo vašom počítači môžete obnoviť pomocou jednej z nasledovných možností: Tabuľka11.
Tabuľka12. Funkcie nástroja Dell Backup and Recovery (pokračovanie) Funkcie Basic Premium Priebežné zálohovanie súborov, ktoré minimalizuje stratu údajov Možnosť vytvorenia úplnej zálohy systému vrátane aplikácií a nastavení Spojte dokopy viaceré zálohovania a archivujte staré zálohovania Zálohujte a obnovujte súbory podľa ich typu Dell Backup and Recovery Basic (základná verzia) Prístup k Dell Backup and Recovery Windows 10 1.
Prechod na prémiovú verziu Dell Backup and Recovery Premium 1. Spustite aplikáciu Dell Backup and Recovery. 2. Kliknite alebo ťuknite na dlaždicu Backup (Zálohovanie) a vyberte položku Data Backup (Zálohovanie údajov). 3. Kliknite alebo ťuknite na položku Upgrade to Dell Backup and Recovery Premium (Prejsť na verziu Dell Backup and Recovery Premium).. Obnovenie údajov z úplného zálohovania systému 1. Spustite aplikáciu Dell Backup and Recovery. 2.
Po dvoch neúspešných pokusoch o zavedenie operačného systému sa zavádzacia postupnosť automaticky pokúsi spustiť možnosti obnovenia systému a vykonať automatickú opravu. Spustenie nástroja Dell Factory Image Restore POZNÁMKA: Použitie nástroja Dell Factory Image Restore natrvalo zmaže všetky dáta z pevného disku a odstráni všetky programy alebo ovládače nainštalované po nadobudnutí počítača. Ak je to možné, pred využitím nástroja Dell Factory Image Restore zálohujte svoje údaje.
3. Kliknite alebo ťuknite na položku Obnovenie. 4. Kliknite alebo ťuknite na položku Otvoriť nástroj Obnovovanie systému. 5. Kliknite alebo ťuknite na tlačidlo Ďalej a postupujte podľa pokynov na obrazovke. Odvolanie posledného obnovenia systému 1. 2. 3. 4. Pravým tlačidlom myši kliknite na tlačidlo Štart (alebo ho stlačte a podržte) a vyberte položku Ovládací panel. Kliknite alebo ťuknite na položku Zabezpečenie a údržba. Kliknite alebo ťuknite na položku Obnovenie.
Disk s operačným systémom VAROVANIE: Preinštalovanie operačného systému pomocou disku s operačným systémom z vášho počítača natrvalo vymaže všetky dáta a softvér. POZNÁMKA: Disk s operačným systémom je voliteľnou možnosťou a nemusí tvoriť súčasť dodávky vášho počítača. Disk s operačným systémom môžete použiť na inštalovanie alebo preinštalovanie operačného systému svojho počítača. Po preinštalovaní operačného systému použitím disku s operačným systémom musíte preinštalovať všetky ovládače a programy.
7 Riešenie problémov Základné kroky pri riešení problémov V tejto časti sú uvedené niektoré základné kroky na riešenie problémov, ktoré môžete použiť na odstránenie bežných problémov s počítačom. • • • • • • • Skontrolujte, či je počítač zapnutý a všetky komponenty sú napájané. Skontrolujte, či sú všetky káble pevne pripojené k príslušným portom. Skontrolujte, či káble nie sú poškodené alebo rozstrapkané. Skontrolujte, či na konektoroch nie sú ohnuté alebo zlomené kolíky.
Pokročilé PSA Vylepšené vyhodnotenie systému pred zavedením (ePSA) môžete používať na diagnostiku rôznych problémov s hardvérom. Test ePSA otestuje zariadenia ako sú systémová doska, klávesnica, displej, pamäť, pevný disk atď. POZNÁMKA: Nie všetky počítače podporujú ePSA. Domovská obrazovka ePSA je rozdelená na tri časti: • • Okno zariadení – nachádza sa na ľavej strane úvodnej obrazovky ePSA. Zobrazuje všetky zariadenia vo vašom počítači a môžete ho používať na voľbu zariadení.
Ak sa test PSA dokončí úspešne, na obrazovke sa objaví nasledujúca správa: No problems have been found with this system so far. Do you want to run the remaining memory tests? This will take about 30 minutes or more. Do you want to continue? (Recommended). (Vykonané testy ukázali, že tento systém funguje správne. Chcete spustiť zvyšné testy pamäte? Dokopy budú trvať minimálne 30 minút. Chcete pokračovať? (Odporúčame pokračovať)).
8 BIOS BIOS uchováva hardvérové informácie o vašom počítači a odovzdáva tieto informácie operačnému systému, keď sa systém zavádza. Základné nastavenie hardvéru uložené v systéme BIOS môžete zmeniť v programe BIOS. Program na nastavenie systému BIOS môžete použiť na: • • • Nastavenie alebo zmenu možnosti voliteľnej používateľom, napríklad používateľské heslo. Určenie zariadení nainštalovaných vo vašom počítači, napríklad množstvo pamäte, typ pevného disku atď.
Takmer všetky systémové dosky v stolných počítačoch obsahujú prepojku na vymazanie nastavení CMOS spolu s heslom pre BIOS. Umiestnenie tejto prepojky sa líši v závislosti od systémovej dosky. Hľadajte prepojky v blízkosti batérie CMOS, zvyčajne označené ako CLR, CLEAR, CLEAR CMOS a podobne. Viac informácií o vynulovaní hesiel a mazaní nastavení v pamäti CMOS nájdete v servisnej príručke vášho počítača na webovej stránke www.dell.com/support.
9 Získavanie pomoci a kontaktovanie spoločnosti Dell Zdroje svojpomoci Ďalšie informácie a pomoc k výrobkom a službám Dell môžete získať z týchto zdrojov svojpomoci: Tabuľka14. Zdroje svojpomoci Zdroje svojpomoci Umiestnenie zdrojov informácií Informácie o výrobkoch a službách Dell www.dell.com My Dell Tipy Kontaktovať oddelenie podpory Do vyhľadávacieho poľa systému Windows zadajte Contact Support a stlačte kláves Enter. Online pomocník pre operačný systém www.dell.com/support/windows www.dell.
POZNÁMKA: Dostupnosť sa líši v závislosti od danej krajiny/regiónu a produktu, pričom niektoré služby nemusia byť vo vašej krajine/vašom regióne dostupné. POZNÁMKA: Ak nemáte aktívne pripojenie na internet, kontaktné informácie nájdete na faktúre, dodacom liste, účtenke alebo v produktovom katalógu firmy Dell.
10 Referenčné materiály Údržba počítača Odporúča sa, aby ste vykonali nasledovné úlohy a tak predišli všeobecným problémom s počítačom: • • • • • • Zabezpečte priamy prístup k napájaciemu zdroju, primerané vetranie a vodorovný povrch na umiestnenie počítača. Nezakrývajte vetracie otvory. Dajte pozor, aby sa do nich nedostali žiadne predmety, a dbajte na to, aby sa v nich nehromadil prach. Pravidelne si zálohujte dáta. Pravidelne vykonávajte antivírovú kontrolu.
Windows 7 1. Kliknite na položky Štart > Ovládací panel > Možnosti napájania. 2. V závislosti od toho, ako používate počítač, si môžete vybrať z plánu zo zoznamu dostupných možností. 3. Ak chcete upraviť nastavenia napájania, kliknite na možnosť Zmeniť nastavenia plánu. Konfigurácia správania tlačidla napájania Konfigurácia správania tlačidla napájania: Windows 10 a 8.1 1. Kliknite alebo ťuknite na ikonu Štart > Všetky aplikácie. 2. Pod položkou systém Windows kliknite alebo ťuknite na Ovládací panel.
• Vysoké nastavenie jasu displeja, 3D šetriče obrazovky alebo iné programy náročné na napájanie, napríklad zložité 3D grafické aplikácie a hry. Výkonnosť batérie môžete zlepšiť nasledovne: • • • Napájajte počítač z napájacieho adaptéra, ak je to možné. Životnosť batérie sa zníži počtom vybití a nabití batérie. Nakonfigurujte nastavenie správy napájania pomocou funkcie možností napájania operačného systému Microsoft Windows tak, aby ste optimalizovali spotrebu počítača (pozrite časť Správa napájania).
Migrácia zo staršieho operačného systému Windows na novší Pri migrácii na novší operačný systém si pozrite dodané pokyny spoločnosti Microsoft pre migráciu z jedného operačného systému na iný. Viac informácií nájdete na webovej lokalite www.microsoft.com. Ergonomické pokyny VAROVANIE: Nesprávne alebo dlhodobé používanie klávesnice môže spôsobiť poškodenie zdravia. VAROVANIE: Dlhodobé sledovanie monitora počítača môže spôsobiť problémy zraku.
1. Monitor na úrovni očí alebo nižšie 3. Stojan na monitor 5. Ruky na úrovni stola 2. Monitor a klávesnica priamo pred používateľom 4. Chodidlá položené na podlahe 6. Zápästia uvoľnené a rovné POZNÁMKA: Najnovšie ergonomické pokyny nájdete na webovej stránke www.dell.com/regulatory_compliance. Dell a životné prostredie Zelená farba nepredstavuje obmedzenie – je to rozšírenie možností. Ide o hľadanie lepších spôsobov.
Tabuľka15. Dell a životné prostredie (pokračovanie) využívaní prírodných zdrojov, preto naše bambusy získavame z lesov, ktoré sú ďaleko od známych miest výskytu pánd. Staňte sa ja vy súčasťou programu Plant a Tree (Zasaď strom) Firma Dell vytvorila program Plant a Tree (Zasaď strom), aby vám uľahčila vykompenzovanie emisií skleníkových plynov z vášho počítača a aj vy ste sa mohli podieľať na vytváraní zdravšieho životného prostredia pekne postupne stromček za stromčekom, les za lesom.