De’Longhi America, Inc. Park 80 West, Plaza One Saddle Brook, NJ 07663 #1-866-Latte-Best 1-866-528-8323 De’Longhi Canada, Inc. 6150 McLaughlin Road Mississauga, Ontario L5R 4E1 Canada #1-866-Latte-Best 1-866-528-8323 FIDUCIA ITALIANA S.A DE C.V Pestalozzi #814 Col. Narvarte Del. Benito Juarez C.P. 03100 tels: 5543 1447 lada sin costo: 01 800 711 8805 www.delonghi.com 5732149900/10.
IMPORTANT INSTRUCTIONS SAVE THESE INSTRUCTIONS MODE D’EMPLOI IMPORTANT CONSERVEZ LES PRESENTES INSTRUCTIONS INSTRUCIONES IMPORTANTES REPASE Y GUARDE ESTAS INSTRUCCIONES LEA ESTE INSTRUCTIVO ANTES DE UTILIZAR EL APARATO ISTRUZIONI IMPORTANTI CONSERVARE LE ISTRUZIONI COFFEE MAKER TYPE ESAM3300/CAFETERIE MODÈLE ESAM3300/ CAFETERA ELECTRICA MODELO ESAM3300/ MACCHINA DA CAFFÈ ESAM3300 Register this product on-line and receive a free trial issue of Cook's Illustrated. Visit www.prodregister.com/delonghi.
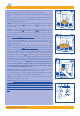
S T K LU A V J B M C W O I D E N R Q G H P
Coffee has been used to factory test the appliance and it is, therefore, completely normal for there to be traces of coffee in the mill. This appliance is, however, guaranteed to be new.
IMPORTANT SAFEGUARDS When using electrical appliances, basic safety precautions should always be followed, including the following: • Read all instructions. • Do not touch hot surfaces. Use handles and knobs. • To protect against fire, electrical shock and personal injury, do not immerse cord, plug or appliance in water or other liquid. • Never allow the appliance to be used by children. • Unplug from the outlet when not in use and before cleaning.
1. DESCRIPTION OF THE APPLIANCE (SEE PAGE 3) A. Cup warmer tray L. Central lid for the ground coffee B. Steam knob M. Infuser C. Steam spout N. Power cable D. Patented Cappuccino System Frother (Milk Frother) O. Removable Milk Frother Body E. Water tank (removable) Q. Measuring scoop for pre-ground coffee F. Cup support tray R. Coffee grounds container (removable) G. Drip tray (removable) S. Grinding coarseness regulator H. Service door T. Coffee bean container I.
2 SAFETY WARNINGS 3 INSTALLATION CAREFULLY READ AND KEEP THESE INSTRUCTIONS! • After unpacking, make sure the appliance is complete and undamaged. If in doubt, do not use it. Contact professionally qualified personnel. • Packing elements (plastic bags, polystyrene etc) must not be left within reach of children as they may represent a hazard. • Place the appliance on a work surface far away from water taps, basins and sources of heat.
To correctly learn how to use the machine, when starting it for the first time, carefully follow the step-by-step instructions described in the following paragraphs. 4 PREPARING THE COFFEE MAKER 4.1 FILLING THE WATER TANK • Remove the water tank (Fig.1), rinse it and fill it with fresh water, never exceeding the MAX line. When removing the tank, the milk frother must always be positioned towards the center of the machine, otherwise the tank cannot be removed. • Replace the tank, pushing it all the way in.
5 PREPARING COFFEE (USING COFFEE BEANS) 1) Before preparing the coffee, always make sure that the green and lights are steady and the water tank and coffee bean container are full. 2) Adjust the coffee flavor dial (Fig. 7) to set the desired taste of the coffee. Turning the knob clockwise increases the quantity of coffee beans that the machine will grind, and thus makes the taste of the coffee stronger.
Run off the water into the underlying drip tray or alternatively use this water to fill (and then empty) the cup to be used for the coffee, so as to pre-heat it. 2) Unless preheated, do not use cups that are too thick, as they will absorb too much heat. 3) Use cups that have been previously heated by rinsing them with hot water or alternatively by leaving them for at least 20 minutes on the cup warmer tray on top of the machine with the appliance on.
When using the machine for the first time, 4-5 cups of coffee need to be made before the machine starts to give satisfying results. If the machine malfunctions, do not contact the service center right away. The problems can almost always be resolved by following the instructions indicated in sections 12 and 13. If this is not the case, or for further explanations, contact customer service by calling the number listed in the warranty or visit www.delonghi.com for a list of service centers near you. (U.S.
7 PREPARING ESPRESSO COFFEE WITH GROUND COFFEE (INSTEAD OF BEANS) 1. Press the button to select the ground coffee function (Fig. 18). The ground coffee light will illuminate indicating the function has been the function has been selected and the coffee grinder has been disabled. 2. Lift the lid in the center, place one measuring scoop of ground coffee in the funnel (see fig. 19) and proceed as described in section 5. Note: You can make just one coffee at a time by pressing the button.
9 PREPARING CAPPUCCINOS (USING STEAM) • Move the cappuccino frother outwards (fig. 3). • Place an empty container under the cappuccino frother (fig. 3). Turn the steam knob a half turn counter-clockwise as far as it will go (the light flashes fig. 22). Run off the steam mixed with water for a few seconds until only steam is given off. • Then interrupt steam delivery by rotating the knob clockwise as far as it will go (fig. 6). • Empty the container and fill it with about 3.5 oz.
• Check that the two holes indicated by the arrows in Fig. 27 are not clogged. If necessary, clean them using a needle or pin. • Replace the steam nozzle by inserting it and vigorously turning it upwards into the steam spout. • Replace the cappuccino frother cover by pushing it upwards and turning it counter-clockwise. 10 CLEANING AND MAINTENANCE • Before performing any cleaning operations, the machine must have cooled down and must be disconnected from the mains power supply.
10.2 CLEANING THE INFUSER The infuser must be cleaned regularly to prevent it from filling with coffee deposits (that may lead to malfunctions). To clean it, proceed as follows: • turn the machine off by pressing the button (Fig. 4) (do not unplug it) and wait for all the indicator lights to go off; • open the service door (Fig. 15); • remove the drip tray and the grounds container (Fig. 16) and clean them; • press the two red release buttons on the infuser sideways and towards the center (Fig.
Check that the two red buttons have snapped out, otherwise the door cannot be closed. The two red buttons have snapped out CORRECTLY The two red buttons have not snapped out CORRECT INCORRECT NOTE 1: If the infuser is not inserted correctly, until it clicks into place, and the two red buttons have not snapped out, the service door will not close and the machine will not operate (when switching on the machine the light starts flashing (section 12 - point 9).
• after around 30 minutes, when the light comes on (section 12 point 1), turn the steam knob half a turn clockwise (Fig.6) until it stops. The machine must be rinsed so as to eliminate the residues of descaling solution from inside the machine. Proceed as follows: • remove the water tank, rinse it and fill it with clean water. • reposition the tank. • empty the collection container (located under the milk frother) that is full of liquid, and then replace it under the milk frother.
11 MEANING OF THE NORMAL OPERATION INDICATOR LIGHTS LIGHT DESCRIPTION MEANING indicator The machine is not ready to make coffee (the ideal water temperature has not yet been reached). Wait for the indicator lights to come on steady before making the coffee. 1 The , lights flash 2 The , indicator The machine is at the right temperature and lights are on steady. ready to make coffee. 3 The steady light is on The machine is delivering one cup of coffee.
12 MEANING OF THE ALARM INDICATOR LIGHTS AND WHAT TO DO WHEN THEY ARE ON LIGHTS 1 DESCRIPTION The light is on steady MEANING ACTION The water tank is empty or is Fill the water tank as described in section 5, note 6 and insert it fully. positioned incorrectly. The tank is dirty or lined with lime Rinse or descale the tank. scale. 2 The light flashes The machine cannot make the Turn the steam knob counter-clockwise (Fig. 5) as described in section 5 note 10. coffee and is noisy.
MEANING DESCRIPTION LIGHTS 10 The light is on steady and the green lights are flashing. 11 The light is flashing ACTION After cleaning, the infuser has Insert the infuser, see section 10.2 probably been left out of the coffee maker The inside of the machine is very Thoroughly clean the inside of the machine, as described in section dirty. 10.2 The ground coffee funnel is Empty the funnel with the help of a knife, as described in par. 7 note 5 clogged. (Fig.20).
PROBLEM • The coffee does not come out of one of the spouts. CAUSE • The spout is blocked. SOLUTION Scrape the remains of dry coffee accumulated with a needle (Fig. 28). • Turning the steam knob, no • The holes in the spouts are clogged. steam comes out of the milk frother. Clean the holes in the milk frother and the steam nozzle (see section 9 - Fig.27). • Pressing the and buttons, the machine does not deliver coffee, but only water. • Ground coffee may be blocked in the funnel.
This warranty applies to Super Automatic Espresso Machines with the De'Longhi brand name. LIMITED WARRANTY What does the warranty cover? We warrant each appliance to be free from defects in material and workmanship. Our obligation under this warranty is limited to repair at our factory or authorized service center of any defective parts or part thereof, other than parts damaged in transit. The repaired or new model will be returned at the company expense.