DE300/DE300P/DE400/DE400P/DH400P/DE500/DE500P/DE650 • Use and maintenance manual . . . . . .pag. 3 • Mode d’emploi et d’entretien . . . . . . .pag. 14 • Instrucciones de uso . . . . . . . . . . . . .pag. 25 • Istruzioni per l’uso . . . . . . . . . . . . . .pag. 37 Register this product on-line and receive a free trial issue of “Cook's Illustrated”. Visit www.prodregister.com/delonghi.Visit www.delonghi.com for a list of service centers near you. (U.S. and Canada).
T hank you for choosing this appliance. This Owner's Manual will provide you with valuable information necessary for the proper care and maintenance of your new appliance. If properly maintained, your appliance will give you many years of trouble-free operation. Please take a few moments and read the instructions thoroughly and familiarize yourself with all of the operational aspects of this appliance. This unit can be conveniently moved from room to room within your home and set-up in just minutes.
Description D escription of the appliance 4 1 2 5 6 3 7 8 1. Control panel 5. Water Tank 2. Cabinet 6. Power Cord 3 Wheels 7. Continuous Draining Outlet 4. Air Filter 8.
S TAND-BY button Press this button to start /stop the appliance. To turn the appliance completely off, remove the plug from the outlet. R oom temperature button Press this button to display the Temperature on the LCD display. If you press the button once the display will show the °F . If you press the button twice, the display will show the temperature in °C. After few seconds, the display will automatically show the humidity level.
Display lights O N light When the STAND-BY button is pressed to start the unit, the ON light will come on automatically. The light will go off again when the unit is switched off. NOTE: After a power outage, the unit will not switch itself on again automatically. When the power supply has been reestablished, please press the STAND-BY button to start the unit again. T ANK Warning light If the water tank is full, improperly positioned or missing, the tank warning light will start blinking.
1. Allow at least 12 inches (30cm) of space on all sides of the unit for good air circulation. 2. Install your dehumidifier on a floor, table, or shelf. When installing the unit on a table or shelf, make sure the table or shelf is strong enough to support the weight of the unit with a full bucket. Note: The dehumidifier needs to be secured when installed on a table or a shelf. Do not sit or stand on the dehumidifier. 3. The tank must be properly positioned. 4.
Disposing of the collected water A) Empty the tank manually. When the tank is full, remove (fig.1) and empty it into a sink. When finished, replace it properly. NOTE: The tank must be positioned properly. If you hear the intermittent sound of the beep, it means the tank is not in the proper position. fig. 1 B) Continuous draining. Condensed water can be drained via a hose connected to the outlet located in the lower part of the tank proceeding in the following way: 1. remove the water tank. 2.
S tand-by position Once the power outlet is plugged in, the display will show on the left side the degree of humidity you want to reach (the default data is 60) and on the right side the display will show (for a minute) two dots, followed by the room humidity level. H ow to Select the Desired Humidity Level 1) Push the stand-by button. 2) Press the button to set the desired humidty level. (30% means a dry environment, 80% a humid environment).
Selecting the operations H ow to Program the delayed stop function: From the ON Position 1) Press the button and use the button to set the number of hours after which the appliance should stop functioning. 2) The left side the display will show the number of hours after which the appliance should stop the operation (1-24h) and a small dot under the symbol indicates that the timer function has been selected. 3) When the selected time is reached, the appliance will stop working.
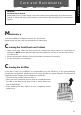
ENGLISH Care and Maintenance WARNING Electrical Shock Hazard Always disconnect power supply cord from outlet before performing any maintenance. Failure to follow the below precautions could result in the electrical shock or personal injuries. M aintenance Your dehumidifier is designed to serve you year-round. Listed below are the care and maintenance instructions C leaning the Front Panel and Cabinet • Using a soft cloth, clean the front panel and cabinet with warm water and a mild soap or detergent.
Tr o u b l e s h o o t i n g t i p s Often times, a problem is minor and a service call may not be necessary. Use this troubleshooting guide to identify possible problems you may be experiencing. Problem Unit does not operate Possible cause •Check power cord connection. •Check if water tank is full •Check water tank is properly installed. •Check if the unit is not turned on. •The desired humidity may be lower than the room humidity.
ENGLISH L i m i t e d Wa r r a n t y This warranty applies to all home appliances with De’Longhi or Kenwood brand names. FOR CONTIGUOUS UNITED STATES ONLY Limited Warranty We warrant each De’Longhi appliance to be free from defects in material and workmanship.
DE300/DE300P/DE400/DE400P/DH400P/DE500/DE500P/DE650 • Use and maintenance manual . . . . . .pag. 3 • Mode d’emploi et d’entretien . . . . . . .pag. 14 • Instrucciones de uso . . . . . . . . . . . . .pag. 25 • Istruzioni per l’uso . . . . . . . . . . . . . .pag. 37 Register this product on-line and receive a free trial issue of “Cook's Illustrated”. Visit www.prodregister.com/delonghi.Visit www.delonghi.com for a list of service centers near you. (U.S. and Canada).
Précautions importantes F élicitations ! Vous avez choisi un produit capable de satisfaire aux exigences de toute la famille, à la maison ou au bureau. Ce manuel contient toutes les informations nécessaires au bon entretien de votre nouvel appareil. Un entretien correct le fera durer longtemps sans qu’il vous pose le moindre problème. Prenez juste quelques instants pour lire cette notice et vous familiariser avec le fonctionnement de l'appareil.
Composants D éscription de l’appareil 4 1 FRANÇAIS 2 5 6 3 7 8 densation 1. Tableau de commande 2. Carrosserie 6. Câble d’alimentation 3 Roulettes 7. Raccord d’évacuation en continu 4. Filtre à air 8. Connexion de la pompe (seulement 5.
Ta b l e a u d e c o m m a n d e B outon STAND-BY Appuyez sur ce bouton pour allumer/ éteindre l’appareil. Pour éteindre complètement l’appareil, débrancher l’aappareil. B outon température ambiente Appuyez sur ce bouton pour afficher la lecture de Température sur l’afficheur. En appuyant une fois sur le bouton , la température en °F sera affichée à l’écran; en appuyant sur le bouton deux fois, l’afficheur visualise la température en °C. Après quelques secondes l’afficheur montre le niveau d’humidité.
Vo y a n t s V oyant “ON” Lorsque le bouton STAND-BY est appuyé, le voyant “ON” s’allume. Le voyant s’éteint quand l’appareil s’arrête. NOTA: Après une coupure de courant, l’appareil ne repart pas automatiquement. Appuyez sur le bouton STAND-BY pour mettre l’appareil en marche. V Si le réservoir de récupération d’eau est plein ou mal positionné, le voyant rouge clignote, et ensuite émet un signal acoustique. Ce signal continuera jusqu’à ce que le réservoir sera vidé ou positionné correctement.
Installation 1. Laissez au moins 30 cm (12 pouces) de chaque côté de l’appareil pour permettre une bonne circulation de l’air. 2. Installez le déshumidificateur sur le sol, sur une table ou sur une étagère. Assurez-vous que la table ou l’étagère peut supporter le poids de l’appareil quand son réservoir est plein. Évitez de vous asseoir ou de monter sur le déshumidificateur. 3.
Évacuation de l’eau de condensation récupérée A) Videz le réservoir manuellement. Quand le réservoir est plein, retirez-le et videzle dans le lavabo ou dans la baignoire (fig.1). Après cette opération, remettez-le correctement à sa place. NOTA: insérez convenablement le réservoir. Sur le modèle électronique, la sonnerie indique que le réservoir est mal positionné. B) Évacuation en continu. Il est possible d’évacuer l’eau de condensation par le tuyau en dotation relié à la sortie au dos du réservoir : 1.
Sélection des fonctions S tand-by Après avoir branché l’appareil, l’afficheur visualise à gauche le niveau d’humidité qu’ on désire atteindre (la valeur affichée automatiquement est 60) et à droite l’afficheur visualise pour une minute deux traits d’union suivi par le niveau d’humidité. C omment sélectionner le niveau d’humidité désiré 1) Appuyez sur le bouton stand-by. 2) Appuyez sur le bouton “ ” ou “ “ pour choisir l’humidité désirée (30% équivaut à un milieu sec, 80% à un milieu humide).
Sélection des fonctions C omment programmer l’arrêt retardé avec appareil allumé FRANÇAIS 2) Avec appareil allumé, appuyer sur le bouton et appuyer sur les boutons pour sélectionner les heures aprè lesquelles vous désirez que l’appareil s’arrête. 2) Sur le côté gauche l’afficheur visualise le numéro des heures après lesquelles l’appareil s’arrête (1-24 heures ) et sous le symbole un point est visualisée pour indiquer que la fonction programmateur a été sélectionée.
N e t t o y a g e e t e n t re t i e n ATTENTION Risque de décharges électriques Avant toute opération d’entretien, débranchez l’appareil. Le non-respect des précautions susmentionnées pourrait provoquer des décharges électriques ou des blessures corporelles. E ntretien Votre déshumidificateur a été conçu pour travailler toute l’année. Veuillez trouver ci-après les instructions pour un correct nettoyage et entretien de l’appareil.
Pr o b l è m e s e t s o l u t i o n s Souvent, les problèmes sont faciles à résoudre, sans appeler le service technique. Ce guide vous aidera à identifier les éventuelles pannes.
G a ra n t i e l i m i t é e Cette garantie s’applique à tous les appareils ménagers de marques De’Longhi ou Kenwood. RÉSERVÉ UNIQUEMENT AUX ÉTATS-UNIS CONTIGUS ET LE CANADA Garantie limitée Nous garantissons que chaque appareil de DeLonghi est exempt de défauts de matériau et de fabrication.