5713221591/09.
ECAM22.
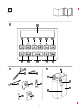
EN page 6 B B1 B2 B3 B8 B9 B4 B5 B10 C B6 B7 B11 B12 D C1 D2 C2 D1 D3 C3 C4 C5 D4 D5 C6 C7 2
A A4 A2 A5 A6 A3 A7 A8 A9 A1 A10 A19 A11 A13 PU SH A15 A14 A17 A12 A18 A16 3
4A 1 2 3 4B 2 5 6 7 8 9 10 11 12 15 16 MA 13 14 4 X
18 17 19 20 23 22 21 24 SH PU 25A B PU SH A B 25B 26 27 A 28 32A 29 30 31 5 32B
CONTENTS MAKING CAPPUCCINO AND MILK BASED DRINKS.12 Symbols used in these instructions................................... 7 Letters in brackets............................................................. 7 Troubleshooting and repairs............................................. 7 Filling and attaching the milk container......................... 12 Adjusting the amount of froth........................................ 13 Making cappuccino.........................................................
INTRODUCTION • Thank you for choosing this automatic espresso and cappuccino machine. We hope you enjoy using your new appliance. Take a few minutes to read this Instruction for Use. This will avoid all risks and damage to the appliance. • • Symbols used in these instructions Unplug directly from the plug only. Never pull the power cable as you could damage it. To disconnect the appliance completely, unplug it from the mains socket. If the appliance is faulty, do not attempt to repair.
Description of the control panel This is a household appliance only. (page 2 - B ) A number of buttons on the panel have a double function. This is indicated in brackets in the description. B1. Display: guides the user in using the appliance. B2. button: turns the appliance on and off. B3. MENU button to access the menu. (When in the settings MENU, it acts as the “ESC” button to exit from the selected function and go back to the main menu).
BEFORE USE Checking the appliance mains electricity supply (fig. 1). Make sure the main switch at the back of the appliance is pressed (fig. 2). You must first choose the language (the languages scroll through at intervals of about 3 seconds): 2. When English appears, press the button (fig. 3) for a few seconds until “ENGLISH set” is displayed. Follow the instructions indicated on the appliance display: 3. “FILL TANK”: remove the water tank, fill to the MAX line with fresh water (fig.
TURNING THE APPLIANCE OFF Please note : To enable this function, the time must already be set correctly. 1. Press the MENU button to enter the menu; 2. Press the or button until “Auto-start” is displayed; 3. Press the button. “Enable?” is displayed; 4. Press the button to confirm; 5. Press the or button to choose the hour; 6. Press the button to confirm; 7. Press the or button to change the minutes; 8. Press the button to confirm; 9. Then press MENU to exit menu.
- how many coffees have been made; how many times the machine has been descaled; the total number of litres of water delivered; how many times the water filter has been replaced; how many cappuccinos and milk based drinks have been made (CAPPUCCINO). 5. Press then the button twice to exit the menu. Please note : When in energy saving mode, a few seconds may elapse before the first coffee is delivered as the appliance must heat up again.
If the coffee is delivered too slowly or not at all, turn one click clockwise. For fuller bodied creamier coffee, turn one click anticlockwise (do not turn more than one click at a time otherwise the coffee could be delivered in drops). These adjustments will only be evident after at least 2 cups of coffee have been delivered. If this adjustment does not obtain the desired result, turn the dial another click.
15). Each mark on the side of the container corresponds to 100 ml of milk. • • • • Please note! For a denser more even froth, you must use skimmed or partially skimmed milk at refrigerator temperature (about 5°C). If “Energy saving” mode is enabled, you may have to wait a few seconds before the drink is delivered. • Making frothed milk only (without coffee) 3. Make sure the milk intake tube is correctly inserted in the bottom of the milk container lid (fig. 16). 4.
Programming the quantity of coffee and milk in the cup for cappuccino or milk CLEANING The appliance is set by default to automatically deliver standard quantities. To change these quantities, proceed as follows: 1. Place a cup under the coffee spouts and milk spout. 2. Press and hold the CAPPUCCINO button until the message “PROGRAM MILK Program quantity” is displayed. 3. Release the button. The appliance starts delivering milk. 4.
Cleaning the inside of the coffee maker 6. Clean coffee residues from the support where the infuser rests. 7. After cleaning, replace the infuser by sliding it onto the internal support (fig. 33), then push the PUSH symbol fully in until it clicks into place. Infuser support Danger of electric shock! Before cleaning internal parts, the machine must be turned off (see “Turning off”) and unplugged from the mains power supply. Never immerse the coffee maker in water. 1.
• 1. 2. 3. 4. 5. 6. 36 7. 4. Wash all the components thoroughly with hot water and mild washing-up liquid. All components are dishwasher safe, placing them in the top basket of the dishwasher. Make sure there are no milk residues on the hollow and groove under the dial (see fig. 37). If necessary, scrape the groove with a toothpick. 5. Rinse inside the froth adjustment dial seat with running water (see fig. 38). 8. 38 6. Check that the intake tube and spout are not clogged with milk residues. 7.
The machine can also be programmed according to the hardness of the mains water in the various regions so that the machine needs to be descaled less often. 3. To activate the filter, run tap water through the hole in the filter as shown in the figure until water comes out of the openings at the side for more than a minute (fig. 30). 4. Extract the tank from the appliance and fill with water. 5.
11. After delivery, the appliance returns automatically to the “Ready for coffee” position. The new filter is now active and you can use the coffee machine. The appliance complies with the following EC directives: • Removing the filter • • • If you want to use the appliance without the filter, you must remove it and notify the appliance of its removal. Proceed as follows: 1. Extract the tank and exhausted filter; 2. Press the MENU button to enter the menu; 3.
GROUND TOO FINE ADJUST The grinding is too fine and the coffee is deli- Repeat coffee delivery and turn the grinding MILL vered too slowly or not at all. adjustment dial (fig. 8) one click clockwise towards “7” while the coffee mill is in operation. If after making at least 2 coffees delivery is still too slow, repeat the correction procedure, turning the grinding adjustment dial another click until delivery is correct (see the section “Adjusting the coffee mill” on page 11).
TROUBLESHOOTING Below is a list of some of the possible malfunctions. If the problem cannot be resolved as described, contact customer services. PROBLEM POSSIBLE CAUSE SOLUTION The coffee is not hot. The cups were not preheated. Warm the cups by rinsing them with hot water. (N.B. you can use the hot water function). The infuser has cooled down because 2/3 mi- Before making coffee, heat the infuser by presnutes have elapsed since the last coffee was sing the button. made.
The appliance does not come It is not plugged into the mains socket. on The main switch (A8) is not turned on. The infuser extracted cannot Plug into the mains socket. Press the main switch (fig. 1). be The appliance has not been turned off correctly Turn the appliance off by pressing the button (page 10).