
Installation manual
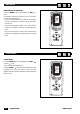

SINGLE SPLIT
16 English 11/2002
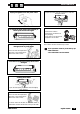
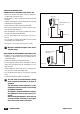
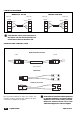
Thermal insulation lining
•Position the drain hose under the pipes.
•Insulation material: polythene foam, thickness greater
than 6mm.
The drain hose must be supplied by the user.
•The drain hose must run downwards,to assist drainage.
• Do not bend the drain hose, allow it to protrude,twist it
or immerse the end in water. If the drain hose is con-
nected to an extension, check that this is thermally insu-
lated when running in the indoor unit.
• If the pipes run to the right, the pipes, the power cable
and the drain hose must be thermally insulated and fas-
tened to the rear of the unit by a pipe coupling.
1.Insert the pipe coupling in the opening.
2.Press the pipe coupling to secure it to the base.
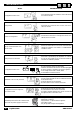
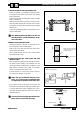
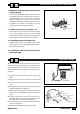
Connecting the pipes
• Connect the pipes to the indoor unit using two span-
ners. Pay careful attention to the torque specified below
to avoid deforming and damaging the pipes, connectors
and countersunk nuts.
• First tighten by hand,and then use the spanners.
(1) Quantity of refrigerant for each metre of pipe over the
5 m.
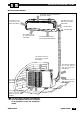
Drain hose
Connection cables
Insulation tape
Control cable
Power cable
Base
Pipe coupling
Insert here
Pipe coupling
Base
Fasten here
Base
Large
pipe
Large
pipe
Small
pipe
Small
pipe
Drain
hose
Drain
hose
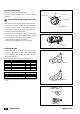
7-9-12-17,3 K Liquid side (ø 6 o 1/4") 1,8 Kg.m 17 mm
23,5 K Liquid side (ø 10 o 3/8") 3,5 Kg.m 22 mm
7-9 K Gas side (ø 10 o 3/8") 3,5 Kg.m 22 mm
12-17,3 K Gas side (ø 12 o 1/2") 5,5 Kg.m 24 mm
23,5 K Gas side (ø 16 o 5/8") 7,5 Kg.m 27 mm
Model Pipe dimensions Torque Nut
7 - 9 - 12 - 17,3 K 10 g/m
23,5 K 20 g/m
Model Q/m (1)