
Human Machine Interface User Manual
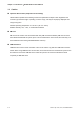

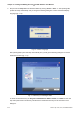
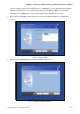

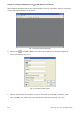
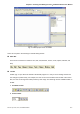
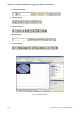
Table Of Contents
- Cover
- Preface
- Table of Contents
- Chapter 1 Introduction
- Chapter 2 Creating and Editing Screens
- 2.1 ScrEdit (Screen Editor) Setup
- 2.2 How to Start ScrEdit
- 2.3 Menu Bar and Toolbar (File)
- 2.4 Menu Bar and Toolbar (Edit)
- 2.5 Menu Bar and Toolbar (View)
- 2.6 Menu Bar and Toolbar (Element)
- 2.7 Menu Bar and Toolbar (Screen)
- 2.8 Menu Bar and Toolbar (Tools)
- 2.9 Menu Bar and Toolbar (Options)
- 2.10 Menu Bar and Toolbar (Window)
- 2.11 Menu Bar and Toolbar (Help)
- Chapter 3 Element Function
- Chapter 4 Macro Function
- Chapter 5 Control Block and Status Block
- Chapter 6 Internal Memory
- Chapter 7 Example Explanation
- Appendix A Specifications and Installation
- Appendix B USB Flash Drive Function
- Appendix C Main Menu Operation of HMI System
Chapter 2 Creating and Editing Screens|ScrEdit Software User Manual
2-6 Revision Apr. 30th, 2007, 2007PDD23000002
When ScrEdit is activated for the first time, the first window to show up is as follows. There are only File (F),
View(V), Option(O) and Help(H) on the toolbar.
Fig. 2.2.3 Screen without editing file
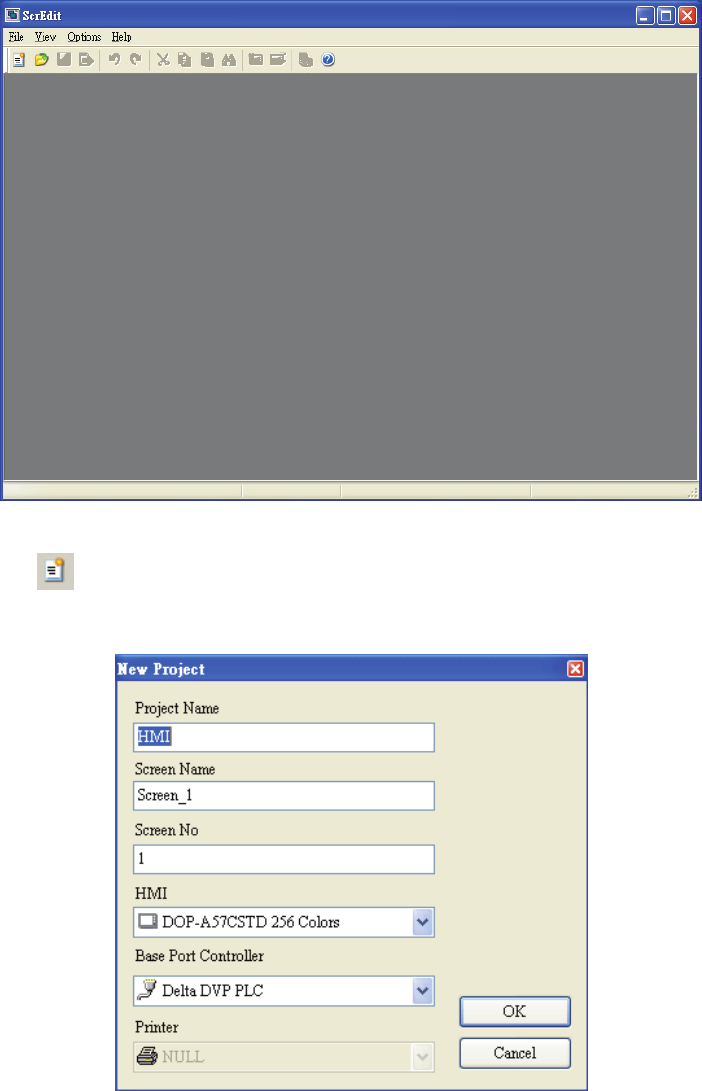
2. After pressing
or click File > New, it can create a new project and you will get a dialog box as
shown in the following. (Fig. 2.2.4)
Fig. 2.2.4 Creating a New project
3. Enter the Project Name, Screen Name, Screen No. and select connected HMI, controller or printer.
Then, click OK. It can create a new project in ScrEdit as shown in the following. (Fig. 2.2.5)