
Human Machine Interface User Manual

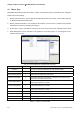
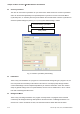
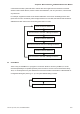
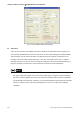
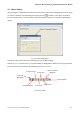
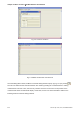
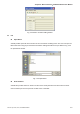
Table Of Contents
- Cover
- Preface
- Table of Contents
- Chapter 1 Introduction
- Chapter 2 Creating and Editing Screens
- 2.1 ScrEdit (Screen Editor) Setup
- 2.2 How to Start ScrEdit
- 2.3 Menu Bar and Toolbar (File)
- 2.4 Menu Bar and Toolbar (Edit)
- 2.5 Menu Bar and Toolbar (View)
- 2.6 Menu Bar and Toolbar (Element)
- 2.7 Menu Bar and Toolbar (Screen)
- 2.8 Menu Bar and Toolbar (Tools)
- 2.9 Menu Bar and Toolbar (Options)
- 2.10 Menu Bar and Toolbar (Window)
- 2.11 Menu Bar and Toolbar (Help)
- Chapter 3 Element Function
- Chapter 4 Macro Function
- Chapter 5 Control Block and Status Block
- Chapter 6 Internal Memory
- Chapter 7 Example Explanation
- Appendix A Specifications and Installation
- Appendix B USB Flash Drive Function
- Appendix C Main Menu Operation of HMI System
Chapter 4 Macro Function|ScrEdit Software User Manual
Revision Apr. 30th, 2007, 2007PDD23000002 4-7
4.2 Macro Editing
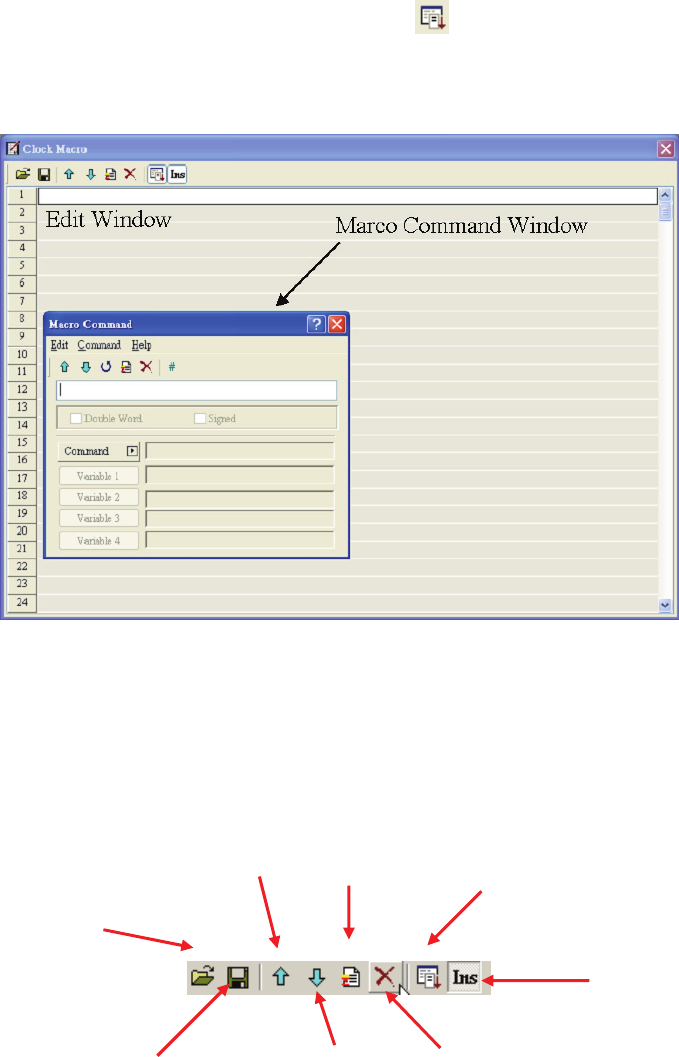
After choosing the desired Macro command from menu bar, the user can start editing Macro as shown as Fig.
4.2.1 below. The Macro command dialog box will pop up when
is clicked. For the user’s convenience,
the user can enter macro command in Marco Command Window or input macro command in Edit Window
directly.
Fig. 4.2.1 Start editing Macro
The user can also use the icons on the toolbars (Fig. 4.2.2) for Macro editing.
Refer to Fig. 4.2.3, 512 lines (from 1 to 512) are available for editing Macro. Blank line in the program means
that line will be set to comment line after updating as shown in Fig. 4-2-4.
Fig. 4.2.2 Toolbar
Open old
Macro files
Save Macro files
To previous line
Macro command
dialog box
Insert / Replace
To next line
Insert a line
Delete a line