
Human Machine Interface User Manual


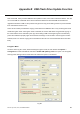
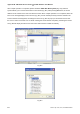
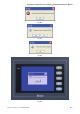
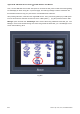
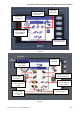
Table Of Contents
- Cover
- Preface
- Table of Contents
- Chapter 1 Introduction
- Chapter 2 Creating and Editing Screens
- 2.1 ScrEdit (Screen Editor) Setup
- 2.2 How to Start ScrEdit
- 2.3 Menu Bar and Toolbar (File)
- 2.4 Menu Bar and Toolbar (Edit)
- 2.5 Menu Bar and Toolbar (View)
- 2.6 Menu Bar and Toolbar (Element)
- 2.7 Menu Bar and Toolbar (Screen)
- 2.8 Menu Bar and Toolbar (Tools)
- 2.9 Menu Bar and Toolbar (Options)
- 2.10 Menu Bar and Toolbar (Window)
- 2.11 Menu Bar and Toolbar (Help)
- Chapter 3 Element Function
- Chapter 4 Macro Function
- Chapter 5 Control Block and Status Block
- Chapter 6 Internal Memory
- Chapter 7 Example Explanation
- Appendix A Specifications and Installation
- Appendix B USB Flash Drive Function
- Appendix C Main Menu Operation of HMI System
Appendix B USB Flash Drive Function|ScrEdit Software User Manual
B-4 Revision Apr. 30th, 2007, 2007PDD23000002
Then, connect USB flash drive to HMI. After power in connected to HMI, power on HMI and a warning dialog
box will display as shown as Fig. B.7 on previous page. This warning message is used to remind the user
that the data transfer and copy only can be done via USB flash drive at this time.
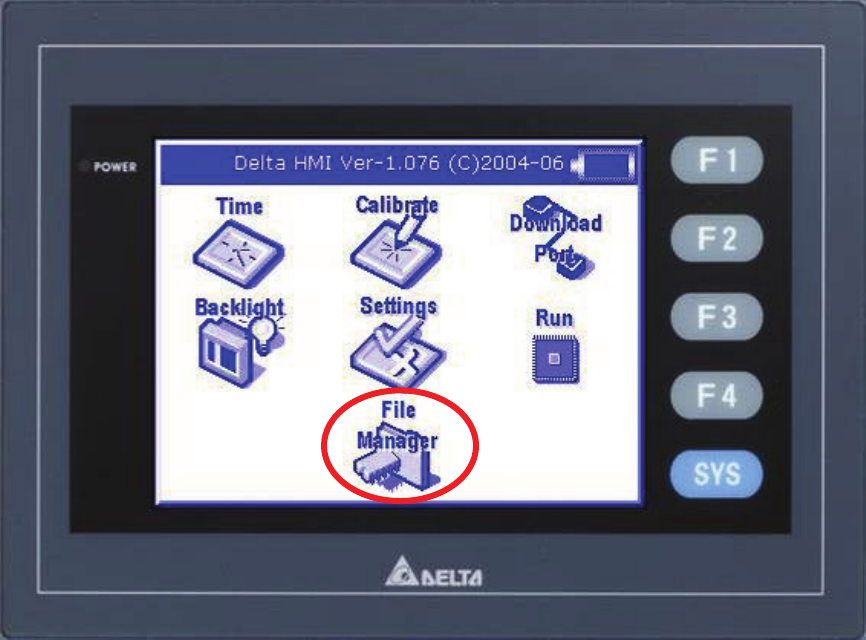
After pressing OK button, it will return the original HMI screen. Then, press SYS (system) key on HMI panel
for three seconds and it will enter into the main menu of HMI system() (Fig. B.8). Please touch the “File
Manager” option and enter into “File Manager” menu screen. When using a DOP AS series HMI, your “File
Manager” menu screen will look like Fig. B.9. When using a DOP AE series HMI, your “File Manager” menu
screen will look like Fig. B.10.
Fig. B.8