
Human Machine Interface User Manual
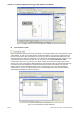
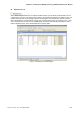
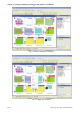
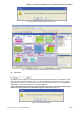
Table Of Contents
- Cover
- Preface
- Table of Contents
- Chapter 1 Introduction
- Chapter 2 Creating and Editing Screens
- 2.1 ScrEdit (Screen Editor) Setup
- 2.2 How to Start ScrEdit
- 2.3 Menu Bar and Toolbar (File)
- 2.4 Menu Bar and Toolbar (Edit)
- 2.5 Menu Bar and Toolbar (View)
- 2.6 Menu Bar and Toolbar (Element)
- 2.7 Menu Bar and Toolbar (Screen)
- 2.8 Menu Bar and Toolbar (Tools)
- 2.9 Menu Bar and Toolbar (Options)
- 2.10 Menu Bar and Toolbar (Window)
- 2.11 Menu Bar and Toolbar (Help)
- Chapter 3 Element Function
- Chapter 4 Macro Function
- Chapter 5 Control Block and Status Block
- Chapter 6 Internal Memory
- Chapter 7 Example Explanation
- Appendix A Specifications and Installation
- Appendix B USB Flash Drive Function
- Appendix C Main Menu Operation of HMI System
Chapter 2 Creating and Editing Screens|ScrEdit Software User Manual
Revision Apr. 30th, 2007, 2007PDD23000002 2-51
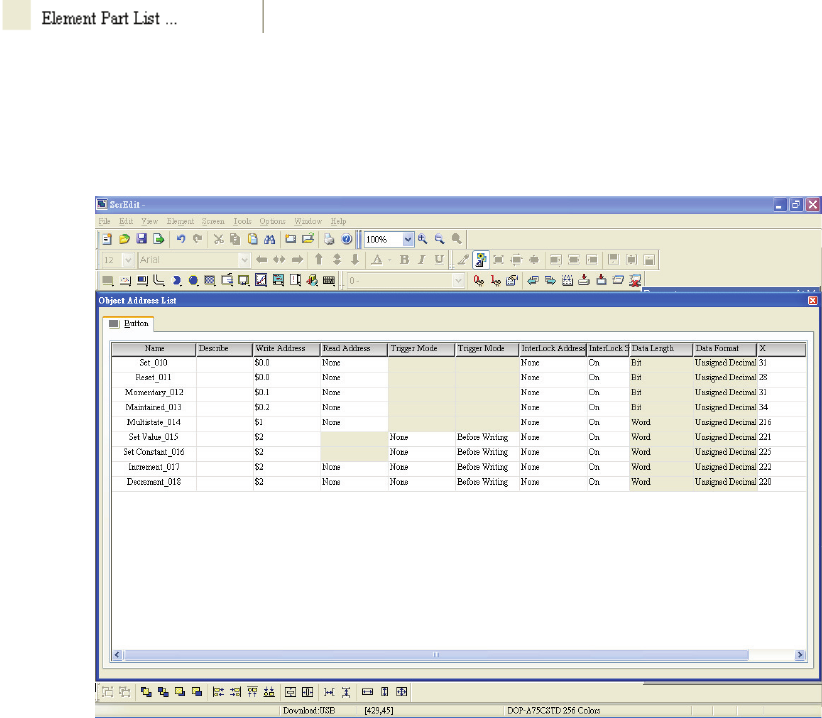
Element Part List
When Element Part List function is enabled, ScrEdit will sort out and classify all the elements on the
current screen. The user can click the tab to switch to the classification that the user wants to view. The
related addresses and corresponding properties will be listed in each classification (Name, Describe,
Write / Read address, Trigger address, Trigger type, Interlock and Level) in each tab (Fig. 2.6.17). The
user can double-click the column to let ScrEdit select the element automatically and allow the user to
edit the detailed property of the selected element in property table.
Fig. 2.6.17 Element Part List dialog box