
Human Machine Interface User Manual
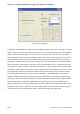
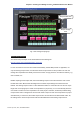

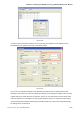
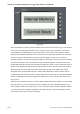
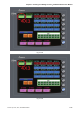
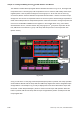
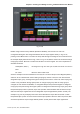
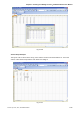
Table Of Contents
- Cover
- Preface
- Table of Contents
- Chapter 1 Introduction
- Chapter 2 Creating and Editing Screens
- 2.1 ScrEdit (Screen Editor) Setup
- 2.2 How to Start ScrEdit
- 2.3 Menu Bar and Toolbar (File)
- 2.4 Menu Bar and Toolbar (Edit)
- 2.5 Menu Bar and Toolbar (View)
- 2.6 Menu Bar and Toolbar (Element)
- 2.7 Menu Bar and Toolbar (Screen)
- 2.8 Menu Bar and Toolbar (Tools)
- 2.9 Menu Bar and Toolbar (Options)
- 2.10 Menu Bar and Toolbar (Window)
- 2.11 Menu Bar and Toolbar (Help)
- Chapter 3 Element Function
- Chapter 4 Macro Function
- Chapter 5 Control Block and Status Block
- Chapter 6 Internal Memory
- Chapter 7 Example Explanation
- Appendix A Specifications and Installation
- Appendix B USB Flash Drive Function
- Appendix C Main Menu Operation of HMI System
Chapter 2 Creating and Editing Screens|ScrEdit Software User Manual
Revision Apr. 30th, 2007, 2007PDD23000002 2-83
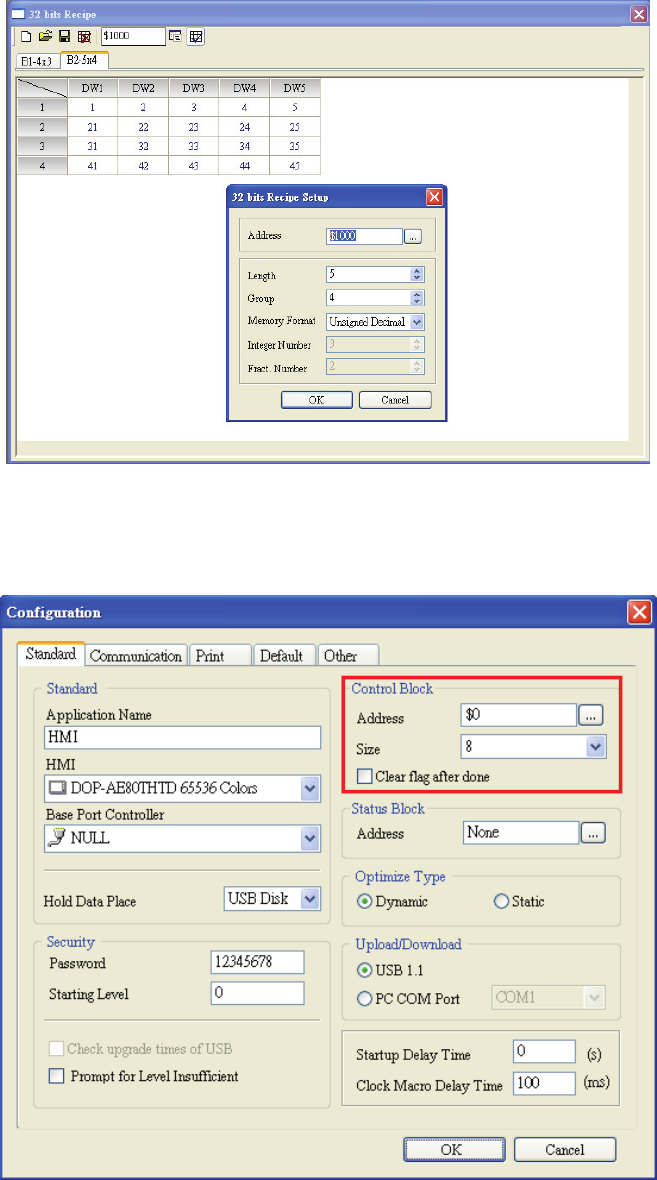
Fig. 2.8.32
In order to perform simulation operation more conveniently, the Address of Control Block is set to
Internal Memory $0. Please refer to Fig. 2.8.33 shown below.
Fig. 2.8.33
Fig. 2.8.34 is an example of starting screen. Besides using internal memory address (RCPG and
RCPNO), the user also can enter into Configuration dialog box and change the address value of recipe
register directly. No matter what kind of method is chosen, the user still needs to execute recipe read
and write operation via Control Block. Pressing Internal Memory button is to switch the recipe data by
using internal memory address and pressing Control Block button is to switch the recipe data through
the settings of the Control Block.