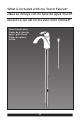
Quick Start Guide Guía del comienzo rápido Guide de début rapide 538T-DST, 551T-DST, 552TLF, 561T-DST 592T-DST, 751T-DST, 752TLF, 761T-DST 15938T-DST, 15960T-DST, 574T-DST, & 774T-DST Series/Series/Seria For installation and troubleshooting help see www.deltafaucet.com Para la instalación y resolución de problemas vaya a www.deltafaucet.com Pour obtenir de l’aide facilitant l’installation et le dépannage, allez à www.deltafaucet.
Table of contents Tools and supplies you may need...........................................................................page 2 What is included with my Touch Faucet?.......................................................... pages 3 & 4 Installation Instructions................................................................................................ page 5-37 Single hole Installation..............................................................................................
Tools and supplies you may need. Herramientas y piezas que necesitará. Outils et fournitures dont vous aurez besoin.
What is included with my Touch Faucet? ¿Qué se incluye con mi llave de agua Touch? Qu’est-ce qui est inclus avec mon robinet? Bagged parts for STEP 1. Piezas para el PASO 1. Pièces ensachées pour L’ÉTAPE 1. Installation Checadora Valve la Válvula de non-retour de Check clapet Instalación du 2 Installation 1 to essential it is plumbingstops. of your supply your operationonto proper inovertighten). assemblies To ensurevalve water stop. (do not es esencial check de agua.
What is included with my Touch Faucet? ¿Qué se incluye con mi llave de agua Touch? Qu’est-ce qui est inclus avec mon robinet? Touch Faucet parts Piezas de la llave de agua / grifo Touch Pièces du robinet tactile 4
Parts for Step 1. Piezas para el Paso 1. Pièces pour l’étape 1.
SINGLE HOLE INSTALLATION (No Escutcheon) INSTALACIÓN DE UN AGUJERO (Sin Chapetón) INSTALLATION DANS UN TROU (Sans Boîtier) Install the faucet such that the light at the base is facing forward. Instale de tal forma que la luz en la base esté hacia adelante. Effectuez l’installation de manière que le voyant dans la base soit orienté vers l’avant.
SINGLE HOLE INSTALLATION (No Escutcheon) INSTALACIÓN DE UN AGUJERO (Sin Chapetón) INSTALLATION DANS UN TROU (Sans Boîtier) Top Arriba Dessus 7
OPTIONAL ESCUTCHEON INSTALLATION INSTALACIÓN DE LA CHAPA OPCIONAL INSTALLATION AVEC LA PLAQUE DE FINITION FACULTATIVE Top View of Escutcheon Vista superior Vue de dessus 1 538T-DST, 15938T-DST & 15960T-DST 1 592T-DST Install the faucet such that the light at the base is facing forward. Instale de tal forma que la luz en la base esté hacia adelante. Notch (1) installs in the back. Effectuez l’installation de manière que le voyant dans la base soit orienté vers l’avant. Muesca (1) se instala al dorso.
OPTIONAL ESCUTCHEON INSTALLATION INSTALACIÓN DE LA CHAPA OPCIONAL INSTALLATION AVEC LA PLAQUE DE FINITION FACULTATIVE Top Arriba Dessus 9
Parts for Step 2. Piezas para el Paso 2. Pièces pour l’étape 2. ora allation Checad ur e Inst Válvula Valv non-reto la Check ión de clapet de Instalaction du 2 Installa 1 al to essenti it is bing s. plum ply stop your n of your sup ratio er ope lies onto prop tighten). emb ensurevalve ass r stop. cial innot over esen agua. nt: To ck wate en (do ería es ro de Importathese che into cold and tight (1) (2) su plom suminist install rt ferrule k valve page 2. ido de s del to deb los tope ns on 1.
Install the included check valves on both hot and cold water supplies. Finger tighten. Instale las válvulas de retención incluidas para ambos suministros de agua, caliente y fría. Serré à la main Apriete con los dedos Tighten one additional turn with wrench. Apriete una vuelta adicional con una llave de herramientas. Faites un tour supplémentaire à l’aide d’une clé. Installez les clapets de non-retour inclus sur les tuyaux d’eau chaude et les tuyaux d’eau froide.
Red tube end - Hot Side. Blue tube end - Cold Side. Fittings are 3/8" compression. For more information see Appendix. Extremo del tubo rojo – Lado caliente. Extremo del tubo azul - Lado frío. Los accesorios (1) son de compresión de 3/8".Para obtener más información vea el apéndice Extrémité du tube rouge – côté eau chaude. Extrémité du tube bleu – côté eau froide. Le branchement est 3/8 po à compression. Pour obtenir plus de renseignements, consultez l'appendice.
Loop the supply lines, if possible, to avoid having to cut them. Finger tighten both hot & cold sides. See appendix for cut to fit instructions. Tighten one additional turn with wrench. Use a second wrench to ensure you do not over tighten the check valves. Repeat for other side. Enlace las líneas de suministro de agua, si es posible, para evitar tener que cortarlas. Apriete con los dedos ambos lados, caliente y frío. Véase el apéndice para información sobre el corte a la medida.
Make sure water supplies are closed. Move handle to full on position. Asegúrese que los suministros de agua estén cerrados. Gire la manija a la posición completamente mixta. Assurez-vous que les robinets d’alimentation sont fermés. Amenez la manette en position de plein mélange. Place bucket under faucet outlet tube. Coloque un cubo o balde debajo del tubo de salida de la llave de agua/ grifo.
Notice Property damage and water leak possible. Leaks and property damage may occur from incorrect installation. Follow all installation instructions before making final connections and turning on the supplies. Aviso Posibles daños a la propiedad y filtración de agua. Las filtraciones o fugas de agua y daños a la propiedad pueden ocurrir por una instalación incorrecta . Siga todas las instrucciones de instalación antes de hacer las conexiones finales y abrir los suministros de agua.
Remove bucket and dry tube with soft cloth. Close water supplies and faucet valve. Cierre los suministros de agua y la válvula Quite el cubo y el tubo seco con el de la llave de agua/grifo. paño suave. Fermez les robinets d’alimentation ainsi que le robinet. 16 Enlevez le seau et le tube sec avec le tissu mou.
Parts for Step 4. Piezas para el Paso 4. Pièces pour l’étape 4.
A B C 18
Notice A Property damage and water leak possible. Incorrectly installed or unapproved clip may cause water leaks and property damage. Follow instructions to install clip provided with this faucet. Aviso Es posible que se produzcan daños a la propiedad y fugas o filtraciones de agua. El gancho mal instalado o no aprobado puede causar fugas de agua y daños a la propiedad. Siga las instrucciones para instalar el gancho provisto con esta llave de agua. B Avis Possibilité de dommages matériels et de fuite.
Notice Property damage and water leak possible. Incorrectly installed or unapproved clip may cause water leaks and property damage. Follow instructions to install clip provided with this faucet. Aviso Es posible que se produzcan daños a la propiedad y fugas o filtraciones de agua. El gancho mal instalado o no aprobado puede causar fugas de agua y daños a la propiedad. Siga las instrucciones para instalar el gancho provisto con esta llave de agua. Avis Possibilité de dommages matériels et de fuite.
A B C Pull down moderately to ensure both connections have been made. Hale, hacia abajo, moderadamente para asegurar que ha hecho la conexión. Side View / Vista lateral / Vue de côté Tirez modérément sur le tuyau pour vous assurer qu’il est bien fixé.
Parts for Step 5. Piezas para el Paso 5. Pièces pour l’étape 5.
23
24
For proper functionality DO NOT tie, twist or bunch the wires. Para un funcionamiento adecuado NO amarre, tuerza o agrupe los alambres. Pour que le répartiteur électronique fonctionne bien, ÉVITEZ de nouer, d’entortiller ou d’enrouler les fils.
"AA" Batteries (Last up to 2 years) Pilas “AA” (Duran hasta 2 años) Piles « AA » (Durée utile de 2 ans) "C" Batteries (Last up to 5 years) Pilas "C" (Duran hasta 5 años) Piles « C » (durée utile de 5 ans) Make sure the batteries are aligned properly (+/-), and be sure to align the +/- on the cap with the +/- on the box. Asegúrese de que las baterías estén correctamente alineados (+ / -), y asegúrese de alinear el + / - en la tapa con el + / - en el cuadro.
1 2 3 4 Place battery box on the cabinet floor or hang on the cabinet wall (Steps 1-4). Coloque la caja de las pilas en el piso del gabinete o cuelgue en la pared del armario (pasos 1-4). Placez le boîtier de piles sur le fond de l'armoire ou accrochez-le sur la paroi de l'armoire (étapes 1 à 4).
Parts for Step 6. Piezas para el Paso 6. Pièces pour l’étape 6. IMPORTANT! YOU MUST USE THIS POP-UP FOR YOUR TOUCH FAUCET TO FUNCTION PROPERLY. ¡IMPORTANTE! DEBE UTILIZAR ESTE DESAGÜE AUTOMÁTICO CON SU LLAVE DE AGUA / GRIFO TÁCTIL PARA QUE FUNCIONE CORRECTAMENTE. IMPORTANT ! VOUS DEVEZ UTILISER CE RENVOI MÉCANIQUE POUR QUE VOTRE ROBINET TACTILE FONCTIONNE CORRECTEMENT.
29
30
31
OR 32
33
34
35
Turn on water supplies. Turn faucet valve on full. Abra los suministros de agua. Gire la válvula de la llave de agua/grifo para abrir totalmente. Ouvrez les robinets d’alimentation. Ouvrez le robinet à fond. Notice Property damage and water leak possible. Leaks and property damage may occur from incorrect installation. Follow all installation instructions before making final connections and turning on the supplies. Aviso Posibles daños a la propiedad y filtración de agua.
Check for leaks at arrows. Refer back to the appropriate installation instructions and retighten if necessary, but do not overtighten. If assembled correctly and still leaking, check for damage to seals and order appropriate replacements. Examine si hay fugas en los lugares indicados con las flechas. Refiérase a las instrucciones de instalación adecuadas y vuelva a apretar si es nece- sario, pero no apriete demasiado.
A. D. C. B. 1 4 2 3 1 1 For Manual Bypass: A. Shut off hot and cold water supplies. B. Move faucet handle to the off position. Disconnect wires and remove clips (1) from solenoid (2). C. Using one of the D. Pull down C. Usando uno de D. Hale hacia abajo C. Au moyen d'une D. Tirez modérément clips (1), attach hose (3) directly to the outlet (4). moderately to ensure connection has been made. Para (Bypass) Paso Manual: A. Cierre los suministros de agua caliente y fría. B.
538T-DST, 15938T-DST & 15960T-DST 551T-DST & 751T-DST 592T-DST 552TLF & 752TLF 9 10 5 5 5 11 4 4 4 4 12 8 3 3 3 3 1/16" 1/16 po 1 1 1 1 6 7 2 2 6 2 6 6 2 561T-DST & 761T-DST 574T-DST & 774T-DST 5 4 3 6 13 Flow Restrictor Inside Restrictor de flujo interior Limiteur de débit à l’intérieur 39
Maintenance Solenoid Troubleshooting If faucet exhibits very low flow: A. Remove aerator (1) with supplied wrench (2) and clean MODELS 561T-DST & 761T-DST Refer to step 3 of installation to flush debris at the outlet. Clean and reinstall the flow restricter (13). MODELS 574T-DST & 774T-DST Refer to step 3 of installation to flush debris at the outlet. Clean and reinstall the flow restricter (13). If low flow still persists remove and replace stream straightener. B. SHUT OFF WATER SUPPLIES.
Mantenimiento 2. Si su surtidor exhibe la luz apropiada, pero no sale el agua del surtidor, Si la llave de agua exhibe un flujo muy bajo: a. Verifique si la manija está en la posición A. Quite y limpie el aireador (1) con la llave de herabierta. ramientas suministrada (2), ó b. Verifique si los suministros de agua están en B. CIERRE LOS SUMINISTROS DE AGUA. la posición abierta. Reemplace la válvula de cartucho (3). Cuando c. Mueva la manija a la posición “cerrada”.
Entretien b. Assurez-vous que les robinets d’arrêt sont ouverts. c. Amenez la manette à la position de fermeture (« off »). Dévissez le tuyau souple de la tête de pulvérisation et cherchez à déceler la présence de corps étrangers dans l’entrée de la tête de pulvérisation. Amenez la manette en position d’ouverture pour vérifier si l’eau atteint la tête de pulvérisation. Remettez la tête de pulvérisation en place. d. Amenez la manette en position de fermeture.
Appendix / El Apéndice / L'appendice Water Line Connections Conexiones a la Línea de Agua Branchement à la tuyauterie B. A.
Water Line Connections Conexiones a la Línea de Agua A. Important: To ensure proper operation of your plumbing it is essential to install these check valve assemblies onto your supply stops. Insert ferrule (1) into cold water stop. A. Importante: Para asegurar el funcio- B. Thread on check valve (2) and tighten. DO NOT OVERTIGHTEN. Repeat steps A & B for hot water stop. namiento correcto de su plomería es esencial instalar los ensambles de las válvulas checadoras en los topes del suministro.
l La tubería está cortada demasiado corta: compre en un almacén un acoplamiento de unión y una tubería de suministro de repuesto que acoplen. El extremo de la unión de acoplamiento que es para conectar a la llave de agua debe acoplar con las tuercas estándares de 3/8" y mangas de plástico incluidas con la llave de agua / grifo. Branchement à la tuyauterie Important : Vous devez installer ces A.
Correct Installation Método Correcto 2 Bonne méthode 3 1 4 Custom Fit Connections - Plastic Sleeve Installation Instructions 1. Identify desired length of tube (1). Leave 1" - 2" of extra length to allow for easier installation and cut tube. Ensure cut is straight and burr free. 2. Slide nut (2) and plastic sleeve (3) onto cut tube. Ensure sleeve is oriented as shown. 3. Insert tube into outlet fitting (4). Tube should touch bottom of hole inside fitting. 4.
Incorrect Installation / Instalación Incorrecta / Installation Incorrecte 1 2 Do not install sleeve upside down. Ensure cut is straight. Do not use RP51243 gasket (1) supplied with PEX tubing or brass ferrule (2) supplied with valve stops. Ensure tube is fully inserted into stop before sliding sleeve down to engage top of fitting. No instale la manga boca abajo. Asegúrese que el corte esté recto.
For Models 538T, 551T and 751T ONLY. Para los modelos 538T, 551T y 751T SOLAMENTE. WARNING Scald possible. May result in personal injury. Adjust handle limit clockwise per these instructions. ADVERTENCIA Posible escaldadura. Puede resultar en lesiones personales. Ajuste el límite de la manija hacia la derecha, de acuerdo a estas instrucciones. MISE EN GARDE Possibilité d’ébouillantage et de blessures. Réglez la limite de la manette dans le sens horaire conformément à ces instructions.
Pour les modèles 538T, 551T et 751T SEULEMENT. Plaçant l’arrêt de limite de poignée (facultatif) Ce robinet est muni d’une butée de température maximale à deux positions. La position 1, à gauche, permet le déplacement de la manette entre les deux extrémités de la plage de température (eau très froide et eau très chaude). C’est la position sélectionnée en usine. La position 2, à droite, permet le déplacement de la manette sur la moitié de la plage de température (eau très froide et eau mitigée).
RP40650 Set Screw Tornillo de Ajuste Vis de calage 592T-DST RP61042p Handle, Red/Blue Button & Set Screw Manija, Botón Rojo/Azul y Tornillo de Ajuste Manette, Bouton Rouge/Bleu et Vis de Calage RP61044p Red/Blue Button & Set Screw Botón–Rojo/Azul y Tornillo de Ajuste Bouton–Rouge/Bleu et Vis de calage RP54972p Cap Casquillo Embase RP54975 O-Ring Anillo “O” Joint Torique RP78256 Bonnet Bonete Chapeau RP64066 Contact Assembly Chapa de Contacto Plaque de contact RP61046p Escutcheon (3 Hole) Chapetón (3
15960T-SS-DST pSpecify Finish Especifíque el Acabado Précisez le Fini RP70176p Handle & Set Screw Manija, Botón Rojo/Azul y Tornillo de Ajuste Manette, Bouton Rouge/ Bleu et Vis de Calage RP40650 Set Screw Tornillo de Ajuste Vis de calage RP51502p Cap Casquillo Embase RP64764 Contact Assembly Chapa de Contacto Plaque de contact RP51503 Bonnet Bonete Chapeau RP50587 Valve Assembly Ensamble de la válvula Soupape RP70177p Escutcheon (3 Hole) Chapetón (3 agujeros) RP54977 (1.5 GPM) RP54977-1.2 (1.
RP40650 Set Screw Tornillo de Ajuste Vis de calage 538T-DST & 15938T-DST RP51343 Red/Blue Button Botón–Rojo/Azul Bouton–Rouge/Bleu RP51342p Handle, Red/Blue Button & Set Screw Manija, Botón Rojo/Azul y Tornillo de Ajuste Manette, Bouton Rouge/ Bleu et Vis de Calage RP51502p Cap Casquillo Embase RP51503 Bonnet Bonete Chapeau RP64764 Contact Assembly Chapa de Contacto Plaque de contact RP50587 Valve Assembly Ensamble de la válvula Soupape RP54977 (1.5 GPM) RP54977-1.2 (1.
551T-DST & 751T-DST RP61837 Button / Botón / Bouton RP61838p Handle, Button & Set Screw Manija, Botón l y Tornillo de Ajuste Manette, Bouton et Vis de Calage RP61840p Escutcheon (3 Hole), Spacer and Gaskets Chapa de cubierta (3 agujeros), Separador y Empaques Plaque de finition (3 trous), Pièce d’espacement et Joints RP50953 Set Screw Tornillo de Ajuste Vis de calage RP54972p Cap Casquillo Embase RP64764 Contact Assembly Chapa de Contacto Plaque de contact RP54976 Bonnet Bonete Chapeau RP75526p Lift R
2TLF & 752TLF RP78711p Bonnet & Glide Ring Capuchón y Aro para Deslizar Chapeaux et L’anneau de Glissement RP78706p Escutcheon with Gasket (3 Hole) Chapetón y Empaque (3 agujeros) RP78712p Handle Manija Manette Boîtier et Joint (3 trous) RP78741 Spring Resorte Ressort RP78714 Bonnet Nut Bonete Chapeau RP78713 Wrench Llave Clé RP78709 Screw / Tornillo / Vis RP78715 Valve Assembly Ensamble de la válvula Soupape 752TLF 552TLF RP78708p Cover Cobertura Couvercle EP74857 Solenoid Assembly Ensamble de
RP72997p Button / Botón / Bouton 561T-DST & 761T-DST RP72995p Handle, Button & Screw Manija, Botón y Tornillo Manette, Bouton et Vis RP72998 Screw / Tornillo / Vis RP54972p Cap Casquillo Embase RP78256 Bonnet Nut Bonete Chapeau RP78259p Escutcheon with Gasket (3 Hole) Chapetón y Empaque (3 agujeros) Boîtier et Joint (3 trous) RP64764 Contact Assembly Chapa de Contacto Plaque de contact RP78257p Lift Rod & Slider Barra de Alzar y Pomo Tige de Manoeuvre et Grain de la Tirette RP73000 Valve Assembly Ensam
4T-DST & 774T-DST RP84411p Handle, Button Cover & Set Screw Manija, tapa del botón y tornillo de ajuste Manette, bouton, capuchon et vis de calage RP84824p Button Cover Tapa del botón Capuchon RP54975 O-Ring Anillo “O” Joint Torique 574T-DST RP84822p Escutcheon and gasket (3 Hole) (Not recommended for use on metal sinks) Chapetón (3 agujeros) (No se recomienda para uso en fregaderos de metal) Boîtier (3 trous) (Non recommandé pour une utilisation sur un évier en métal) RP72993p Cap Casquillo Embase R
Limited Warranty on Delta® Faucets Parts and Finish All parts (other than electronic parts and batteries) and finishes of this Delta® faucet are warranted to the original consumer purchaser to be free from defects in material and workmanship for as long as the original consumer purchaser owns the home in which the faucet was first installed or, for commercial users, for 5 years from the date of purchase.
Garantía Limitada de las Llaves de Agua (grifos) Delta® Piezas y acabado Todas las piezas (excepto las piezas electrónicas y las pilas) y los acabados de esta llave de agua Delta® están garantizados al consumidor comprador original de estar libres de defectos en material y fabricación durante el tiempo que el comprador original posea la vivienda en la que la llave de agua fue originalmente instalada o, para los consumidores comerciales, durante 5 años a partir de la fecha de compra.
Garantie limitée des robinets Delta® Pièces et finis Toutes les pièces (à l’exception des composants électroniques et des piles) et tous les finis de ce robinet Delta® sont protégés contre les défectuosités du matériau et les vices de fabrication par une garantie qui est consentie au premier acheteur et qui demeure valide tant que celui-ci demeure propriétaire de la maison dans laquelle le robinet a été installé.
9 NOTES / NOTAS / NOTES
NOTES / NOTAS / NOTES
NOTES / NOTAS / NOTES
Quick Tips for your Delta® Touch2O® Technology Bathroom Faucet. Sugerencias rápidas para su llave de agua/grifo Delta® Touch2O® Technology para la cocina Conseils concernant votre robinet d’évier de cuisine Delta® doté de la technologie Touch2O® 1 Operation is simple! Place your hands within 4” of the faucet and it will turn on and stay on until you remove them. 2 By tapping the faucet, it will run for up to 2 minutes or until you tap it off.