
Installation Sheet


1
5
3
2
4
Installation
4
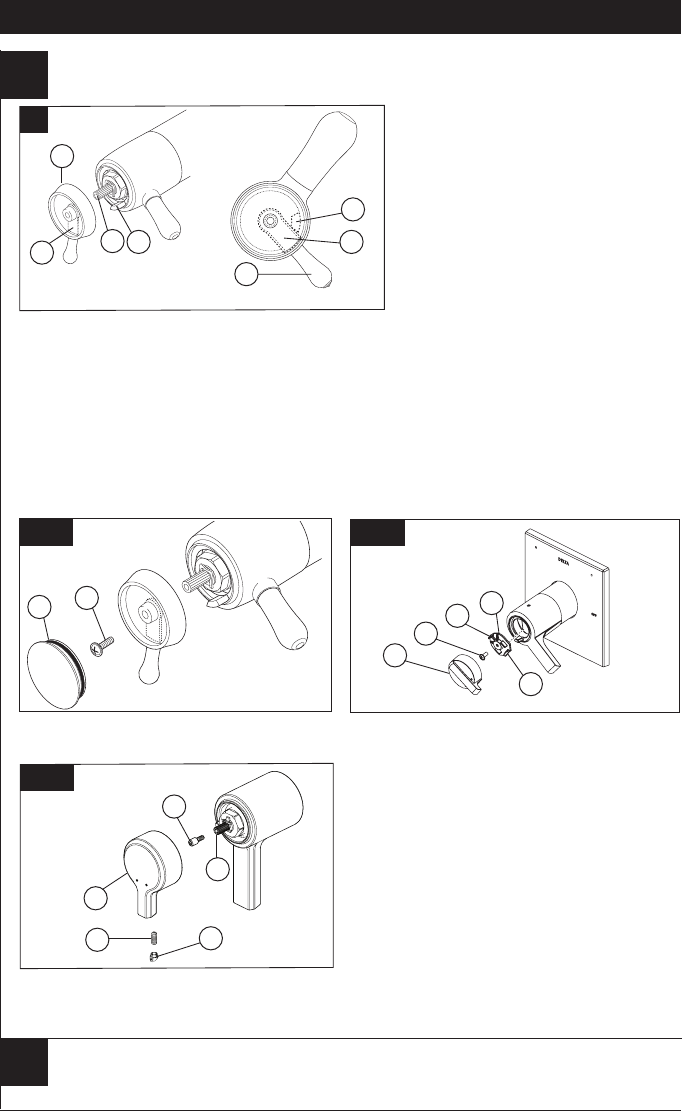
Installation and Adjustment of the Temperature Knob
Failure to do so may cause injury.
7
5
Potential scald or thermal shock injury could result due to cross ow if outlet at the
shower is blocked or restricted (e.g., pause control on showerhead). Be sure to point
showerhead away from you when re-starting ow or install inlet check valves on both
supply lines to prevent possible injury.
A. Adjust temperature limit stop!
Turn on water supplies; LET THE WATER RUN
AT BOTH FULL HOT AND FULL COLD TO
ENSURE THE WATER IS RUNNING AS HOT/
COLD AS POSSIBLE. Place a thermometer
in a plastic tumbler, and hold the tumbler
in the water stream. Place the temperature
knob (1) onto the splines (2), then rotate the
temperature knob counter-clockwise until you
achieve your maximum desired temperature
from the outlet (not more than 120° or the lower
temperature mandated by your local plumbing
code).
If max temperature is not achieved before limit
stop (3) on temperature knob (1) meets the limit
stop (4) on the volume control handle. Remove
the temperature control knob (1) from splines (2).
Rotate temperature control knob (1) clockwise.
Place temperature control knob (1) back onto
splines (2) and continue to rotate counter-clockwise
until maximum desired temperature is achieved.
Remove the temperature knob (1) and replace onto
the splines (2), making sure that the temperature
knob limit stop (3) hits against the volume handle
limit stop (4) as shown.
Secure the temperature knob using screw (1) and
place cap (2) on knob.
Secure temperature control knob (1) with screw (2).
Hook (3) front of temperature control cover (4) onto
knob (1) before engaging rear snap (5).
B-1.
B-2.
A.
1
1
3
4
3
2
4
1
2
3
1
5
2
4
68883 Rev. I
Attach spacer screw (1) to valve stem (2). Slide
temperature control handle (3) into place over
spacer screw (1) and secure using set screw (4).
Cover with decorative button (5).
B-3.